
How to Lay Sod for Beginners: A Step-by-Step Guide
Creating a thriving lawn in Central Florida means working with our unique climate of intense sun and heavy rains. Laying sod is an excellent way to establish a strong, resilient lawn that can handle our weather, but timing and technique are everything. The key is to give your new grass the best possible start so it can develop deep roots before the peak of summer heat arrives. This guide is tailored specifically for our local conditions, explaining the ideal seasons for installation and the watering strategies that work best here. We’ll show you how to lay sod for beginners in a way that sets your lawn up for long-term success in its new Florida home.
Key Takeaways
- A great lawn needs a great foundation: The most critical step is preparing your yard before the sod arrives. This means completely clearing old grass and weeds, tilling the soil, and creating a smooth surface for the new roots to grow into.
- Consistent watering is crucial for new sod: Your lawn’s survival depends on immediate and consistent watering. Water within 30 minutes of installation and then daily for the first two weeks to keep the soil moist and help the roots establish themselves.
- Stagger the seams for a seamless finish: When laying sod, arrange the pieces in a staggered pattern, similar to bricks in a wall. This simple technique helps the seams knit together invisibly and creates a stronger, more unified lawn.
Get Your Yard Ready for Sod
A lush, green lawn starts long before the first piece of sod is laid. Think of it like painting a room; the prep work is what makes the final result look professional and last for years. Taking the time to properly prepare your yard creates the perfect foundation for your new grass to thrive. A healthy base means stronger roots, better water absorption, and a more resilient lawn. These next steps are the most important part of the entire process, so let’s walk through how to get your soil in top shape for its new green carpet.
Clear Out Old Grass and Debris
First things first, you need a clean slate. This means removing all the old grass, stubborn weeds, rocks, and any other debris from the area where you plan to lay your new sod. For smaller areas, a sturdy shovel and some elbow grease will do the trick. If you’re working with a larger yard, you might want to use a sod cutter to make the job easier. The goal is to get down to the bare soil, creating a clear and welcoming bed for the new sod roots. For extensive projects, professional land clearing can handle the heavy lifting and ensure your site is perfectly prepped.
Test and Amend Your Soil
Before you do anything else, it’s a great idea to understand what you’re working with. A simple soil test will tell you everything you need to know about your soil’s pH and nutrient levels. You can get a testing kit and send a sample to a local lab; just be sure to do this early, as results can take a week or two. Once you know what your soil is missing, you can amend it. This might mean adding specific fertilizers or lime to create a balanced, nutrient-rich environment where your new sod can flourish from day one. The University of Florida’s extension office offers great resources on soil testing.
Create a Smooth, Level Surface
Now it’s time to shape the ground. Your goal is to create a surface that is smooth and level, but with a gentle slope that directs water away from your home’s foundation or any other structures. This is crucial for proper drainage. Use a tiller to loosen the top four to six inches of soil, which helps break up compaction and allows the new roots to penetrate easily. This is also the perfect time to work in any amendments your soil test recommended. Rake the entire area to remove any remaining clumps or rocks, creating a fine, smooth surface for the sod.
Gather Your Tools and Materials
Having everything you need on hand will make installation day go much more smoothly. You don’t want to be running to the store mid-project. Your basic toolkit should include a sharp utility knife for cutting sod pieces, a measuring tape, a garden rake, and a lawn roller to ensure good contact between the sod and the soil. For the prep work, you’ll likely need a tiller, which you can often rent. Getting organized beforehand lets you focus on laying the sod correctly. If gathering all the equipment feels like a lot, remember that a professional sod installation team will arrive with everything needed to get the job done right.
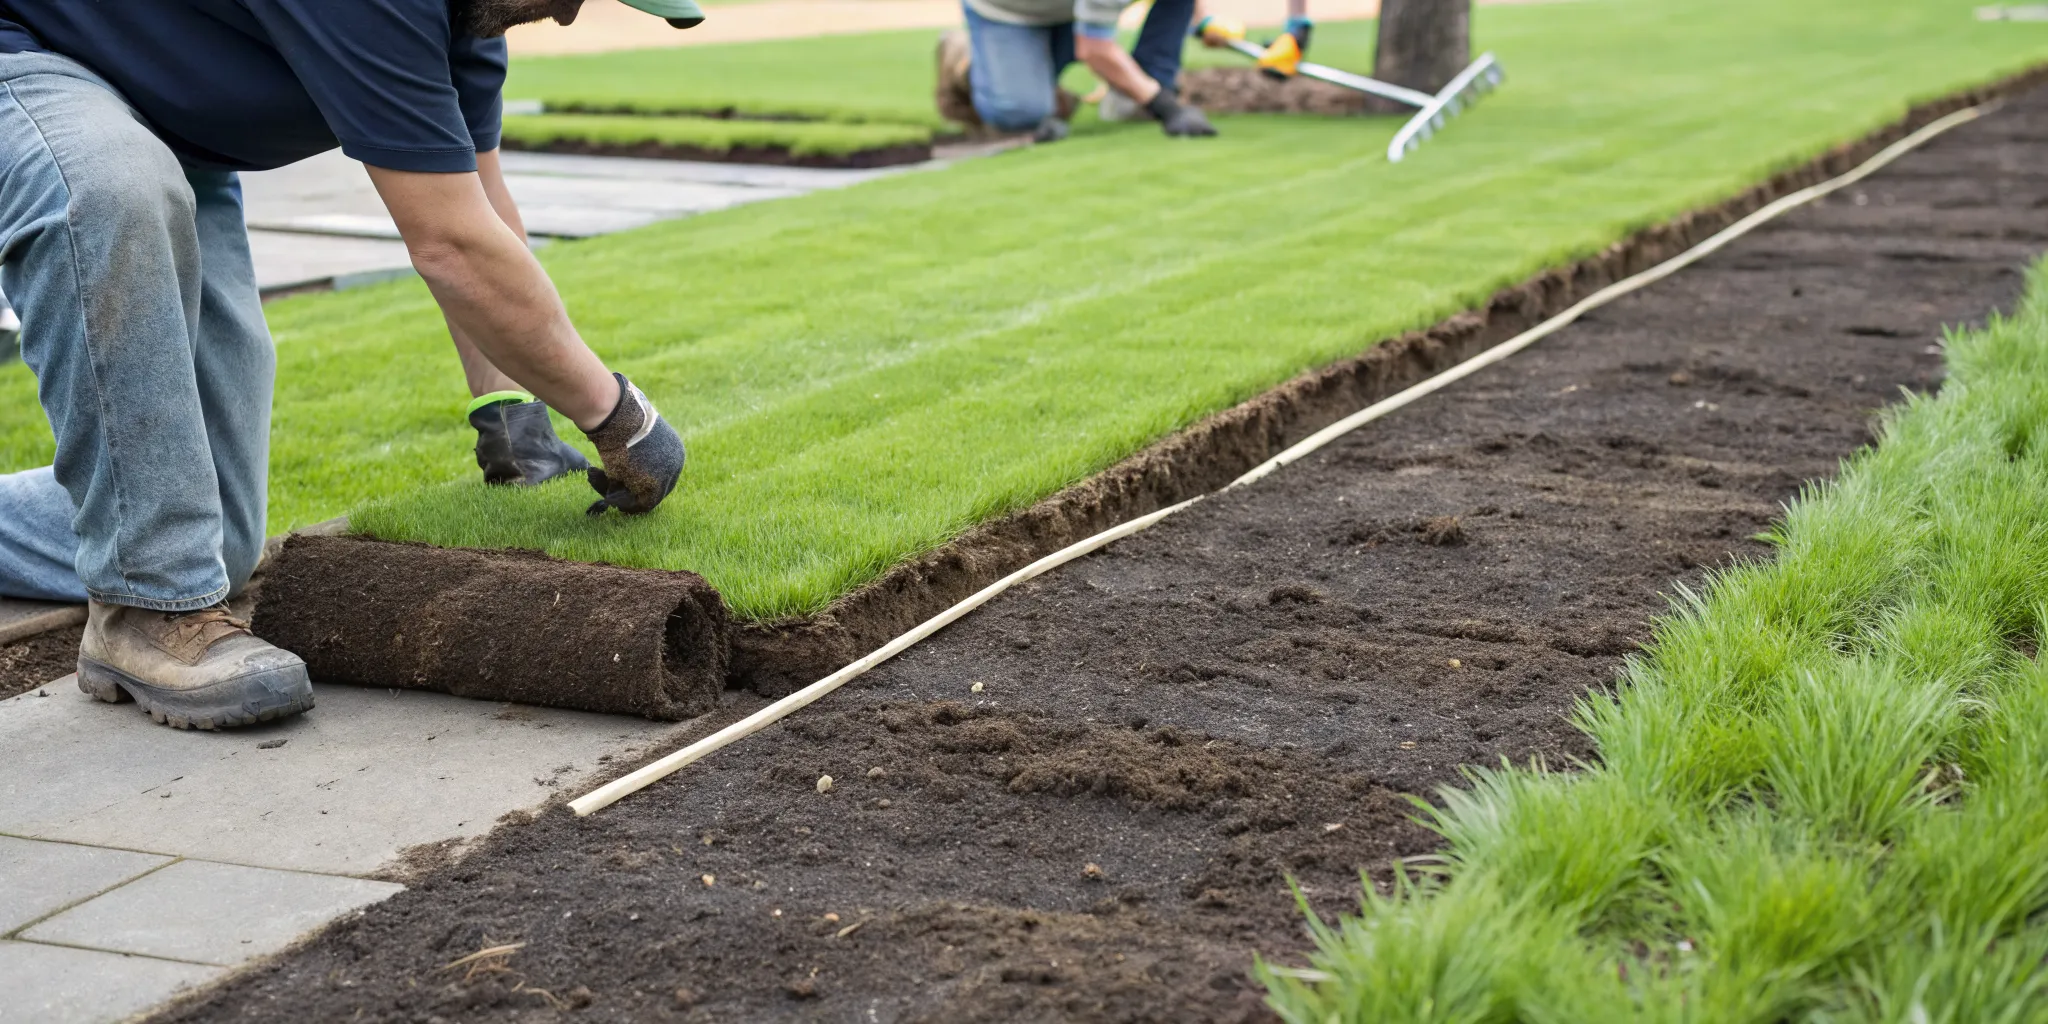
How to Lay Sod, Step by Step
Once your soil is prepped and ready, it’s time for the most satisfying part: laying the sod. This process is a bit like putting together a puzzle, where every piece needs to fit just right. Taking your time here will pay off with a lush, seamless lawn that establishes quickly. The goal is to create a uniform surface where the roots can make immediate contact with the soil, which is why careful placement is so important. Think of it as rolling out a green carpet that will soon become a permanent part of your landscape. While it’s a project you can tackle yourself, remember that a professional sod installation ensures every step is handled correctly, from sourcing high-quality turf to ensuring perfect soil contact, giving your new lawn the best possible start. If you’re ready to get your hands dirty, we’ll walk you through the key techniques. From establishing a straight line to staggering the seams for a natural look, each step builds on the last. Following these guidelines will help you avoid common pitfalls like uneven patches or visible seams, leading to a beautiful, healthy lawn you can enjoy for years to come.
Start Along a Straight Edge
To keep your lines clean and your lawn looking uniform, begin laying sod along the longest straight edge available. This is typically a driveway, sidewalk, or the foundation of your house. By starting here, you create a stable, straight line to build from, which makes it much easier to keep the rest of your rows aligned. Unroll the first piece of sod carefully, making sure it’s straight and flush against the edge. This first row acts as your guide for the entire lawn, so getting it right is key to achieving a professional-looking finish. It prevents the pattern from drifting into curves and ensures your lawn looks intentional and well-planned from day one.
Stagger the Seams (Like a Brick Wall)
When you start the second row, don’t line up the short ends with the pieces in the first row. Instead, stagger the seams just like a bricklayer would. You can do this by cutting the first piece of the new row in half. This staggered pattern helps the individual sod pieces knit together more effectively, creating a stronger, more unified lawn. It also prevents visible lines from forming as the sod settles and makes it harder for water to run off between the seams, encouraging better root growth and a healthier overall appearance.
Fit Edges Snugly Together
As you lay each piece of sod, make sure the edges fit snugly against one another. You want them to be touching but not overlapping. Gaps between the pieces can dry out and die, leaving you with bare spots and an open invitation for weeds to move in. On the other hand, overlapping sod creates a lumpy, uneven surface and prevents the roots from making good contact with the soil underneath. Take a moment to gently push the edges together to ensure a tight fit. This attention to detail is what creates that seamless, carpet-like lawn you’re aiming for.
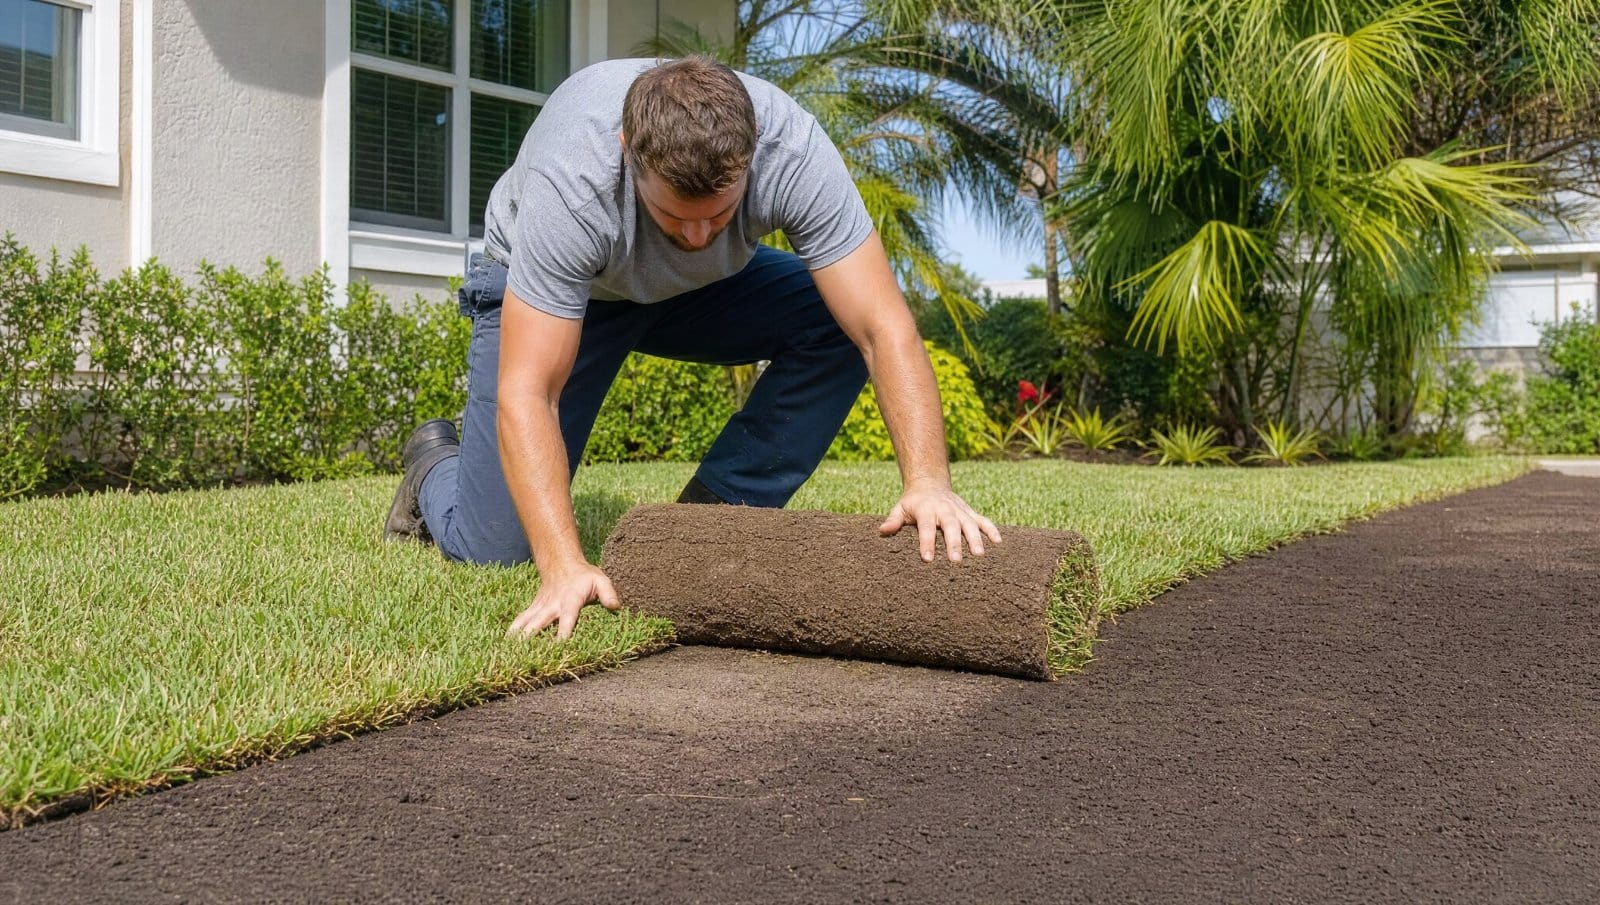
Roll It Out for Good Soil Contact
After you’ve laid all the sod, the final step is to roll the entire area with a lawn roller. You can typically rent one from a local garden or home improvement store. Rolling the lawn presses the sod firmly against the soil, removing any air pockets that might have formed. This direct contact is essential for the roots to grow down into the soil and establish themselves. A good rolling ensures your new lawn gets the water and nutrients it needs right from the start, setting it up for healthy, successful growth. Don’t skip this step; it’s crucial for a smooth surface and strong roots.
Watering Your New Sod: The Golden Rules
Laying new sod is a fantastic step toward a beautiful yard, but the work isn’t over once the last piece is in place. Proper watering is the single most important factor in helping your new grass establish deep, healthy roots. Getting this part right, especially in the first few weeks, sets the stage for a lush, green lawn that will last for years. Think of it as the final, crucial step in your sod installation project. Let’s walk through the simple rules for watering your new lawn to life.
Water Immediately After Laying
The golden rule of new sod is to water it within 30 minutes of installation. Don’t wait until you’ve laid the entire yard; start watering the first sections as soon as they are down. This initial soak is critical because it helps the sod make firm contact with the soil beneath it, removing air pockets and preventing the delicate roots from drying out. Give your new grass a deep, long drink for about 45 to 60 minutes, or until you can lift a corner and see that the soil is damp several inches down. This first watering rehydrates the sod after its journey and gives it the best possible start in its new home.
Follow a Daily Watering Routine
For the first one to two weeks, consistency is your best friend. Your goal is to keep the sod and the top few inches of soil consistently moist, but never soggy or flooded. A great routine is to water for about 15 to 20 minutes every morning. Watering in the morning is most effective because less water is lost to evaporation, and the grass blades have plenty of time to dry before evening, which helps prevent fungal growth. On especially hot or windy Central Florida days, you might need a second, shorter watering session in the late afternoon to keep the sod from drying out.
Adjust for Rain and Shine
While a daily routine is a great starting point, you also need to be a bit of a weather watcher. Your lawn doesn’t need to be watered if a classic Florida downpour has already done the job for you. A simple rain gauge can be a huge help here. If your lawn needs about an inch of water per day and it rains half an inch, you only need to provide the other half-inch. Conversely, during a dry, sunny spell, you may need to water a little more than usual. The key is to be flexible and give your lawn what it needs based on the current weather conditions.
Know When It’s Thirsty
Your new lawn will give you clues when it needs a drink. The easiest way to check is by lifting a corner of one sod piece. If the soil underneath is damp, you’re in good shape. If it’s dry and crumbly, it’s time to water. After about two weeks, you can perform a gentle tug test. Lightly pull up on the grass; if you feel resistance, it means the roots are successfully growing down into the soil. Once you feel that resistance, you can gradually start reducing the frequency of your watering while increasing the duration to encourage deeper root growth.
Caring for Your New Lawn
You’ve laid the groundwork, and now your yard is a beautiful sea of green. But the job isn’t quite finished. The first few weeks are critical for helping your new sod establish deep, healthy roots. Giving your lawn the right care during this period will ensure it thrives for years to come. Think of it as nurturing your investment. With a little patience and the right techniques, you’ll help your new grass knit together into a durable, lush carpet. If you’ve had professional sod installation, following these steps will help you maintain that perfect look.
Keep Off the Grass (For Now)
I know it’s tempting to walk on your perfect new lawn, but it’s best to admire it from a distance for a little while. For the first three to four weeks, try to keep all foot traffic (including pets!) to an absolute minimum. Your new sod is working hard to send roots down into the soil, and heavy steps can compact the ground and disturb this delicate process. This can create shallow roots or prevent the sod from properly attaching to the soil underneath. Giving it this undisturbed time to settle in is one of the most important things you can do to guarantee a strong, healthy lawn.
When and How to Do the First Mow
That first mow is a big milestone! You can typically break out the mower after about three to four weeks. A good rule of thumb is to wait until the grass blades are about one-half to one inch taller than their ideal mowing height. Before you start, make sure the lawn is dry enough to walk on without leaving deep footprints. For the first cut, set your mower blade high; you never want to remove more than one-third of the grass blade at a time. Using a sharp blade is also key, as it gives a clean cut that helps the grass stay healthy.
Feeding Your New Lawn
All the water your new sod needs in the beginning can wash away some of the essential nutrients in the soil. To replenish them, it’s a good idea to apply a starter fertilizer about three to four weeks after installation. This gives your grass a dose of the nutrients it needs to develop a robust root system and vibrant green color. Look for a fertilizer that’s specifically designed for new grass, as it will have the right balance to support early growth without overwhelming the tender new blades. This step helps your lawn build the strength it needs to handle the Florida heat.
Check for Strong Root Growth
Want to know if your sod is taking root? There’s an easy way to check. After about two weeks, head to a corner of one of your sod pieces and gently tug on the grass. If you feel resistance, that’s great news! It means the roots are growing down and anchoring themselves into the soil below. If the sod lifts up easily with no resistance, don’t panic. It might just need a little more time and consistent watering. This simple tug test is a fantastic way to monitor your lawn’s progress and make sure everything is on the right track.
Common Sod Mistakes (And How to Avoid Them)
Laying sod can be incredibly rewarding, giving you an instant green lawn. But a few common missteps can turn that dream into a patchy, brown reality. The good news is that these mistakes are easy to avoid once you know what to look for. By sidestepping these common errors, you can ensure your new grass gets the best possible start and grows into a lush, healthy lawn that you can enjoy for years to come. Let’s walk through what not to do, so you can get it right the first time.
Skipping the Soil Prep
Think of soil preparation as creating the foundation for your new lawn. If you lay beautiful new sod on top of compacted, weedy, or uneven ground, it will struggle to take root. The most important step is to completely clear the area of old grass, weeds, rocks, and any other debris. For larger areas, this might require professional land clearing to ensure a perfectly clean slate. Once cleared, tilling the soil and adding a layer of quality topsoil will give the new roots a soft, nutrient-rich place to grow. Taking the time to do this right is the single best thing you can do for your new lawn.
Watering Too Much or Too Little
Finding the right watering balance is key. Underwatering is a primary reason new sod fails, as the roots can dry out before they have a chance to establish. On the other hand, overwatering can lead to root rot and disease. For the first couple of weeks, you should water your new sod every day, often twice a day, to keep the soil consistently moist but not waterlogged. A good rule of thumb is to lift a corner of a sod piece; the soil underneath should be damp. After a few weeks, you can gradually reduce watering as the roots grow deeper into the ground.
Ignoring the Weather Forecast
In Central Florida, the weather plays a huge role in any outdoor project. Laying sod on a scorching hot or windy day will cause it to dry out incredibly fast, putting a lot of stress on the grass. Always check the forecast before your sod is delivered. An overcast, calm day is ideal. If you must install it during a hot spell, be prepared to water it more frequently to keep it from drying out. It’s crucial to lay the sod on the same day it arrives, so planning around the weather helps ensure you can get the job done under the best possible conditions.
Letting Sod Dry Out Before Laying
Sod is a living, perishable product. The moment it’s harvested from the farm, the clock starts ticking. You should only order as much sod as you can realistically install in one day. If your sod pallets sit out in the sun for hours, the grass will start to dry out, turn yellow, and may not recover. If you have a slight delay, move the pallets into a shady spot and lightly mist the exposed edges with water. But the best plan is always to have your site fully prepped and ready to go before your sod installation delivery arrives.
When Is the Best Time to Lay Sod in Central Florida?
Timing is everything, especially when you’re laying new sod in our Central Florida climate. You can do all the prep work perfectly, but if you lay your sod at the wrong time of year, you’re setting yourself up for a struggle. The goal is to give your new grass the best possible start, allowing its roots to establish without battling extreme heat or cold. Choosing the right window in the calendar makes the entire process smoother and sets the stage for a lush, healthy lawn that you can enjoy for years to come. Let’s talk about the ideal seasons and what to look for in the weather forecast.
Picking the Right Season
Here in Florida, we have a pretty long growing season, but that doesn’t mean any time is a good time for new sod. The sweet spots are spring and fall. During these seasons, the temperatures are milder, which is perfect for new grass. The sod isn’t stressed by scorching summer heat, so it can focus its energy on developing a strong root system. Laying sod in the fall gives it time to get established before the cooler, dormant winter period. Spring installations allow the grass to take hold just before the active growing season kicks into high gear. Most lawn care experts agree that the best time to lay sod in Florida is during these gentler months.
What to Look for in the Forecast
Once you’ve picked the right season, it’s time to zoom in on the weekly forecast. Avoid laying sod right before a major heatwave or an unexpected cold snap. The ideal temperature range for new sod to thrive is in the upper 70s to low 80s. These conditions are warm enough to encourage growth but not so hot that they scorch the tender new grass blades. A little cloud cover can also be a blessing, as it reduces the initial stress on your new lawn. When planning a professional sod installation, we always keep a close eye on the forecast to ensure your new lawn gets the best possible start in its new home.
How Long Until Your Sod Takes Root?
You’ve laid your new sod, and now the waiting game begins. This is a crucial time for your new lawn as it works to establish a strong root system in its new home. While it might look like a finished lawn from day one, the real magic is happening beneath the surface. With a little patience and the right care, you’ll see your new grass thrive.
The rooting process doesn’t happen overnight, but you can watch for specific signs that tell you everything is on track. Understanding the general timeline and knowing what a healthy, rooting lawn looks like will give you the confidence that your hard work is paying off. Let’s look at what you can expect in the first few weeks.
A General Timeline for Rooting
Typically, it takes about two to six weeks for new sod roots to firmly connect with the soil below. During this initial period, your main job is to provide consistent moisture to encourage the roots to grow downward. Think of it as giving your new lawn the support it needs to anchor itself. A professional sod installation gives your lawn the best possible start, but this post-installation care is what truly ensures its long-term success. Factors like the type of grass, the season, and how well the soil was prepared can influence the exact timing, but this two-to-six-week window is a reliable benchmark.
Signs of a Happy, Healthy Lawn
After about two weeks, you can start checking on your sod’s progress. The best way to do this is with a gentle tug test. Carefully lift a corner of a sod piece or gently pull on the grass blades. If you feel resistance, that’s great news! It means the roots are beginning to knit into the soil. You should also look for a uniform, green color across the lawn without significant gaps between the seams. The soil underneath should feel moist, like a wrung-out sponge, but not muddy or waterlogged. A vibrant, healthy lawn is a key component of any beautiful landscape design, and these early signs confirm you’re on the right path.
DIY vs. Hiring a Pro: Making the Call
One of the biggest questions you’ll face is whether to lay the sod yourself or bring in a professional team. There’s no single right answer; it really comes down to the size of your yard, your timeline, and how much hands-on work you’re ready to tackle. A small, square patch of grass is a very different project from a large, sloped yard with tricky angles.
Thinking through the scope of your project is the best first step. Laying sod is physically demanding, involving lifting heavy rolls and spending hours on your knees. It also requires careful attention to detail, from preparing the soil correctly to laying each piece without gaps. Before you decide, consider what your project truly requires and what you can realistically accomplish. This will help you choose the path that leads to the best-looking lawn with the least amount of stress.
The Benefits of Professional Installation
If your project feels too big or you’re short on time, hiring a professional is an excellent choice. A skilled team handles all the heavy lifting, from clearing the old lawn to ensuring every roll of sod is laid perfectly. They have the right equipment and experience to prepare the ground properly, which is the most critical step for a healthy lawn. Professionals also understand the specific challenges of Central Florida soil and weather, so they can get the job done efficiently and correctly the first time. Opting for professional sod installation means you can relax and simply enjoy a beautiful, instant lawn without the back-breaking work.
When to Tackle It Yourself
Are you up for a weekend project? Laying sod yourself can be a rewarding experience. From a technical standpoint, the process is straightforward. If you have a smaller yard and enjoy physical work, a DIY installation is completely achievable. The biggest hurdles are the manual labor and the commitment to watering your new lawn correctly in the weeks that follow. Success depends on careful preparation and consistent aftercare. If you do your research, gather the right tools, and are prepared for the physical effort, you can absolutely achieve a lush, green lawn on your own.
Related Articles
Frequently Asked Questions
Can I just lay new sod over my existing lawn? It’s a tempting shortcut, but laying new sod directly over old grass is a recipe for failure. The new roots need to make direct contact with nutrient-rich soil to establish themselves. An old layer of grass or weeds acts as a barrier, preventing the roots from anchoring and forcing them to compete for water and nutrients. Taking the time to properly clear the area gives your new lawn the clean slate it needs to thrive.
What should I do if I see gaps appearing between the sod pieces? If you notice small gaps forming between the sod strips a few days after installation, you can easily fix them. Mix some quality topsoil or compost with sand to create a loose filler. Lightly pack this mixture into the gaps. This will help keep the edges of the sod from drying out and encourage the grass to grow together, creating a seamless look. Avoid trying to stretch or pull the sod pieces together, as this can damage the delicate new roots.
My new sod is turning a little yellow. Should I be worried? A bit of yellowing in the first week or two can be perfectly normal. This is often just a sign of transplant shock as the grass adjusts to its new environment. The most common cause is a lack of water, so your first step should be to check if the sod and the soil beneath it are consistently moist. As long as you are watering correctly and the yellowing doesn’t worsen or turn brown, the grass should recover its vibrant green color as the roots begin to establish.
How long do I really need to keep my kids and pets off the new lawn? It’s crucial to keep all foot traffic, including pets, off the new sod for at least three to four weeks. During this time, the grass is working hard to send fragile new roots down into the soil. Walking on the lawn can compact the soil and break these delicate roots, creating uneven spots and preventing the sod from knitting together properly. Think of it as a short-term inconvenience for a long-term, healthy lawn.
When can I switch from daily watering to a normal schedule? You can start to adjust your watering routine once the sod has passed the “tug test.” After about two or three weeks, gently pull up on a corner of a sod piece. If you feel solid resistance, the roots are establishing well. At this point, you can begin to water less frequently, perhaps every other day, but for longer periods. This encourages the roots to grow deeper into the soil in search of moisture, which will make your lawn stronger and more resilient in the long run.