
How Long Does Sod Take to Root in Winter? What to Expect
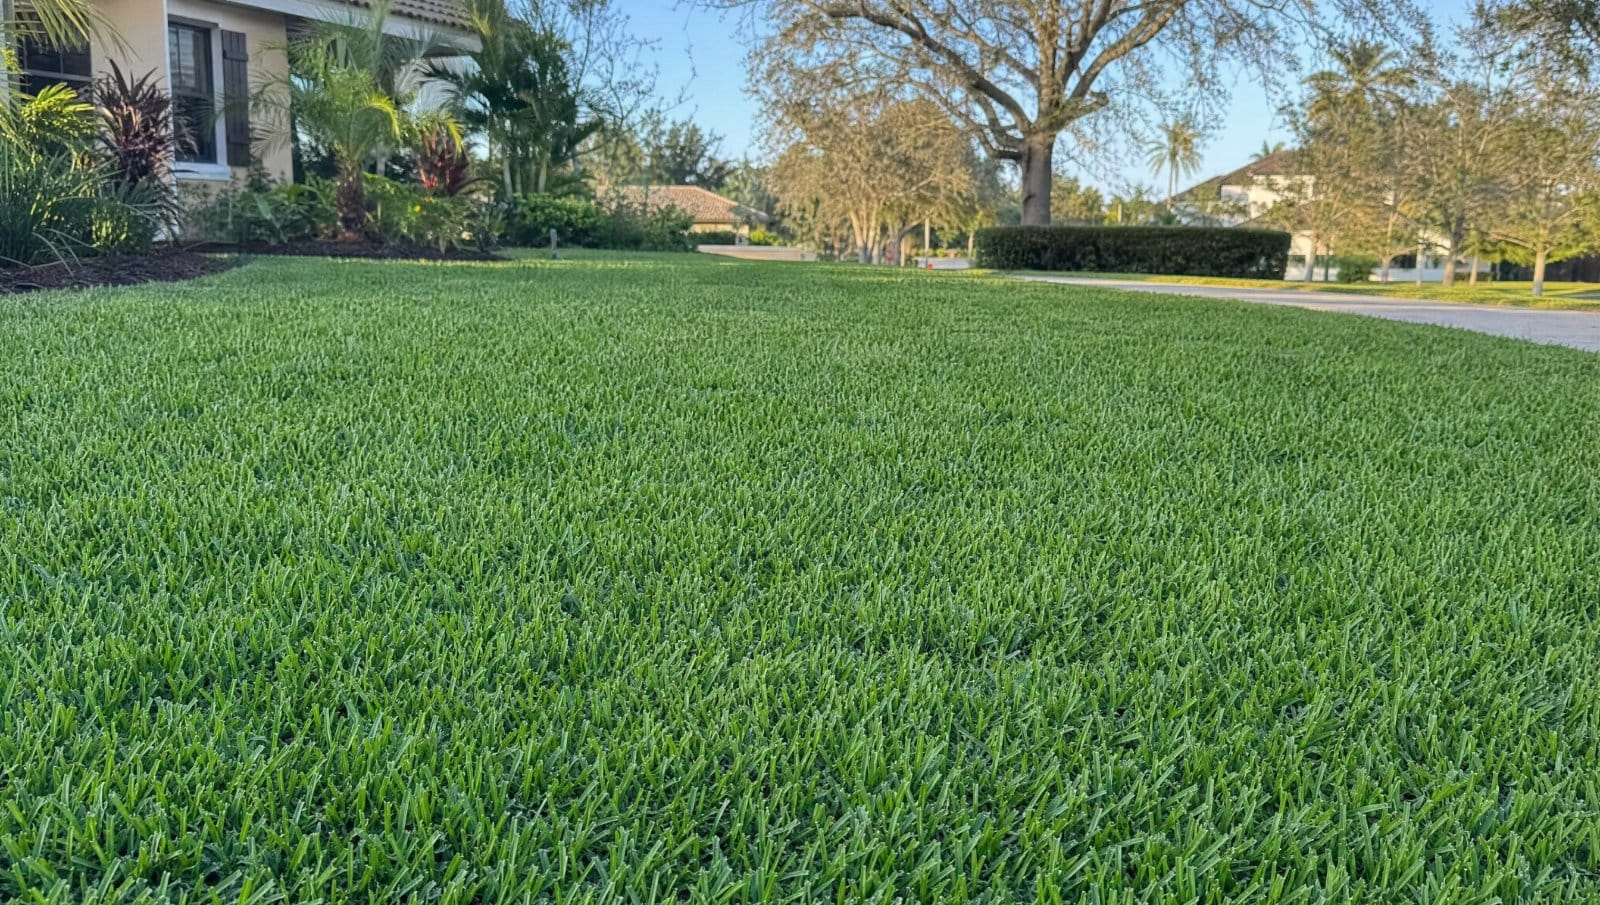
That fresh, green lawn you’ve been dreaming of is absolutely achievable during the cooler months. Here in Central Florida, our mild climate gives us a unique advantage for off-season projects. But it’s natural to have questions, especially about the timeline. The main concern for most homeowners is how long does it take sod to root in winter? While the process is slower, it’s also incredibly effective. By installing sod now, you’re giving the root system a head start without the stress of summer heat. This guide is specifically for Florida property owners, breaking down what to expect from our warm-season grasses and how to ensure your new lawn is ready to thrive when spring arrives.
Key Takeaways
- Think of Winter Sod as a Spring Head Start: Your new lawn will look dormant and brown through the cooler months, which is completely normal. The roots are establishing themselves slowly underground, so when warmer weather arrives, your grass will be ready for lush, green growth.
- Prioritize Consistent Watering and Zero Foot Traffic: Even dormant sod needs moisture to root, so keep the soil consistently damp but never soggy. The most important rule is to stay off the new grass completely, as foot traffic can easily damage the fragile, developing root system.
- A Thriving Lawn Starts with Professional Soil Prep: The long-term health of your sod is determined before it’s even laid. Proper soil grading, clearing, and drainage create the foundation for strong roots, preventing common issues like patchiness and poor growth down the line.
How Long Does Sod Take to Root in Winter?
If you’re thinking about laying new sod during the cooler months, your main question is probably about timing. The short answer is: yes, you can install sod in the winter, but you’ll need to pack your patience. Unlike the rapid growth you see in spring and summer, winter sod takes its time establishing. The cooler soil temperatures cause the grass to go into a dormant state, meaning its energy is focused on survival, not on sending out new roots.
Think of it as a slow and steady process. While the visible green blades might not be growing much, there’s still activity happening beneath the surface, just at a much slower pace. The success of a winter installation hinges on understanding this timeline and providing the right care. A professional sod installation ensures the groundwork is properly prepared, giving your new lawn the best possible start, even when it’s chilly. The goal is to have the sod in place and ready to thrive the moment warmer weather returns.
Expect a 2-4 Month Establishment Period
When you lay sod in the spring, you might see shallow roots form in just a couple of weeks. In winter, you can expect that timeline to double. It might take a month or more for even shallow roots to begin anchoring the turf. Full, deep establishment—where the roots have grown firmly into the soil—is a much longer game. You’re realistically looking at a two- to four-month period, with the process often extending into the early spring when the soil finally warms up. This extended timeline is completely normal and not a sign that something is wrong.
How Winter Slows Down Grass Growth
The main reason for the slowdown is soil temperature. Grass, especially the warm-season varieties we have here in Florida, thrives when the soil is warm. As temperatures drop, the grass enters a state of dormancy to protect itself from the cold. It’s essentially hibernating. During this time, all its metabolic processes, including root growth, slow dramatically. While the sod isn’t dead, it’s not actively growing. It’s simply waiting for the right conditions to wake up and start establishing its new home in your yard.
Cool-Season vs. Warm-Season Grass: What’s the Difference?
Understanding your grass type is key. In Central Florida, we almost exclusively use warm-season grasses like St. Augustine, Zoysia, and Bermudagrass. These varieties love the heat and go dormant in the winter. While you can install them when it’s cool, they won’t truly start rooting until the spring. Cool-season grasses, like Tall Fescue, behave differently and actually have a prime growing season in the fall and winter. However, they don’t tolerate our intense summer heat well, which is why they aren’t a common choice for lawns in our area.
What Affects How Fast Sod Roots in Winter?
Laying sod in the winter isn’t a simple “set it and forget it” project. Several key factors influence how quickly your new grass will establish itself. While it’s true that the rooting process is slower when it’s cool, understanding these elements can help you set your lawn up for success. It’s not just about the cold; it’s about the type of grass you choose, the condition of your soil, and the specific weather patterns we get here in Central Florida. Getting these details right is the difference between a lawn that’s just surviving and one that’s ready to thrive when spring arrives.
The Role of Soil Temperature and Moisture
Think of your new sod as being in a state of semi-hibernation. Colder soil temperatures significantly slow down root development. While sod might establish shallow roots in just a couple of weeks during the summer, you can expect it to take at least twice as long in the winter. Moisture is the other half of the equation. Even though your grass is dormant, it still needs water. Florida’s cool, dry winter winds can easily dry out the sod pads before they have a chance to root. A consistent, light watering schedule is crucial to keep the soil and roots from desiccating. Proper sod installation includes preparing the soil to retain the right amount of moisture.
Choose the Right Grass for a Winter Install
The type of grass you install plays a huge role in its winter performance. In Central Florida, we primarily use warm-season grasses like St. Augustine, Zoysia, and Bahia. These grasses are built for our hot summers, but they go dormant in the winter, meaning they turn a brownish or straw-like color and stop growing above ground. Don’t let the color fool you—the roots are still alive and can slowly establish themselves over the winter. Choosing the right variety for your property’s specific conditions is a critical first step. A professional landscape contractor can help you select the best sod for your yard’s sun exposure and soil type.
Why Timing and Weather Matter
Patience is key when installing sod in the winter. Your lawn won’t give you that instant “green-up” you’d see in the spring. The sod will stay dormant through the coldest months, and the real transformation happens when the weather warms up. As temperatures consistently rise, the roots, which have been slowly growing underground, will kick into high gear, and the grass blades will begin to turn a lush green. It’s important to understand this seasonal cycle to set realistic expectations. The work you do in the winter is all about preparing your lawn for a spectacular spring debut.
What’s a Realistic Rooting Timeline for Winter Sod?
Patience is your best friend when it comes to winter sod. While you might be eager to see a lush, green lawn right away, grass takes its time establishing itself in cooler weather. The good news is that while the blades on top might look sleepy, the roots are busy working underground, setting the stage for a beautiful lawn in the spring. Understanding the timeline helps you know what to expect and how to care for your new grass properly.
The key is to remember that “dormant” doesn’t mean “dead.” Your new sod is simply conserving energy. With the right care and a little time, it will develop a strong root system that will pay off when the weather warms up.
Rooting Times for Common Grass Types
Generally, sod takes about two to three weeks to form shallow roots in warm weather. During the winter, you can expect that timeline to double. It might take 30 to 45 days, or even a bit longer, for your new sod to develop the deep, strong roots it needs to thrive. The first shallow roots will likely start to form within the first two weeks, but the full, deep establishment process is a marathon, not a sprint.
This slower pace is completely normal for any type of grass. The goal of a winter sod installation isn’t immediate green perfection; it’s about giving your lawn a significant head start for the spring growing season.
The Ideal Temperatures for Root Growth
Soil temperature is the main factor that dictates how quickly your new sod will take root. Grass, like most plants, has its preferred temperature range for active growth. When the soil is warm, the roots grow quickly. As temperatures drop, the grass’s metabolism slows down to conserve energy, which also slows root development.
Even when it’s chilly outside, the soil underground retains some warmth, allowing the roots to continue growing, just at a much slower rate. This quiet, underground work is crucial. By the time spring arrives with its warmer air and sunshine, your sod will already have an established root system, ready to support vigorous top growth.
What to Expect in Central Florida
Here in Central Florida, we have a major advantage when it comes to winter sod. Our mild winters mean the ground rarely, if ever, freezes solid. This makes our region an ideal place for installing sod during the cooler months. While growth will be slower than in the summer, the consistent, moderate temperatures provide a great window for roots to get established without the stress of extreme heat.
For homeowners in Lake Mary, Orlando, and the surrounding areas, installing sod in winter is a smart move. It helps prevent soil erosion and mud pits, especially on newly cleared land. Plus, with proper landscape drainage, your new lawn will be perfectly positioned to flourish once spring rolls around.
What to Expect as Your Winter Sod Takes Root
Laying new sod is exciting—it’s an instant transformation for your yard. But when you install sod in the winter, the process that follows is a bit different. Instead of a quick green-up, your new lawn will enter a period of dormancy. It’s easy to look out at the brownish, sleepy-looking grass and wonder if everything is going according to plan. The good news is, it probably is.
During the cooler months in Central Florida, your new sod is focusing all its energy on what’s happening underground. While the grass blades on top might not be growing much, the root system is hard at work, slowly establishing itself in the new soil. This is the most critical phase for the long-term health of your lawn. Think of it as building a strong foundation before the house goes up. The visible growth will come with the warmer spring weather, but the invisible work happening now is what makes a lush, resilient lawn possible. Understanding this process helps you stay patient and care for your new turf correctly as it gets ready for its big spring debut.
Dormant or Damaged? How to Tell the Difference
It’s the biggest question on every homeowner’s mind: is my brown sod dormant or dead? It’s a valid concern, but in most cases, that brown, lifeless look is completely normal for winter sod. The grass is simply conserving energy. The roots will begin to grow and anchor into the soil long before the grass blades turn green.
To tell the difference, get up close. Gently pull back a few grass blades at the base of the turf. Dormant grass will still show small signs of life, like tiny green shoots at the crown, right near the soil. The sod itself should also feel pliable and cool to the touch, not dry and brittle. Damaged sod, on the other hand, will often feel crunchy and may not show any signs of life at the base.
When to Worry About Brown Sod
While a brown, dormant appearance is standard, there are a few signs that could point to a problem. The most reliable indicator is the “gentle tug test.” After a couple of weeks, try to lift a corner of a sod piece. You should feel some resistance, which tells you the roots are beginning to anchor into the soil. If the sod lifts easily with no grip, it may not be rooting properly. This could be due to watering issues or poor contact with the soil beneath. Also, watch for sod pieces that are shrinking and pulling away from each other, leaving large gaps. If you notice these issues, it’s a good idea to consult with the team that handled your sod installation.
Set Realistic Expectations for Seasonal Changes
Patience is your best friend when it comes to winter sod. Don’t expect an immediate, vibrant green lawn. The real “green-up” and deep rooting happen in the spring as temperatures consistently rise. Full establishment can take two to three months, sometimes longer, until the warm weather truly settles in. The rooting process happens in stages. You can expect shallow roots to form within the first two to four weeks, which helps hold the sod in place. The deeper, stronger roots that create a durable lawn will continue to develop throughout the spring. Viewing winter as the establishment period will help you appreciate the beautiful, healthy lawn that emerges when the seasons change as part of your overall landscape design.
How to Know Your Sod is Rooting Successfully
It’s completely normal to feel a little impatient after a new sod installation. You’ve made an investment in your property, and you’re eager to see that beautiful, green lawn take shape. But when you install sod in the winter, the signs of success look a little different. The grass is dormant, so you won’t see the vibrant green growth you’d expect in spring or summer. Instead, you need to look for more subtle clues that the root system is getting established.
Don’t panic if your lawn looks brown and sleepy—that’s usually part of the process. The key is to know the difference between healthy, dormant sod and sod that’s struggling. By performing a few simple checks, you can get a clear picture of how your new lawn is doing and feel confident that it’s on track to flourish when the weather warms up. Below are a few easy ways to monitor your sod’s progress without disturbing its delicate new roots.
Try the “Gentle Tug” Test
This is the easiest way to check if roots are beginning to form. Find a corner of a sod piece and give it a very gentle tug upward. If you feel some resistance, that’s a fantastic sign! It means the new roots are starting to anchor themselves into the soil below. Don’t pull hard, as you could damage the fragile roots. If it lifts easily with no resistance, don’t worry. For sod installed during dormancy, it might take until early spring before you feel that reassuring hold. Just be patient and give it time to wake up and get to work.
What Healthy Dormant Sod Looks Like
First things first: brown does not equal dead. During winter, your new sod will likely look brown and lifeless until the weather warms up, and that’s perfectly okay. Think of it as the grass hibernating to conserve energy. Healthy dormant sod should have a consistent tan or brownish color across the lawn. What you want to watch out for are signs of trouble, like slimy patches, a moldy smell, or areas that are brittle and dry. A uniform, sleepy brown color, however, is exactly what you should expect to see.
Check for Soil Moisture and Resistance
Proper moisture is critical for root development, even in winter. The soil underneath the sod should be consistently moist but never waterlogged. You can check this by lifting a corner and feeling the soil—it should feel like a damp sponge. This is why having good drainage solutions in place before installation is so important. It prevents water from pooling and rotting the roots. Also, remember to stay off the new sod. Walking on it compacts the soil and can break the delicate new roots as they try to establish, so give your lawn plenty of undisturbed rest.
How to Care for Your New Winter Sod
Once your new sod is installed, your job is to give it the best possible start. Caring for sod in the winter is a little different than in the peak growing season, but it’s straightforward once you know what to do. The main goal is to keep the dormant grass healthy and hydrated while protecting the delicate, developing root system underneath. Think of it as a quiet period of establishment, setting the stage for a vibrant green lawn when spring arrives.
Success comes down to three key things: a smart watering routine, protecting the turf from stress, and ensuring the ground was properly prepared from the start. Getting these elements right helps your new lawn settle in, even when the weather is cool. With a bit of attention, you can ensure the investment you made in your property pays off with a beautiful, resilient lawn. We’ll walk through exactly what you need to do to care for your new grass during the cooler months.
Create the Right Watering Schedule
Even dormant sod needs water. While you don’t need to water as heavily as you would in the summer, consistency is key. Cold, dry winter winds in Florida can easily dry out new turf. As soon as your sod is laid, it needs a good drink—at least an inch of water within the first 30 minutes. For the next couple of weeks, water every other day or so, making sure the soil underneath stays moist but not waterlogged. After that, you can scale back to once or twice a week, depending on rainfall. Always check the soil with your finger; if it feels dry a couple of inches down, it’s time to water. This consistent moisture is crucial for our professional sod installation to take root successfully.
Protect Sod from Frost and Foot Traffic
Your new sod is in a dormant, sleep-like state, which makes it vulnerable. The most important rule is to keep off the grass! Avoid walking on your new sod for at least the first two to three weeks, and even longer if you can. Foot traffic, pets running around, or heavy objects can compact the soil and damage the fragile new roots before they have a chance to establish. This can create bare patches or unevenness later on. You also want to hold off on mowing until you can’t easily pull up a corner of the sod, which signals the roots have taken hold. Give your new lawn the quiet, undisturbed time it needs to get settled in its new home.
Why Proper Soil Prep is Key
The secret to a healthy lawn starts long before the first roll of sod is laid. Proper soil preparation creates the ideal foundation for roots to grow deep and strong. The ground should be cleared of old grass and weeds, tilled to loosen compacted earth, and graded for proper drainage. For many Central Florida soils, adding amendments like compost can introduce vital nutrients and improve soil structure. This prep work ensures the new roots can easily penetrate the soil, access water and nutrients, and establish themselves quickly. Without this step, sod can struggle to root, leading to weak, patchy grass. That’s why our sod installation process always begins with a thorough assessment and preparation of your property.
Myths About Installing Sod in Winter
When you think of laying new sod, you probably picture a sunny spring day. The idea of installing a new lawn in the winter can feel counterintuitive, and there are plenty of myths out there that might make you hesitate. But here in Central Florida, our mild winters create a unique opportunity for landscape projects. Putting off your new lawn until spring might not be necessary, and in some cases, a winter installation can even give your grass a healthy head start. It allows the root system to establish itself without the stress of scorching summer heat, which can make a huge difference in the long-term health of your turf.
Let’s clear up some of the most common misconceptions about winter sod installation. Understanding the science behind how grass behaves in cooler weather will help you see why this season can be a perfect time to get the lawn you’ve been wanting. We’ll walk through what’s really happening with your sod when the temperatures drop so you can make an informed decision for your property. By separating fact from fiction, you can move forward with your project confidently, knowing you’re setting your new lawn up for success.
Myth: Sod Can’t Root in the Winter
This is probably the biggest myth of all. While it’s true that sod goes dormant in the winter and you won’t see much top growth, there’s still a lot happening beneath the surface. The roots are slowly but surely working their way into the soil, establishing a strong foundation. Think of it as a quiet preparation phase. This slower rooting process is actually less stressful on the grass than the intense heat of a Florida summer. By the time the weather warms up, your sod will be ready to take off, resulting in a lush, green lawn much faster than if you had waited.
Myth: Brown Sod Is Dead Sod
It can be alarming to see your newly installed lawn looking brown and lifeless, but don’t panic. This is a completely normal part of dormancy for many grass varieties. The brown color is a sign that the grass is conserving its energy to focus on root development rather than producing green blades. It’s a natural survival mechanism. Once the warmer spring weather arrives and the growing conditions improve, that dormant sod will wake up and transform into the vibrant green turf you’ve been waiting for. Patience is key here; that brown lawn is just resting.
Myth: You Don’t Need to Water Sod in the Winter
While winter sod needs less water than it would in the middle of July, it absolutely still needs moisture to survive and establish its roots. Your new sod should be watered right after it’s installed and kept consistently moist—but not soaking wet—throughout the winter. Windy days can be particularly drying, so you may need to water a little extra then. The only time to hold off is if temperatures are expected to drop below freezing. Proper watering is crucial, as is ensuring you have good drainage solutions in place to prevent the soil from becoming waterlogged, which can harm the new roots.
Avoid These Common Winter Sod Mistakes
Installing sod in the winter is a smart move for many Florida properties, but a few simple missteps can slow down the rooting process. Giving your new lawn the right start involves more than just laying down the turf; it’s about creating the perfect environment for those new roots to take hold. By steering clear of a few common mistakes, you can ensure your investment pays off with a lush, healthy lawn come spring. It all comes down to proper watering, patience, and timing.
Overwatering and Ignoring Drainage
It’s easy to assume that more water is better, but that’s rarely the case, especially with dormant winter sod. While you should water your new sod thoroughly within 30 minutes of installation, the goal afterward is to keep the soil moist, not saturated. Overwatering can suffocate the new roots and lead to fungal diseases. If you notice standing water or soggy spots, you may have a bigger issue. Proper landscape drainage is essential for a healthy lawn, ensuring that excess water has a place to go so your sod’s roots can breathe and grow strong.
Walking on Your New Sod Too Soon
Your new lawn needs time to settle in, and foot traffic is its worst enemy in the early days. Walking, running, or letting pets on the sod can compact the soil and prevent the delicate new roots from making firm contact with the ground beneath. This can create air pockets that dry out the roots and kill the grass. As a rule of thumb, you should avoid walking on new sod for at least two weeks. Since rooting takes longer in the winter, it’s best to be even more patient. Give it a gentle tug; if you feel resistance, the roots are starting to anchor.
Installing at the Wrong Time
While winter is a great season for sod installation in Central Florida, timing is still important. The biggest mistake is laying sod right before a predicted hard freeze. Even our mild winters can have cold snaps, and freezing temperatures can stress the new turf before it has a chance to establish. The best approach is to watch the forecast and choose a mild stretch of weather for your project. A professional sod installation team will know how to time the work perfectly, giving your lawn the best possible start and preventing issues with erosion on bare soil.
Why Professional Sod Installation Matters in Central Florida
Laying sod can seem like a straightforward weekend project, but getting that lush, green carpet of grass you’re dreaming of involves more than just rolling it out. Especially here in Central Florida, with our unique sandy soil, intense sun, and humid climate, a DIY job can quickly turn into a patchy, brown headache. Investing in professional sod installation isn’t just about saving you time and a sore back; it’s about ensuring the long-term health and beauty of your lawn.
A successful lawn starts long before the first piece of sod is laid. Professionals understand the critical importance of site preparation. This means properly removing old grass and weeds, grading the soil for a level surface, and addressing any underlying issues. For example, ensuring proper drainage is essential to prevent water from pooling and rotting the new roots. These are the foundational steps that are often rushed or overlooked in a DIY project, yet they make all the difference in whether your sod thrives or fails.
Expertise in local conditions is another huge advantage. A professional team knows which grass varieties perform best in the Lake Mary area and can help you choose the right sod for your property’s specific needs, considering factors like sun exposure and foot traffic. They also use the right techniques and equipment to lay the sod tightly, eliminating gaps and ensuring good root-to-soil contact. This meticulous approach gives your new lawn the best possible start, leading to faster rooting and a more resilient, beautiful yard for years to come.
Related Articles
Frequently Asked Questions
My new winter sod is brown. Should I be worried? It’s completely understandable to feel a little nervous when your new lawn looks brown, but in most cases, it’s perfectly normal. The warm-season grasses we use in Florida go dormant in the winter to conserve energy. Instead of putting effort into growing green blades, the grass focuses all its resources on establishing a strong root system underground. As long as the sod feels pliable and not dry or brittle, that brown color is just a sign that your lawn is resting and getting ready for a big debut in the spring.
How can I tell if the sod is actually rooting if it’s not turning green? Since you can’t rely on color, the best way to check on your sod’s progress is with the “gentle tug test.” After a couple of weeks, find a corner of one of the sod pieces and give it a very light pull. If you feel some resistance, that’s great news! It means the new roots are beginning to anchor into the soil. If it lifts up easily, don’t panic. The process is slow in cool weather, so just give it more time before you check again.
What’s the biggest mistake people make with new winter sod? The most common misstep is either watering incorrectly or walking on the new lawn too soon. It’s easy to overwater dormant sod, which can suffocate the new roots. The goal is to keep the soil underneath consistently moist, not soaking wet. Just as important is keeping off the grass. Foot traffic compacts the soil and can break the delicate new roots as they try to form, creating weak spots in your future lawn.
Is it really better to install sod in the winter instead of waiting for spring? There are great benefits to a winter installation. It allows the sod to establish its root system in a low-stress environment, without the shock of intense summer heat. This gives your lawn a significant head start, so it’s ready to thrive the moment the weather warms up. While a spring installation might give you a faster green-up, the grass then has to immediately deal with rising temperatures, which can be more challenging for a new lawn.
How often should I be watering my new dormant lawn? Even though the grass is dormant, it still needs consistent moisture to establish its roots. You should water thoroughly right after the sod is installed. For the first couple of weeks, watering every other day is usually sufficient. After that, you can typically scale back to once or twice a week, but always let the soil be your guide. If you stick your finger a couple of inches into the soil under the sod and it feels dry, it’s time to water.