How to Lay Sod in a Small Area Like a Pro
Here in Central Florida, our lawns face unique challenges, from the intense summer sun to sudden downpours. Simply rolling out new sod isn’t enough; you need a strategy that works with our specific climate and soil conditions. Choosing the right type of grass and preparing the ground to handle our weather is critical for a lawn that doesn’t just survive, but thrives. This guide is tailored for Florida homeowners, offering practical advice that makes a real difference. We’ll walk you through how to lay sod in a small area, covering everything from improving sandy soil to selecting a shade-tolerant variety, ensuring your new lawn can handle everything our local environment throws at it.

Key Takeaways
- Prepare your foundation: The success of your new lawn depends entirely on the ground beneath it. Before you begin, completely clear the area of old grass and weeds, till the soil to loosen it, and create a smooth, level surface for the new roots to grow.
- Lay sod with precision: For a professional, seamless look, always stagger the seams of your sod pieces in a brick-like pattern. Ensure the edges fit snugly together without overlapping to prevent gaps and help the pieces knit together into a uniform lawn.
- Water wisely and wait patiently: Consistent watering is the most important part of aftercare. Keep the new sod and topsoil moist for the first two weeks, stay off the lawn to allow roots to anchor, and wait at least three weeks before the first mow.
Prepping Your Small Space for New Sod
A lush, green lawn starts long before you lay the first piece of sod. Proper preparation is the single most important factor in getting your new grass to take root and thrive, especially in a smaller yard where every inch counts. Taking the time to get the groundwork right ensures your sod has the best possible start, creating a healthy foundation that will last for years. Think of it as setting the stage for a beautiful performance. These steps will guide you through creating the perfect canvas for your new lawn.
Measure and Plan Your Space
Before you do anything else, grab a tape measure. You’ll need to calculate the square footage of the area you plan to cover with sod. Simply multiply the length by the width to get your number. If your space has an irregular shape, break it down into smaller rectangles or squares, measure each one, and add the totals together. Once you have your final measurement, add about 5% to 10% extra. This little buffer is a lifesaver, as it accounts for any cuts you’ll need to make around curves, sprinklers, or garden beds, ensuring you don’t run out of sod mid-project.
Choose the Right Sod for Central Florida
Not all grass is created equal, especially in our warm, humid climate. Choosing the right type of sod is critical for a lawn that can handle the Florida sun and seasonal rains. For Central Florida, you’ll want to look for warm-season grasses that flourish here. The most popular and successful varieties include St. Augustinegrass, Zoysiagrass, and certain types of Bermudagrass. Each has slightly different characteristics regarding drought tolerance, shade resistance, and texture. Do a little research on which one best fits your yard’s specific conditions and your personal preference for a beautiful, resilient lawn.
Clear and Prep the Soil
Now it’s time to get your hands dirty. You need to create a clean slate for your new sod, which means removing all the old grass, weeds, rocks, and roots from the area. Once the surface is clear, it’s time to loosen the ground. Use a tiller or a garden rake to work the soil to a depth of about four to six inches. This step is crucial because it breaks up compacted earth, improves drainage, and makes it much easier for the new sod’s roots to penetrate the ground and establish themselves. A well-prepped soil bed is the key to a successful sod installation.
Test and Amend Your Soil
This is a step that many DIYers skip, but it can make a huge difference in the long-term health of your lawn. A simple soil test kit can tell you about the pH and nutrient levels of your soil. Is it too acidic or alkaline? Is it lacking key nutrients? Knowing this information allows you to amend the soil with the right materials, like compost, lime, or specific fertilizers, before you lay the sod. Creating a balanced, nutrient-rich environment gives your new grass everything it needs to grow strong, healthy, and vibrant from the very beginning.
Level and Grade the Area
The final step in preparing your ground is to create a smooth, properly graded surface. Use a rake to level out any high spots or fill in low areas, removing any remaining clumps of dirt or debris. You want the soil to be about one inch below the level of any surrounding sidewalks, patios, or driveways so the new sod will sit flush. It’s also important to ensure the area has a slight slope that directs water away from your home’s foundation. Proper grading prevents water from pooling on your lawn, which is essential for avoiding root rot and other drainage issues.
What You’ll Need for Sod Installation
Getting your supplies together before you start laying sod will make the entire process feel much smoother. The actual work isn’t complicated, but the physical effort can be demanding. Having everything you need within arm’s reach means you can focus on getting the job done right without any frustrating interruptions. Think of it like cooking a new recipe; you want all your ingredients prepped and ready to go. A little preparation here saves a lot of headaches later and sets your new lawn up for success from day one. From basic tools to the right soil additives, gathering these items is your first step toward a beautiful, green space.
The Essential Tools
You don’t need a shed full of professional equipment, but a few key tools will make a world of difference. The hardest part of this project is often the physical labor, and the right tools can lighten the load significantly. Start with the basics: a sturdy wheelbarrow for moving sod and soil, a garden rake for leveling the ground, and a sharp utility knife for cutting sod pieces to fit. If you’re removing an old lawn, a sod cutter can be a lifesaver. Once the sod is down, a lawn roller filled with water will help press the roots firmly into the soil, removing air pockets and ensuring good contact.
Soil Amendments and Fertilizer
Your new sod needs a nutrient-rich foundation to establish strong roots and thrive. Before you lay the first piece, it’s a great idea to work some organic matter into your existing soil. Materials like compost enrich the ground and help it retain moisture, giving your sod a healthy head start. You should also apply a starter fertilizer specifically designed for new lawns. This will provide the essential nutrients your grass needs to grow quickly and develop a deep, resilient root system. Think of it as the first meal for your new lawn, giving it the energy to flourish. Adding quality mulch to surrounding garden beds can also help retain soil moisture for the entire area.
How to Calculate How Much Sod You Need
Running out of sod mid-project is a scenario everyone wants to avoid. To figure out how much you need, start by measuring the length and width of the area and multiplying them to get the total square footage. For irregularly shaped spaces, break them down into smaller squares or rectangles, calculate the area for each, and add them together. Once you have your total, it’s smart to add an extra 5% to 10%. This little buffer accounts for any miscuts or pieces you’ll need to trim to fit around curves and corners. Professional sod installation always includes careful measurement to ensure complete coverage.
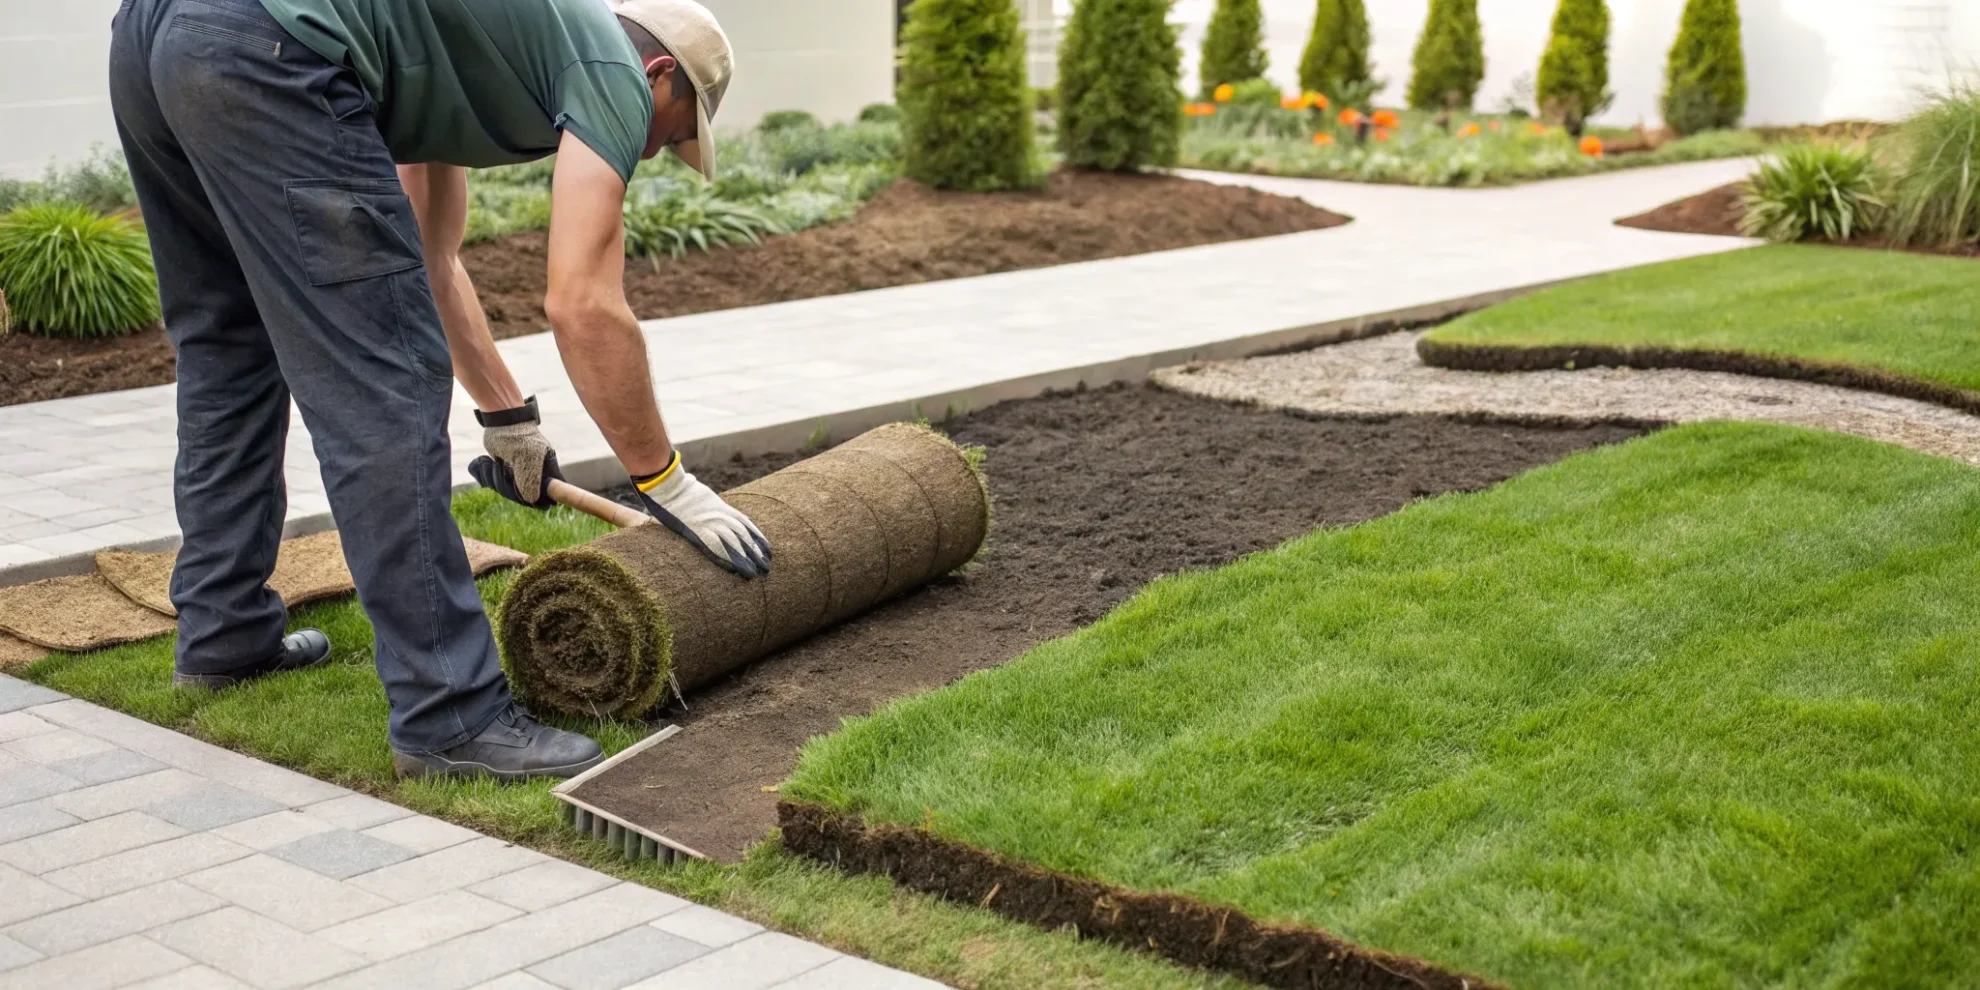
How to Lay Sod in a Small Area
With your soil prepped and sod on site, it’s time for the most satisfying part: laying down your new lawn. This is where your space truly transforms. You don’t need to be a pro to get professional results. Following a few key techniques will help you create a seamless, healthy lawn that looks like it’s been there for years.
Plan Your Layout
Before you lay the first piece, have a solid plan. Start along the longest straight edge in your yard, like a driveway or patio, to create a clean baseline. This gives you a straight line to work from and minimizes difficult cuts later on. When ordering your sod, it’s wise to calculate your square footage and add about 5% extra to your order. This buffer is a lifesaver for making custom cuts around curves and fixing any mistakes without running out of material. A little planning is a crucial step for a successful sod installation and ensures you have everything you need.
Stagger the Seams
To avoid a checkerboard pattern, stagger the seams of your sod pieces. Think of it like laying bricks. After you place your first full row, start the next row with a half-piece of sod. This simple trick ensures the short seams don’t line up, creating a more natural and uniform appearance. Staggering also helps the sod knit together more effectively. It prevents water from running down long seams and encourages the roots to establish a stronger foundation across the entire area. This technique is a hallmark of professional landscape design and makes a huge difference in the final look.
Cut Sod for Tight Spots
Your yard likely isn’t a perfect square, so you’ll need to make some custom cuts. Whether you’re working around sprinkler heads, curved flower beds, or a stone walkway, precision is key. Use a sharp utility knife or a sod knife for the cleanest cuts. Lay the piece of sod over the obstacle and press down to make an impression, then flip it over and cut along the line. Taking your time on these details will give your lawn a polished, custom-fit look, especially when integrating it with your existing hardscaping services like patios and pathways.
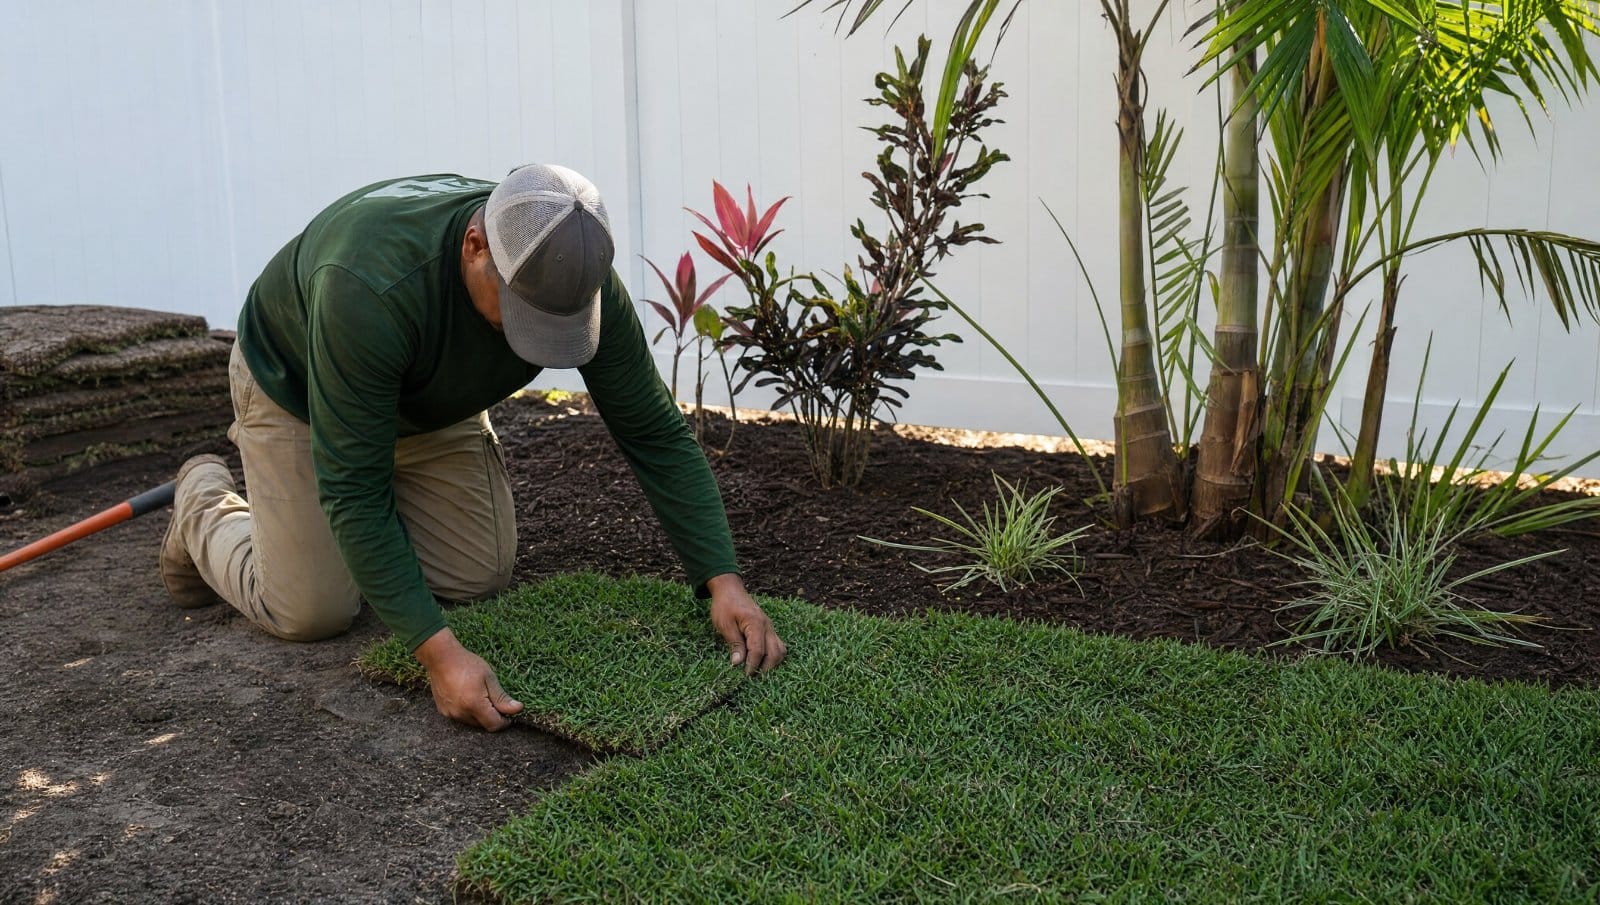
Ensure Tight Seams and Edges
As you lay each piece of sod, make sure the edges are snug against each other. You want them to touch firmly, but not overlap or be stretched. Gaps between the pieces can cause the edges to dry out and turn brown, leaving you with visible lines in your new lawn. Use your hands to gently push the edges together. If you find any small gaps after you’re done, you can fill them with a bit of topsoil to protect the roots from drying out. A tight fit is crucial for helping the individual pieces grow together into a single, seamless lawn.
How to Water Your New Sod
Proper watering is the single most important step to help your new sod establish deep, healthy roots. Think of it as the welcome-home party for your new lawn. Especially here in Central Florida, the sun can be intense, and those tender new roots need consistent moisture to thrive and knit into the soil below. Getting this right from day one sets the stage for a beautiful, green lawn that lasts. Let’s walk through exactly how to do it.
Water as You Go
A common mistake is waiting until the entire area is covered before turning on the sprinkler. For the best results, you should water your sod as you lay it. This simple step prevents the roots from drying out while you work. After you’ve laid down a section, maybe about 200 square feet, give it a light watering. You don’t need to soak it completely at this stage, just provide enough moisture to keep it cool and damp. This little bit of care during installation gives your sod a much better chance of taking root without stress.
Follow a Deep Watering Schedule
Once all the sod is in place, it’s time for its first deep drink. You want to water thoroughly enough to soak the sod and the top few inches of soil beneath it. For the first two weeks, your new lawn is very thirsty. Plan to water it twice a day, once in the early morning and again in the late afternoon. After two weeks, you can usually reduce this to once a day. The goal of this deep watering is to encourage the roots to grow downward, creating a stronger, more resilient lawn. Our professional sod installation always includes guidance on the best watering practices for your specific lawn.
Check for Proper Moisture
How do you know if you’re watering enough, or too much? The best way to find out is to check. Gently lift a corner of one of the sod pieces. The soil underneath should be damp, but not a muddy puddle. If it’s dry, you need to water more frequently or for longer periods. If it’s completely waterlogged, you might be overdoing it. Poor drainage can also lead to soggy soil, which is a separate issue. Checking the soil moisture every few days helps you adjust your routine and give your new lawn exactly what it needs to flourish.
Common Sod Installation Mistakes to Avoid
Laying new sod is an exciting step toward a beautiful lawn, but a few common missteps can turn your dream green space into a frustrating project. Even in a small area, the details matter. From preparing the ground to that very first mow, avoiding these simple mistakes will help ensure your new grass takes root and thrives for years to come. By getting the process right from the start, you set your lawn up for long-term success and save yourself from having to fix problems later on. A successful sod installation is all about giving your new grass the best possible start in its new home.
Skipping Soil Prep
Think of your soil as the foundation for your new lawn. Simply laying sod over old, compacted dirt is a recipe for failure. The new roots need a welcoming environment to grow deep and strong. Proper soil preparation involves clearing away all the old grass and weeds, tilling the soil to loosen it up, and mixing in organic matter to add nutrients. This step is critical because it ensures your sod gets the air, water, and nutrients it needs to establish itself quickly. A well-prepared base is the single most important factor for a healthy, vibrant lawn.
Watering Incorrectly
When it comes to watering new sod, there’s a delicate balance. Too little water, and the roots will dry out; too much, and you risk root rot and disease. For the first two weeks, the goal is to keep the sod and the soil just beneath it consistently moist, but not soggy. This often means watering lightly several times a day. After the roots begin to take hold, you can gradually shift to a deeper, less frequent watering schedule. If you notice water pooling, you may have an underlying issue that requires professional drainage solutions.
Walking on the Sod Too Soon
It’s tempting to walk on your new lawn right away, but patience is key. Your new sod is extremely fragile for the first couple of weeks. Walking on it can compress the soil, damage the delicate, developing roots, and create uneven spots. This can prevent the grass from properly establishing itself and bonding with the soil underneath. Give your sod at least two to three weeks of undisturbed time to root before you start walking on it regularly. Let the grass tell you when it’s ready; if you can gently tug a corner without it lifting, it’s starting to establish.
Leaving Gaps Between Pieces
When you’re laying out your sod, you want the pieces to fit together snugly, like a puzzle. Leaving even small gaps between the strips can cause problems. These empty spaces can dry out quickly and become a perfect spot for weeds to sprout. To avoid this, make sure the edges of each piece of sod are butted up tightly against each other, with no soil showing in between. Don’t overlap them, just ensure a close fit. A seamless installation not only looks better but also helps the lawn grow into a uniform, dense carpet of green.
Mowing Too Early
That first mow is a big milestone, but doing it too soon can put a lot of stress on your new grass. The blades need time to grow, and the roots need time to anchor themselves firmly in the soil. Mowing prematurely can pull up the sod and damage the fragile root system. As a general rule, wait about three weeks before the first mow. Before you do, check to make sure the sod is firmly rooted. Your first cut should be gentle, with the mower set to its highest setting. Never remove more than one-third of the grass blade height at a time.
Handling Small-Space Challenges
Small yards often come with their own unique set of puzzles, from awkward shapes to less-than-ideal growing conditions. But don’t worry, these challenges are completely manageable. With a few smart strategies, you can lay sod successfully and create a beautiful, green space no matter the size. Here’s how to tackle some of the most common issues you might face in a compact yard.
Working in Tight Corners
Don’t let a narrow strip of land between your driveway and a fence intimidate you. The key is to customize the sod pieces to fit the space perfectly. Instead of trying to force a full roll where it won’t fit, measure the width of the area. Then, use a sharp utility knife to cut your sod rolls into strips that match that measurement. Lay these custom-cut strips snugly against each other, ensuring there are no gaps. This approach gives you clean, professional-looking results in even the most awkward corners of your yard. For tricky layouts, professional sod installation ensures every inch is covered correctly.
Dealing with Low Sunlight
Big trees or the shadow from your house can leave small yards with very little direct sun. While many grass types love sunshine, some varieties are more shade-tolerant than others. Choosing the right type of sod is your first line of defense. If your yard is heavily shaded, you might also consider professional tree trimming to thin the canopy and let more light filter through. This can make a huge difference for your new lawn’s health, helping it establish strong roots and maintain its vibrant green color even with limited sunlight.
Improving Drainage
Puddles in your yard after a rainstorm are a clear sign of poor drainage. Laying sod over these low spots will only lead to soggy, rotted roots. Before you lay a single piece of sod, you need to level the area. Use a mix of topsoil or sand to fill in any depressions where water collects and rake it smooth to create an even surface. For more persistent water issues, you may need a more robust solution. Installing proper landscape drainage systems, like a French drain, can redirect excess water away from your lawn and protect your investment.
Fixing Compacted Soil
If your soil feels as hard as a rock, your new sod will struggle to grow deep roots. This is called soil compaction, and it happens when soil particles are pressed together, reducing space for air and water. You can check for this by trying to push a screwdriver into the ground; if it’s difficult, your soil is likely compacted. The best fix is to till or aerate the soil before laying your sod. This breaks up the compacted earth, creating a loose, welcoming environment for new roots to thrive. Proper soil preparation is a non-negotiable step for a healthy lawn.
Caring for Your New Sod
You’ve laid the last piece of sod, and your yard already looks transformed. But the job isn’t quite finished. The care you provide in the first few weeks is what truly sets the foundation for a lush, healthy lawn that will last for years. Think of it as a crucial after-care routine that helps your new grass settle in and thrive. Here’s how to give your new sod the best possible start.
Your First-Week Care Plan
The first week is all about water and patience. Your new sod is thirsty, and its shallow roots need consistent moisture to connect with the soil below. Water it every day for the first week, and maybe even twice a day if the Florida sun is especially intense. The goal is to keep the sod and the top inch of soil consistently damp, but not swimming in puddles. Proper drainage solutions are key to preventing water from pooling. Just as important is keeping everyone, including pets and kids, off the lawn. Foot traffic can prevent the delicate new roots from taking hold and create uneven spots.
When to Do the First Mow
It’s tempting to break out the mower as soon as you see new growth, but it’s best to wait. Give your sod about three weeks to establish a solid root system before its first trim. Mowing too soon can stress the grass and pull up the squares, undoing all your hard work. Not sure if it’s ready? Gently lift a corner of one of the sod pieces. If you feel resistance, it means the roots are anchoring into the soil, and you’re getting close. When you do mow for the first time, you’ll want to do it carefully.
Long-Term Care for a Healthy Lawn
After the first few weeks, you can adjust your routine. Start watering less frequently but more deeply, maybe once a day for weeks three and four, then tapering off from there. Deep watering encourages the roots to grow further down into the soil, which builds a stronger, more drought-resistant lawn. For that first mow, set your mower blade to its highest setting. You only want to trim the very tops of the grass blades. In later mows, you can gradually lower the blade to your preferred height. Following these steps after a professional sod installation will help you cultivate a beautiful green space you can enjoy for a long time.
Troubleshooting Your New Sod
Even when you do everything right, your new sod can sometimes hit a snag. Don’t worry, most common issues are easy to fix if you catch them early. A little troubleshooting can get your small lawn back on track and growing beautifully. The key is to observe your new grass closely for the first few weeks and act quickly when you spot a problem. From small gaps to concerning brown spots, there’s almost always a straightforward solution to help your sod thrive.
Fixing Gaps and Seams
When you lay your sod, you want the pieces to be snug against each other, like a puzzle. Sometimes, small gaps or visible seams appear as the sod settles. These gaps aren’t just a cosmetic issue; they can cause the edges of your sod pieces to dry out and shrink, making the problem worse. The fix is simple. Just fill any small gaps with a bit of topsoil or potting mix. This protects the vulnerable edges from the sun and encourages the roots to knit together, creating a seamless, uniform lawn.
What to Do About Uneven Growth
If you notice some parts of your new sod are growing faster than others, the issue usually lies beneath the surface. Uneven growth is often a sign that the ground wasn’t perfectly leveled before installation. Low spots can collect too much water, while high spots might dry out too quickly. This is why professional sod installation focuses so heavily on proper ground preparation. If you’re seeing minor unevenness, you can sometimes correct it by lightly topdressing the area with soil to fill in dips once the sod is established.
Handling Brown or Dying Patches
Seeing brown patches on your brand-new lawn can be alarming, but it’s usually a watering issue. For the first two weeks, your sod needs to stay consistently moist, not soggy. Water it daily, or even more if it’s very hot, until the roots take hold. You can check by gently lifting a corner of a sod piece; if you feel resistance, the roots are starting to establish. If you’re watering correctly and still see brown spots, the soil underneath might be too compacted for roots to penetrate. A professional arborist can help diagnose underlying soil health issues that prevent your lawn from flourishing.
Related Articles
Frequently Asked Questions
How soon can I walk on my new sod? It’s so tempting to use your new lawn right away, but you should wait at least two to three weeks. The new sod is very fragile, and walking on it can damage the developing roots and create low spots. A good test is to gently tug on a corner of a sod piece. If it feels anchored and doesn’t lift easily, the roots are starting to establish, and you can begin light foot traffic.
What’s the best type of grass for a small yard in Central Florida? The best choice really depends on your yard’s specific conditions, especially how much sun it gets. For our warm and humid climate, you’ll want to stick with warm-season grasses. St. Augustinegrass is a very popular choice and handles heat well, while Zoysiagrass is known for its dense, soft texture. If you have a particularly sunny spot, some varieties of Bermudagrass could also be a great fit.
Why are the edges of my new sod turning brown? Brown edges are usually a sign that the sod is drying out too quickly. This often happens when there are small gaps left between the sod pieces during installation, exposing the edges to the air and sun. It can also be a sign of underwatering. Make sure you are watering enough to keep the entire sod piece and the soil just beneath it consistently moist for the first couple of weeks.
Do I really need to remove all the old grass before laying new sod? Yes, this step is absolutely essential. Laying new sod directly over an old lawn prevents the new roots from making good contact with the soil. The old grass and weeds will compete for water and nutrients, and they can also create an uneven surface. Taking the time to create a clean slate by removing all the old vegetation gives your new lawn the best possible chance to establish a deep, healthy root system.
How can I tell if I’m watering my new sod correctly? The best way to check is to get your hands a little dirty. Gently lift a corner of a sod piece and feel the soil underneath. It should be damp to the touch, like a well-wrung-out sponge. If the soil is dry, you need to increase your watering. If you see puddles or the soil is muddy and waterlogged, you should cut back a bit. This simple check helps you find the perfect balance for your lawn’s needs.