How to Lay Sod Fast: A Pro’s Step-by-Step Guide
A new sod lawn is a major investment in your home’s curb appeal, and you want to protect that investment from day one. The health of your new grass depends entirely on a successful installation. While sod offers a quick solution for a beautiful lawn, the installation itself is a race against time to get the roots in contact with moist soil. Knowing how to lay sod fast is crucial, not to cut corners, but to minimize stress on the grass. This guide provides a clear, step-by-step plan to ensure your investment thrives, covering everything from ground prep to the final, critical watering.
Key Takeaways
- Start with a strong foundation: The success of your new lawn depends entirely on the ground beneath it, so be sure to clear all old debris, loosen the topsoil, and amend it based on a soil test.
- Lay sod with a professional technique: For a seamless, uniform look, always begin along a straight edge, stagger the seams in a brick-like pattern, and push the edges together snugly to avoid gaps.
- Prioritize aftercare for a lasting lawn: Your work isn’t done after installation; water the new sod daily for the first week and keep all foot traffic off it for at least two weeks to help the roots establish properly.
How to Prepare Your Yard for Sod
A lush, green lawn starts long before the first piece of sod is unrolled. Proper ground preparation is the most important factor in helping your new grass thrive. Think of it as creating the perfect foundation for your yard. Rushing this stage can lead to patchy growth, drainage issues, and a lawn that never looks its best. Taking the time to clear, test, and amend your soil will make all the difference, ensuring your investment grows into the beautiful yard you envision.
Clear and Level the Ground
Start by creating a clean slate. Remove all old grass, weeds, and debris. A grub hoe works for small yards, but a sod cutter is more efficient for large areas. Once clear, loosen the top four to six inches of soil by tilling or raking to break up compaction and help new roots grow. The goal is a smooth, level surface without low spots where water can pool. For properties with stubborn vegetation or major grading challenges, professional land clearing can ensure your yard is perfectly prepped.
Test and Amend Your Soil
Get to know your soil before laying sod. A simple soil test reveals its pH and nutrient levels, which are critical for healthy grass. Use a DIY kit or send a sample to a local extension office, mixing soil from a few spots for an accurate reading. The results will tell you what your soil needs. Many Florida soils are acidic and benefit from lime, while others may need compost or starter fertilizer. Amending the soil gives your new sod the best possible start, helping it establish quickly and grow strong.
Gather Your Tools and Materials
Have your tools ready before the sod arrives to make installation day smoother. Your essential list includes a garden rake for leveling, a utility knife for trimming, and a lawn roller. A rototiller is also great for breaking up compacted soil. After laying the sod, use the water-filled lawn roller to press it firmly against the ground. This removes air pockets and ensures good root-to-soil contact. If your project involves correcting a slope or drainage, professional excavation services may be needed to properly grade the site first.
How to Choose the Best Sod
Choosing the right sod is the first step toward a beautiful, long-lasting lawn. While it might seem like all green grass is the same, different varieties have unique needs and thrive in different conditions. Picking the perfect match for your yard depends on a few key factors, from our sunny Florida climate to the specific soil in your backyard. Getting this choice right from the start saves you a lot of headaches later and sets your new lawn up for success. Let’s walk through what you need to consider to make the best decision for your property.
Consider Central Florida’s Climate
Here in Central Florida, our climate is a major player in lawn health. The heat, humidity, and intense sun mean you need a grass that can handle it. When you’re selecting sod, it’s crucial to choose a variety that thrives here. Warm-season grasses like St. Augustine, Zoysia, and Bahia are popular for a reason. Think about your yard’s specific conditions, too. Does it get full sun all day, or do you have shady spots under large trees? Some grasses are more shade-tolerant than others. Also, be realistic about how much upkeep you’re willing to do. Some types require more frequent watering and attention to stay lush and green.
Match Sod to Your Soil Type
Your soil is the foundation of your new lawn, so you want to make sure it’s ready. Before you lay a single piece of sod, it’s a great idea to understand what you’re working with. A simple chemical soil test can tell you the pH level of your topsoil. This is important because if your soil is too acidic or alkaline, the grass won’t be able to absorb nutrients properly. For example, acidic soil might need lime to create a better growing environment. Knowing your soil type helps you choose a sod variety that will naturally do well or tells you what amendments are needed for a successful sod installation.
Explore Fast-Growing Sod Varieties
One of the biggest perks of using sod is that you’re essentially “buying time” and getting an instant lawn. The grass has already been professionally cultivated for a year or more, so you get to skip the slow, patchy process of growing from seed. To get the best results, look for high-quality sod that is dense, green, and has moist soil at the roots. Fresh, healthy sod will establish its root system much faster in your yard. While all sod gives you a head start, choosing a variety known for strong root growth in our area will help it take hold quickly and become a durable, beautiful part of your landscape.
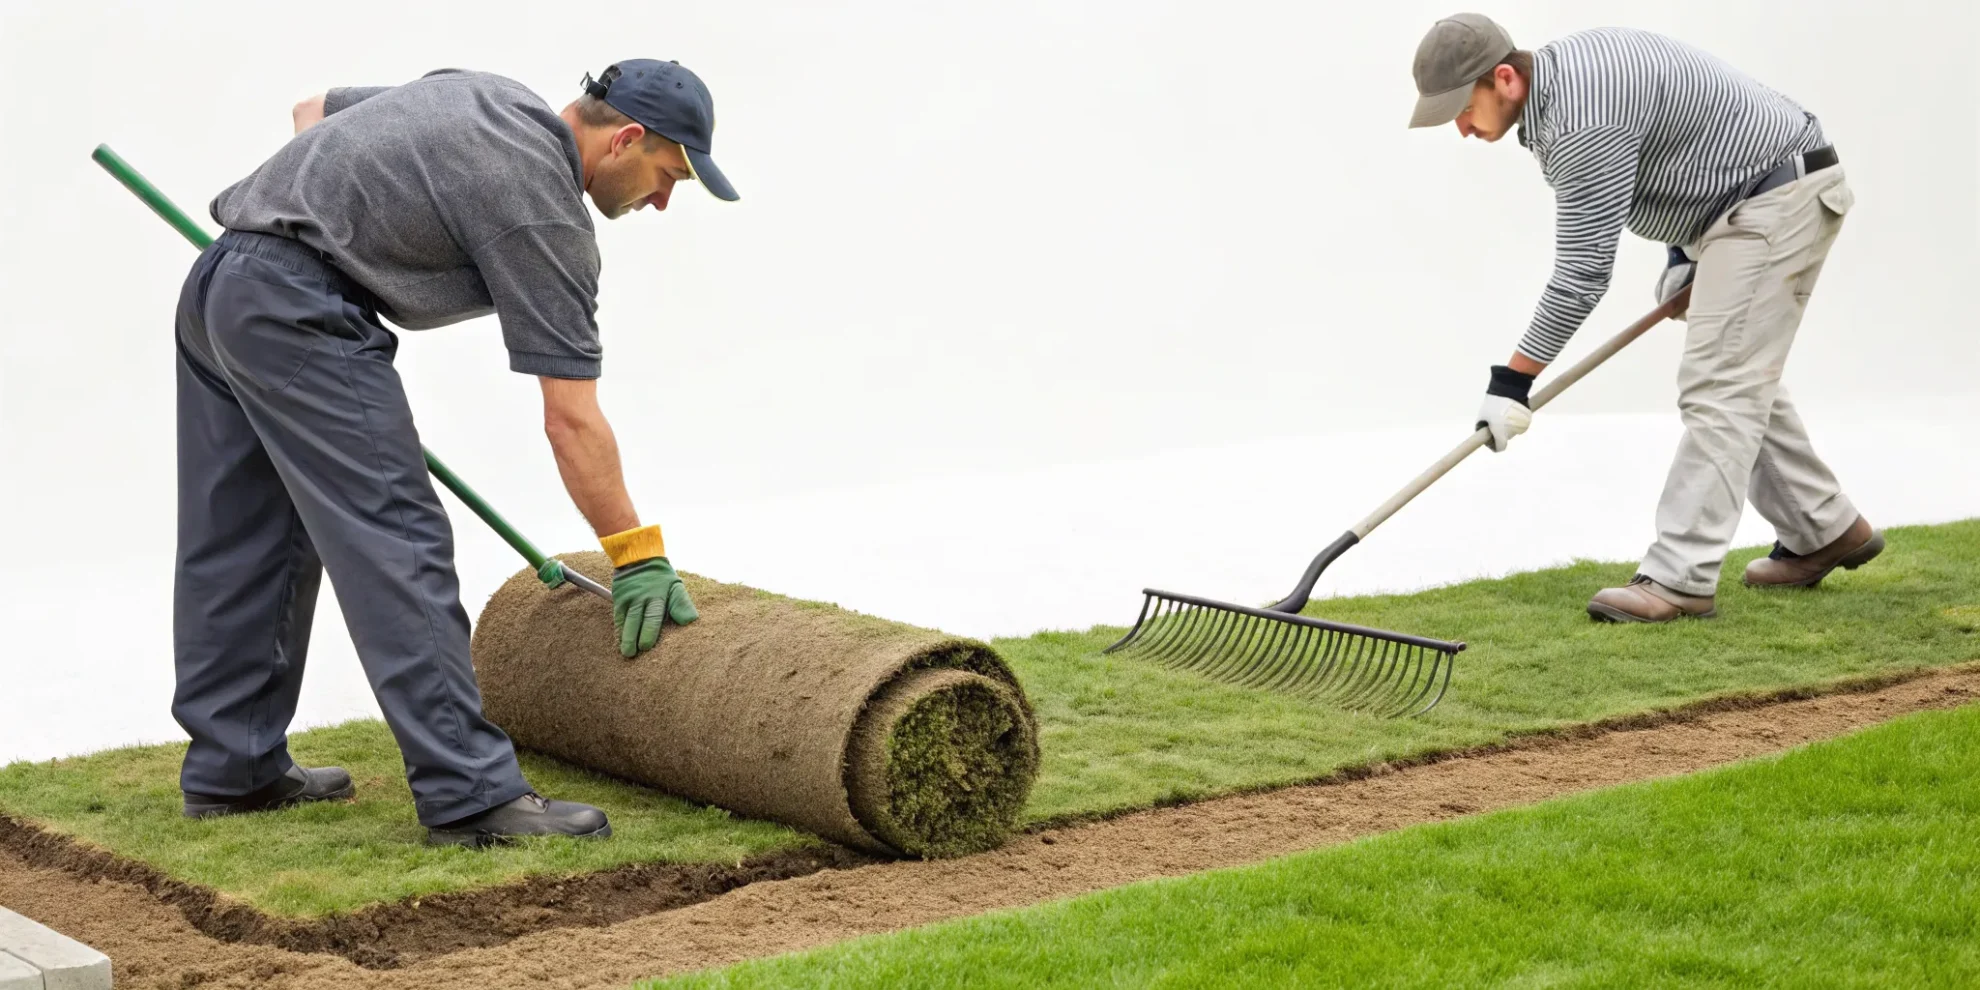
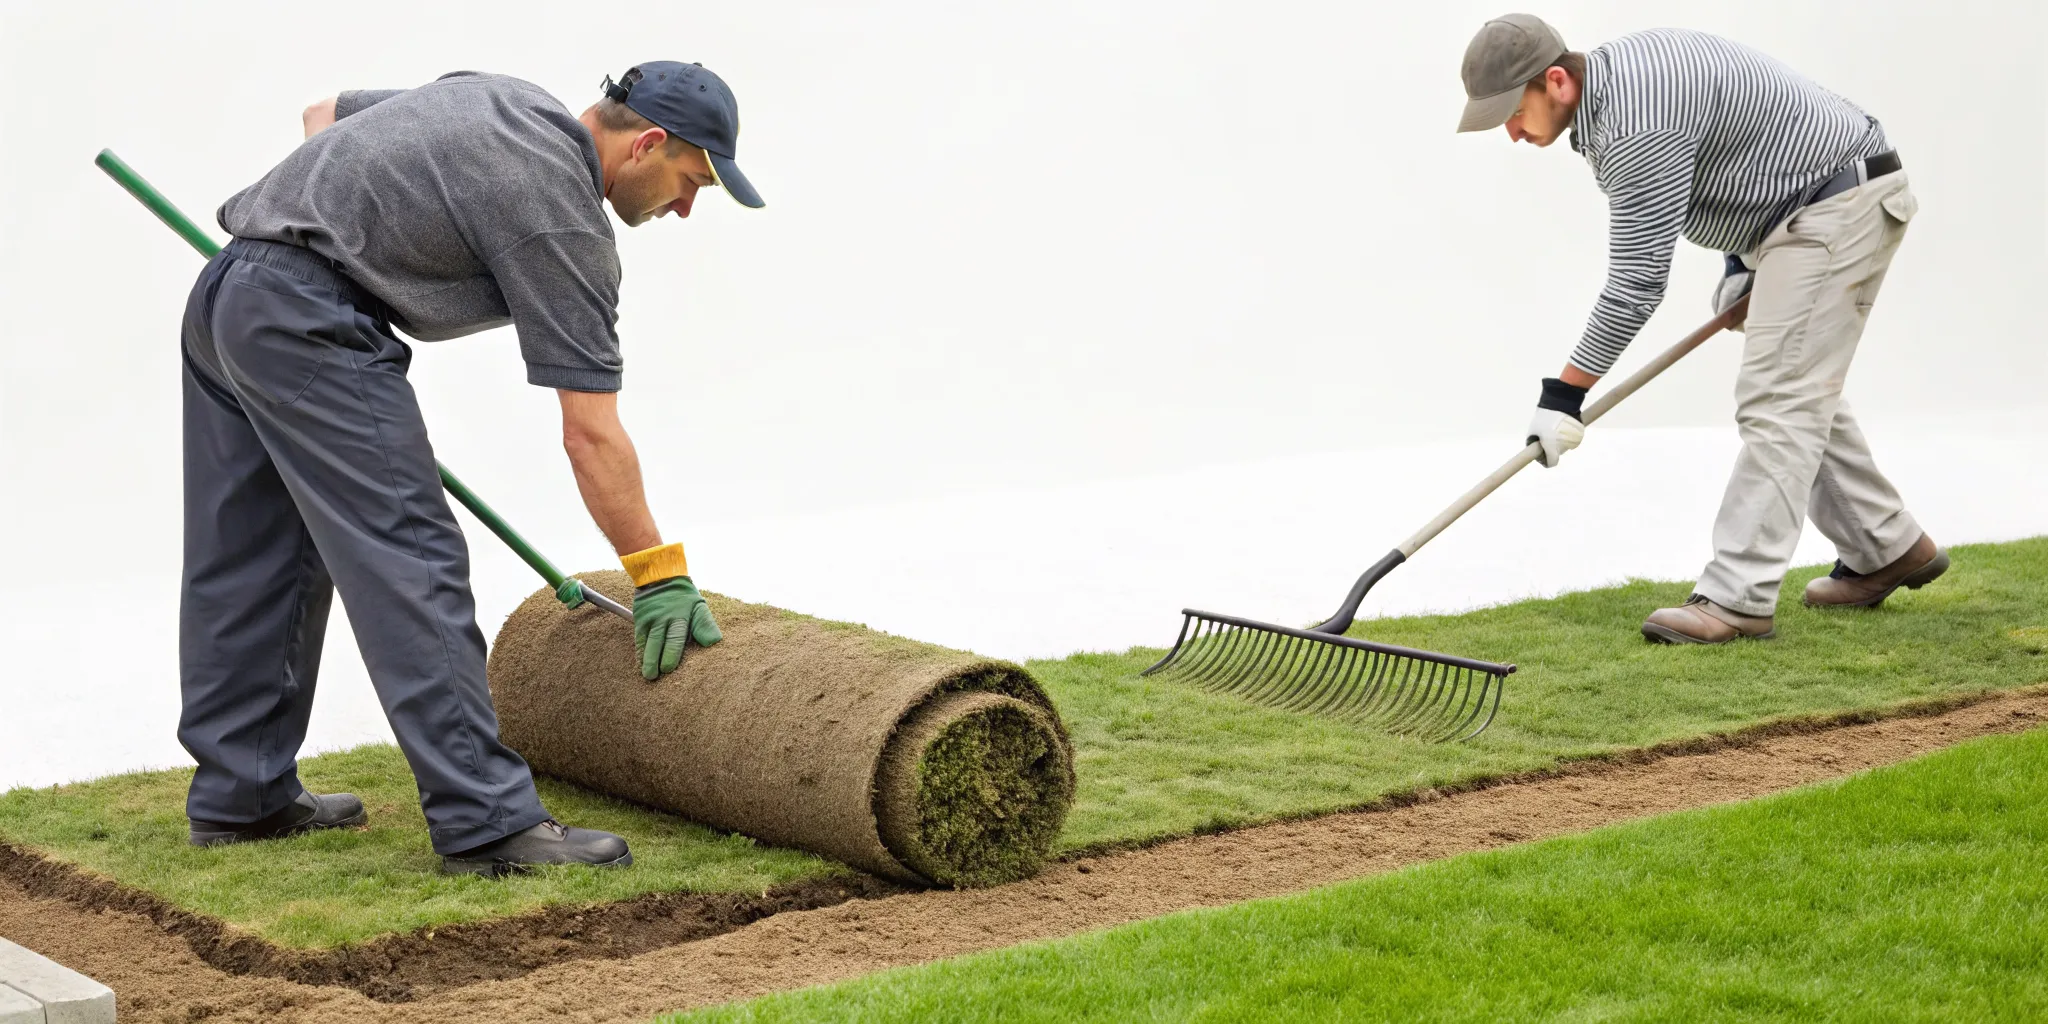
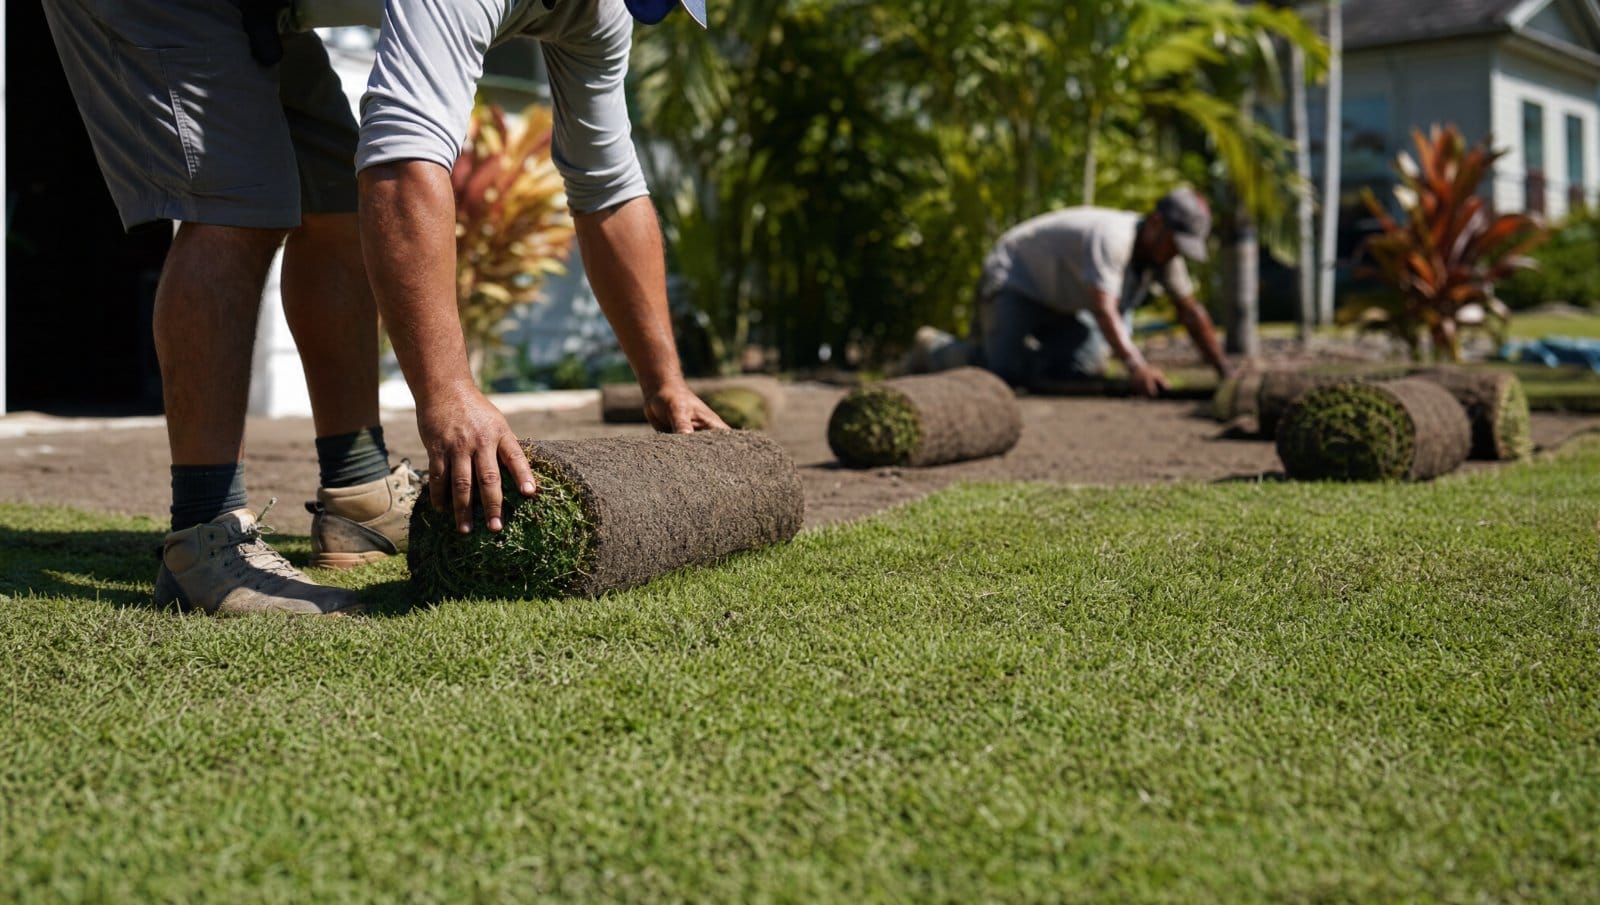
The Best Technique for Laying Sod
Once you’ve prepped your yard and chosen the perfect sod, the real fun begins. Laying sod isn’t just about rolling out a green carpet; there’s a technique to it that separates a decent lawn from a stunning one. The right approach ensures the roots establish quickly, the seams disappear, and your new grass grows into a lush, uniform lawn that looks like it’s been there for years. Think of it like laying tile or hardwood floors—precision and a solid system make all the difference. Following these steps will help you achieve that professional, seamless look that makes your yard the envy of the neighborhood.
At DEANGELOS LAND SERVICES, our professional sod installation team uses these exact methods to guarantee a healthy, beautiful lawn from day one. We understand that every piece of sod needs to be perfectly placed to create a strong, unified root system. These pro tips will help you get the same results, ensuring your investment in new sod pays off with a gorgeous green space for years to come. From creating clean lines to ensuring every root touches the soil, each step is critical for success. Let’s walk through the best techniques for getting the job done right.
Start Along a Straight Edge
To get those clean, professional lines, always start laying your sod along the longest straight edge available. This is usually a driveway, sidewalk, or fence line. Using this as your guide creates a strong starting point and ensures the rest of your rows will be straight and even. It prevents the pattern from slowly skewing as you move across the yard. Think of it as laying the foundation for your project. Getting that first row perfectly straight makes every subsequent row easier to place and results in a much more polished and organized final look.
Stagger the Seams
You want your lawn to look like a single, seamless carpet of green, not a checkerboard. To achieve this, lay the sod pieces in a staggered, brick-like pattern. This means the short seams of one row should never line up with the seams of the row next to it. This simple technique does two important things: it makes the seams much less visible once the grass grows in, and it creates a stronger, more integrated root system. When the roots knit together, a staggered pattern helps hold the entire lawn together more effectively, preventing weak spots.
Keep the Edges Tight
Pay close attention to how you place each piece of sod. The goal is to butt the edges up against each other snugly, without any overlap or gaps. Overlapping edges create a lumpy, uneven surface and can cause the raised edge to dry out and die. Gaps, on the other hand, expose the soil underneath, inviting weeds to move in and creating visible lines in your lawn. Take your time to push the edges together firmly so they make good contact. This ensures even water distribution and helps the seams disappear quickly as the grass grows.
Roll the Sod for Good Contact
Once all the sod is laid, there’s one more crucial step to ensure success: rolling it. Use a lawn roller (you can usually rent one) to gently press the sod down. This isn’t about flattening it; it’s about ensuring every part of the sod’s root system makes firm contact with the soil beneath it. This simple action eliminates air pockets that can prevent roots from getting the water and nutrients they need to establish. Good root-to-soil contact is the key to helping your new lawn take hold quickly and thrive in its new home.
Water Immediately
Your new sod is thirsty. It has been harvested, transported, and laid in a new environment, and it needs water right away to reduce stress and start establishing its roots. As soon as you finish laying the last piece (or even as you work, if it’s a large area on a hot day), give it a deep, thorough watering. You want the water to soak not just the sod itself but also the top few inches of soil underneath. This initial watering is the most important one it will receive, as it helps settle the sod and gives the roots their first essential drink.
Your Watering Schedule for New Sod
Once your new sod is in place, your focus shifts to watering. This is the single most important step to ensure your new lawn thrives. The goal isn’t just to keep the grass green; it’s to encourage the roots to grow deep into the soil beneath, creating a strong, resilient turf. A consistent watering schedule for the first few weeks is your ticket to a lush, beautiful lawn that lasts. After a professional sod installation, following these steps will help your new grass establish itself quickly and correctly. Think of it as a welcome drink for your new lawn, helping it settle into its new home.
Week One: Water Daily
As soon as the last piece of sod is laid, it’s time for its first watering. Give it a deep soak to ensure the water penetrates the sod and moistens the top inch of soil underneath. For the rest of the first week, you’ll want to water every single day. The best time to do this is in the morning, as this minimizes evaporation from the sun and allows the grass blades to dry before evening, which helps prevent fungal diseases. The key is to keep the sod and the soil just beneath it consistently moist, but not waterlogged.
Week Two: Reduce Watering Frequency
During the second week, you can start to scale back. Instead of watering every day, try watering every other day. This slight change encourages the grassroots to stretch deeper into the soil to find moisture, which is exactly what you want for a strong foundation. Before you water, you can start to check for rooting. Gently lift a corner of one of the sod pieces. If you feel resistance, it means the roots are beginning to take hold. If it lifts easily, it still needs a bit more time and consistent moisture.
Signs Your Sod Is Taking Root
The “gentle lift” test is your best indicator of success. When you tug a corner and the sod holds firm, you know the roots are anchoring into the soil. This is a great sign that your lawn is establishing well. Once your lawn is fully established, it will typically need about one to one-and-a-half inches of water per week, either from rainfall or irrigation. You can track this with a simple rain gauge. For more detailed advice on Florida lawns, the University of Florida’s gardening solutions are an excellent resource.
How to Adjust for Rain and Heat
Living in Central Florida means you have to pay close attention to the weather. During extremely hot or dry periods, you may need to water more frequently to prevent the new sod from drying out before its roots are established. On the other hand, if you get a heavy downpour, you can skip watering for that day. The goal is to maintain that consistent soil moisture. After about 14 days, if the sod is well-rooted, you can begin transitioning to a more typical watering routine based on your lawn’s needs and the current weather.
Common Sod Installation Mistakes to Avoid
Laying sod can transform your yard almost instantly, but a few common missteps can turn your dream lawn into a patchy problem. After all the work of preparing your yard and choosing the right grass, the last thing you want is for it to fail. The good news is that these mistakes are easy to sidestep once you know what to look for. From preparing the soil correctly to giving your new grass the space it needs to grow, avoiding these errors is key to a successful sod installation. Let’s walk through the most frequent issues so you can get it right the first time.
Skipping Soil Prep
One of the biggest mistakes you can make is laying beautiful new sod on poorly prepared ground. Think of it like painting a wall; you wouldn’t just paint over dirt and cracks. Your soil needs to be a clean, welcoming bed for the new roots. According to experts at Sunshine Sod, poor soil preparation is a primary reason new sod fails to thrive. Before you lay a single piece, you need to ensure the ground is completely cleared of old grass, weeds, and rocks. The soil should be tilled to loosen it up, allowing the new roots to penetrate easily. A smooth, level surface prevents air pockets and ensures every part of the sod makes good contact with the earth.
Watering Improperly
Finding the right watering balance is tricky, and it’s where many new lawns run into trouble. Both too much and too little water can be disastrous. As the team at Ground Source points out, watering errors are among the most common problems with new sod. In the first week, the soil beneath the sod should be kept consistently moist, but not waterlogged. Overwatering can lead to root rot and disease, while underwatering will cause the sod to dry out and shrink, creating gaps. If you notice your yard has trouble with standing water, you might need to look into drainage solutions before laying your sod.
Ignoring the Weather Forecast
In Central Florida, the weather plays a huge role in any landscaping project. Trying to lay sod on a scorching hot day when the ground is bone-dry is setting yourself up for a struggle. The intense heat can stress the grass and dry out the roots before they even have a chance to establish. It’s best to install sod on a cooler, overcast day if possible. You want to make sure the soil isn’t dry when you place the sod. Planning your installation around the forecast helps give your new lawn a much stronger start and reduces the immediate demand for water.
Leaving Gaps or Overlapping Edges
How you piece your sod together matters. When laying the strips, you want the edges to meet snugly, but you should never overlap them. Overlapped edges will create a lumpy, uneven surface, and the covered grass will likely die. On the other hand, leaving gaps between the pieces exposes the soil, allowing it to dry out quickly and inviting weeds to move in. The goal is to push the edges tightly together so they butt up against one another, creating a seamless, uniform look. This careful placement ensures the entire lawn knits together properly.
Walking on the Sod Too Soon
Your new lawn needs time to settle in, and that means keeping off the grass. It’s tempting to walk on your beautiful new turf, but patience is essential. The root system is incredibly fragile during the first few weeks. According to horticultural experts, you should avoid walking on your new sod for at least two to three weeks. Foot traffic can compact the soil, damage the delicate new roots, and prevent the sod from making firm contact with the ground. Give your lawn the uninterrupted time it needs to anchor itself. Once the roots are firmly established, your lawn will be strong enough to handle regular activity.
Related Articles
- Sod Installation 101: A Step-by-Step Guide
- How Long Does Sod Take to Root in Winter? A Guide
- How Long for Sod Lines to Disappear? (+ Tips)
Frequently Asked Questions
When is the best time of year to lay sod in Florida? The ideal times to lay sod in Central Florida are during the spring and fall. The milder temperatures put less stress on the new grass, helping it establish roots more easily. While you can certainly install sod during the summer, the intense heat requires you to be much more attentive with your watering schedule to keep the new lawn from drying out.
Do I really need to remove my old lawn before laying new sod? Yes, creating a clean slate is one of the most important steps for success. Laying new sod directly over old grass or weeds prevents the new roots from making contact with the soil. Without good soil contact, your sod won’t get the water and nutrients it needs to thrive. Taking the time to properly clear the area gives your investment the best possible foundation.
How long until I can walk on my new sod? Patience is key here. You should avoid walking on your new lawn for at least two to three weeks. The first few weeks are a critical time for the fragile roots to anchor into the soil. Foot traffic can compact the ground and damage this delicate growth. After about 14 days, you can gently tug on a corner of the sod. If it holds firm, it’s a good sign that the lawn is ready for light activity.
What should I do if I see gaps appearing between the sod strips? Gaps between sod pieces are typically a sign of dehydration, which causes the strips to shrink. If you notice this, your lawn is telling you it needs more water. Make sure the sod and the top inch of soil beneath it are staying consistently moist. For small gaps, you can sweep some topsoil into the crevices to protect the edges and help the grass grow together more quickly.
My yard has a lot of shade. Are there sod options for me? Of course. While every type of grass needs some sun, many varieties are specifically cultivated to handle shadier conditions. Certain types of St. Augustine and Zoysia grasses, for instance, are known for their shade tolerance. The trick is to match the grass variety to your yard’s specific light conditions to ensure it grows into a healthy, beautiful lawn.