
How to Lay Pavers on Uneven Ground Step-by-Step
Tackling a paver project on a sloped yard can feel intimidating, but it’s a challenge you can absolutely conquer with the right knowledge. This isn’t a project where you can cut corners. Success depends on careful planning and a solid understanding of how to work with gravity, not against it. We’ve created this comprehensive guide to empower you with the steps and techniques the pros use. From assessing your grade and managing drainage to choosing the right paver pattern for stability, we will show you how to lay pavers on uneven ground and achieve a professional-quality result you can be proud of.
Key Takeaways
- A Solid Base is Non-Negotiable: The success of your paver project hinges on the work you do before laying the first stone. This means thoroughly excavating the area to reach firm subsoil and building a stable foundation with meticulously compacted layers of gravel and sand.
- Plan for Water from the Start: To prevent pooling, erosion, and shifting pavers, you must create a gentle, consistent slope that directs water away from structures. Using polymeric sand and strong edge restraints will further protect your hardscape from heavy rains.
- Recognize When Expert Help is Needed: While DIY is rewarding, complex slopes, significant drainage issues, or projects requiring retaining walls are best handled by professionals who have the right equipment and expertise to ensure a safe and lasting result.
Planning Your Paver Project on Uneven Ground
Before you even think about picking up a shovel, let’s talk about planning. When you’re working with uneven ground, a solid plan is the difference between a beautiful, long-lasting patio and a lumpy, shifting headache. Taking the time to map everything out will save you from costly mistakes and ensure your finished project looks professional and holds up for years. This initial phase is all about understanding your unique landscape, choosing the right materials for the job, and setting a realistic timeline.
Proper preparation is the most important part of any successful hardscaping project. For sloped or uneven yards, this is especially true. You’ll need to consider how water flows across your property, how to create a stable and level base, and what steps are needed to get there. Think of it as creating a blueprint for success. By assessing your terrain and defining your goals upfront, you can tackle the installation with confidence, knowing you’ve covered all your bases.
Assess Your Slope and Drainage Needs
First things first: take a good look at your yard. Installing pavers on a slope requires extra care to prevent them from shifting and to manage water runoff. Even a gentle grade can cause soil erosion under your pavers if it’s not handled correctly. The goal is to create a slight slope—typically about a quarter-inch drop for every foot—that directs water away from your home’s foundation.
This is where a clear understanding of your property’s drainage is essential. You want to prevent water from pooling on your new patio or flowing back toward your house. Properly grading the area is a critical step, and in some cases, you may need to install specific drainage solutions to manage heavy Florida rains and protect both your home and your new hardscape investment.
Choose the Right Pavers for Your Terrain
While the color and style of your pavers are important, the terrain itself plays a huge role in your project. If the ground isn’t perfectly prepared and leveled before installation, your pavers won’t stay level for long. For yards with significant slopes, you may need to think beyond just laying pavers on the ground.
Creating level tiers is often the best solution for a steep grade. This involves building one or more retaining walls to create flat surfaces for your patio or walkway. This approach not only solves the slope issue but also adds beautiful dimension and structure to your landscape. The key is to build a solid, compacted base on each level so your pavers have a stable foundation to rest on.
Define Your Project Scope and Timeline
With a clear picture of your slope and material needs, you can outline the scope of your project. Start by marking the exact dimensions of your planned patio or walkway. This will help you calculate the amount of materials you’ll need, from the base gravel and sand to the pavers themselves.
Consider all the steps involved. Will you need to do significant digging to create a level base? Does your plan require building retaining walls? Answering these questions will help you create a realistic timeline. Projects on uneven ground often require professional excavation to remove soil and properly grade the area, which is a crucial step you’ll want to factor into your schedule from the very beginning.
Your Paver Installation Toolkit
Before you can start laying pavers, you need to gather the right tools and materials. A successful paver project is all about what’s underneath, and having the right equipment from the start is the secret to a patio or walkway that looks professional and lasts for years. Rushing this step or trying to make do with the wrong gear can lead to uneven surfaces, wobbly pavers, and drainage headaches down the road. It’s the difference between a project you’re proud of and one that needs constant repairs.
Think of it like gathering your ingredients before you start cooking—proper preparation makes the entire process smoother and far more enjoyable. We’ve broken down the essential toolkit into three main categories: the tools for prepping the ground, the materials for building a solid base, and the pavers and joint compounds that will bring your vision to life. Getting these items organized before you dig that first shovelful of dirt will set you up for success. This isn’t just about having a checklist; it’s about understanding what each tool and material does to contribute to a stable, long-lasting, and beautiful hardscape. With the right toolkit, you can confidently tackle your project and create an outdoor space you’ll love.
Tools for Ground Prep and Leveling
A solid foundation is everything, and that starts with proper ground preparation. First, you’ll need a good shovel to dig out the soft topsoil and create space for your base. To get the surface perfectly flat, a simple long, straight 2×4 board works wonders for scraping and smoothing the area, helping you identify and fix any high or low spots. For the most critical step—compaction—you’ll want a plate tamper or ground pounder. You can often rent these. This tool firmly compacts the base layer, which is essential for preventing your pavers from shifting or sinking later on.
Base Materials: Gravel, Sand, and Edging
With your ground prepped, it’s time to build the base. You’ll need a crushed gravel aggregate for the primary layer. A good rule of thumb is to add it in 3-inch layers, compacting each one thoroughly before adding the next. On top of the gravel, you’ll add a layer of coarse sand, which provides a bed for the pavers to sit in. Finally, don’t forget the edging. A fixed edge is crucial for holding the pavers in place and preventing the sand from washing away. This strong border is a key part of professional hardscaping services and ensures your project lasts.
Pavers and Joint Materials
Of course, you’ll need your chosen pavers. But what goes between them is just as important. For the joints, polymeric sand is your best friend, especially if you’re working on a slope. This special sand hardens when wet, which helps lock the pavers together, prevent erosion, and stop weeds from growing through the cracks. Once your pavers are laid, you’ll sweep the polymeric sand into the joints, lightly mist it with water according to the product directions, and let it set. This final step gives your paver project a clean, durable finish.
How to Prepare Uneven Ground for Pavers
Getting your ground ready is arguably the most critical part of any paver project. It’s where you put in the hard work to ensure your new patio or walkway looks great and lasts for years without sinking or shifting. A beautiful paver surface is only as good as the foundation beneath it, and on uneven terrain, that foundation is everything. This stage involves clearing the site, digging down to stable soil, and carefully grading the area for proper drainage. While it requires some muscle, taking the time to do it right will save you from major headaches down the road. Think of it as setting the stage for a flawless finish. For larger or more complicated sites, professional excavation services can handle the heavy lifting and ensure the base is perfectly prepared for your project.
Clear and Excavate the Area
Your first hands-on step is to clear the designated area of all grass, weeds, and large rocks. Once the surface is clear, it’s time to start digging. You’ll need to remove the soft topsoil until you hit the firmer, more compacted subsoil underneath. This is non-negotiable for creating a stable base. A good rule of thumb is to dig deep enough to accommodate your paver base materials plus the thickness of the pavers themselves. This usually means excavating several inches deeper than the final height of your pavers. This step ensures your finished project has a solid footing and prevents the pavers from settling and becoming uneven over time.
Remove Topsoil and Debris
After the initial excavation, take a closer look at the area. It’s important to remove any remaining organic material, like roots or leftover turf, as they will decompose and create empty pockets under your pavers. If the ground isn’t properly compacted and cleared, it can eventually settle, leading to frustrating dips and low spots in your beautiful new surface. A thoroughly prepared site is the best defense against future problems. For properties with extensive vegetation or challenging terrain, professional land clearing ensures a perfectly clean slate, removing all debris and setting you up for a successful installation.
Measure Elevation Changes
With a clear and excavated base, you can now address the slope. Even on “flat” ground, you need a slight grade to direct rainwater away from your home’s foundation and prevent puddles from forming on your pavers. You can measure the slope by dividing the vertical drop by the horizontal distance. A standard guideline is to create a slope of about one-quarter inch for every foot of run. Getting this calculation right at the start is essential, as the slope of your base will determine the final slope of your paver surface. Proper grading is key to effective water management and the long-term stability of your hardscape, a core principle of any good landscape drainage solution.
Building a Solid Foundation on Uneven Terrain
Once you’ve cleared and excavated your project area, it’s time to build the foundation. This is arguably the most critical phase of the entire project. A strong, stable base is what keeps your pavers from shifting, sinking, or becoming a waterlogged mess over time. Rushing through these steps can undo all your hard work, so take your time to get it right. Building a solid base involves three key stages: establishing proper drainage, layering and compacting your gravel, and setting your sand course and edge restraints. Each step builds upon the last to create a durable surface that can handle Florida’s weather and stand the test of time, ensuring your new patio or walkway looks great for years to come.
Install a Proper Drainage System
Water is the number one enemy of a paver installation. Without a clear path to escape, it will pool, erode the base, and cause your pavers to shift. To prevent this, you need to build a slight slope—a guideline is about a 1-2% grade—that directs water away from your home or other structures. For steeper properties, building a retaining wall can create level tiers, making the slope more manageable. You can also install dedicated drainage solutions like a French drain or catch basins to effectively channel heavy rainfall away from the paver area, keeping your foundation dry and stable.
Layer and Compact the Gravel Base
The gravel base is the backbone of your paver project, providing the primary layer of support. You’ll need to dig down about eight inches to accommodate the gravel, though you may need to go deeper if you’re working with heavy clay soil. The key to a rock-solid base is to add the gravel in layers. For example, if you need a nine-inch base, lay it down in three separate three-inch layers. After spreading each layer, you must compact it thoroughly with a plate compactor. Simply raking it smooth or walking on it won’t be enough to prevent future settling. This methodical approach to excavation and compaction ensures a firm, even foundation.
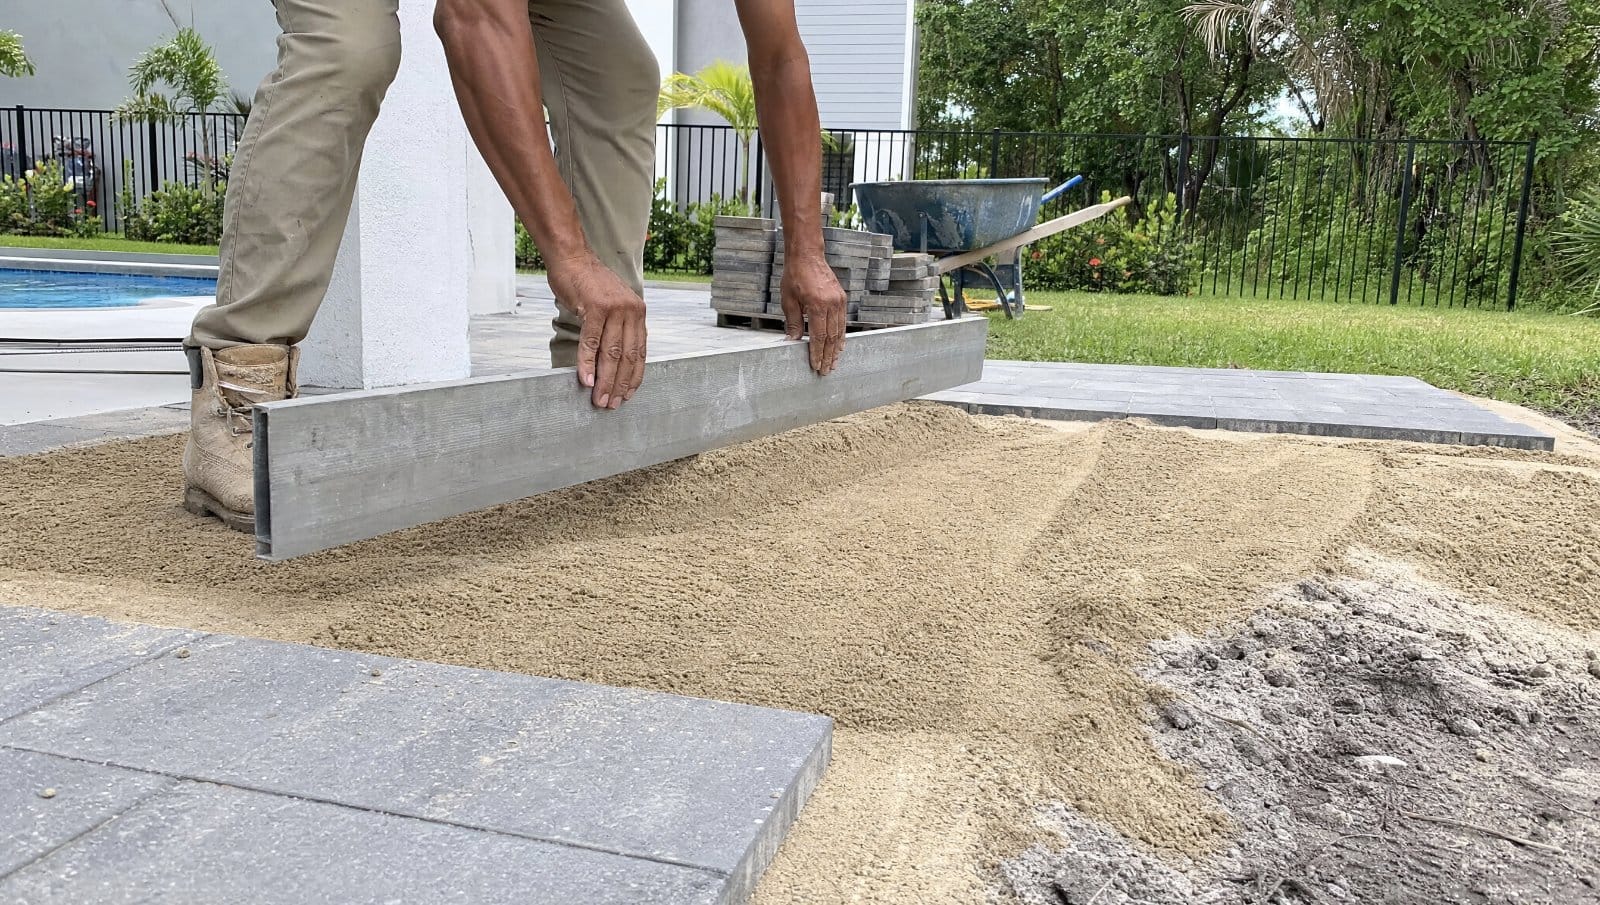
Add the Sand Course and Edge Restraints
With the gravel base compacted, the next step is to add a one-inch layer of coarse sand. This is the bed your pavers will sit in. To get it perfectly flat, use a technique called “screeding,” where you pull a straight board across two parallel pipes to level the sand. Before you start laying pavers, you must install edge restraints around the perimeter of the project. These plastic, metal, or concrete edges act as a frame, locking the pavers in place and preventing the sand base from washing away. Make sure the restraints are secured into the compacted gravel base, not just the surrounding soil, for maximum stability in your hardscaping project.
How to Lay Pavers on a Slope
Laying pavers on a slope introduces a few extra challenges, but it’s entirely possible to create a beautiful and stable surface. The key is to work with gravity, not against it. On a slope, pavers are more susceptible to shifting and erosion from water runoff, so your technique needs to be precise. A successful sloped paver project relies on a solid base, smart paver placement, and sometimes, a bit of structural support to keep everything locked in place for years to come. The main goals are to prevent the pavers from sliding downhill and to manage water flow effectively so it doesn’t wash away the sand and gravel foundation you worked so hard to build. This means paying close attention to spacing, the pattern you choose, and how you handle the grade itself. For gentle slopes, careful installation is often enough to ensure a lasting result. However, for steeper inclines, you might need to think about creating terraced levels. This approach not only solves the stability issue but also adds a professional, dynamic look to your landscape. Proper hardscaping services can turn a tricky slope into a stunning feature, ensuring the final product is both safe and visually appealing. It’s about understanding the forces at play and building a system that can withstand them.
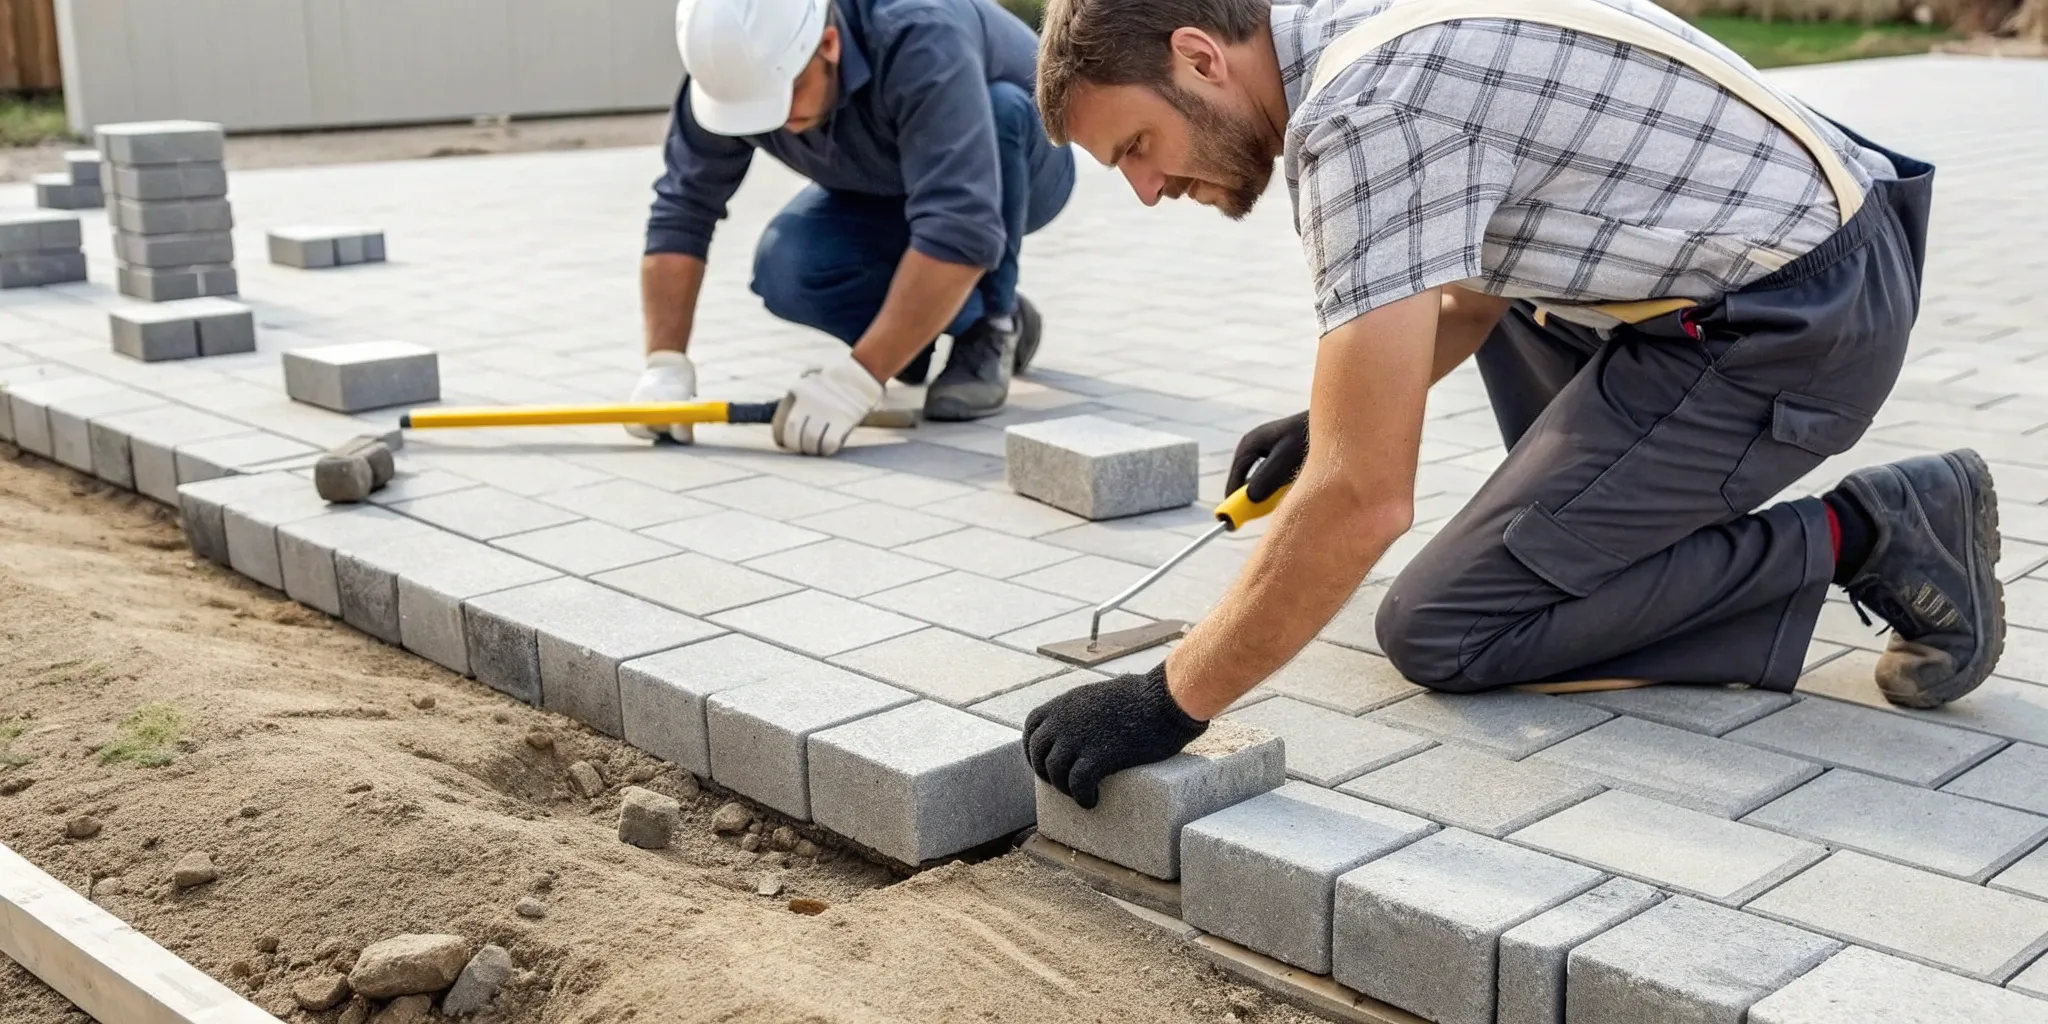
Set Pavers with Correct Spacing
When you’re working on a slope, it’s tempting to pack pavers tightly together to prevent them from moving. However, you need to do the opposite. It’s crucial to leave a small, consistent gap between each paver. Avoid hammering them snugly into position. This intentional spacing allows the pavers to settle naturally during the final compaction step when you sweep sand into the joints. If they’re too tight, they can’t adjust properly, which can lead to shifting or an uneven surface over time. Think of it as giving the system a little room to breathe and lock itself into a solid, flexible surface that can handle minor ground movements.
Keep Your Pattern Consistent
The pattern you choose is more than just a style choice—it’s a structural one. On a slope, some patterns provide more stability than others. Interlocking patterns, like herringbone or basketweave, are excellent choices because they distribute weight and pressure more evenly, making the entire surface more resistant to movement. One of the biggest challenges on a slope is preventing the base materials from washing away. A strong, consistent pattern helps create a more stable installation that holds everything together. A simple running bond pattern, where the joints line up in straight lines, is generally less stable and best reserved for completely flat areas.
Tackle Steep Grades and Slopes
If your property has a particularly steep grade, laying a continuous paver path might not be the safest or most stable option. For these situations, the best solution is often to build terraces. This involves constructing one or more retaining walls to break the slope into a series of smaller, flatter levels. You can then install pavers on these level sections, creating a beautiful tiered walkway or patio. Assessing the slope beforehand will help you determine if this is the right approach. A professionally installed retaining wall not only makes the paver installation possible but also adds valuable structure and visual appeal to your landscape, turning a problem area into a highlight.
How to Ensure Proper Drainage with Pavers
One of the most critical parts of a successful paver project, especially on uneven ground, is managing water. Without a solid plan for drainage, you risk water pooling on your beautiful new patio, eroding the base materials, and causing pavers to shift or sink over time. Proper drainage protects your investment and ensures your hardscape remains stable and beautiful for years to come. It’s all about giving water a clear path to travel away from your home’s foundation and your paver surface. By planning for water flow from the very beginning, you can prevent major headaches down the road. Thoughtful grading and the right drainage systems work together to create a durable, long-lasting installation that can handle Florida’s heavy rains. This isn’t just an optional step; it’s a foundational element of a quality hardscape. Ignoring it can lead to uneven surfaces, weed growth in soggy joints, and even damage to nearby structures. Getting it right means you can enjoy your new space without worrying every time the forecast calls for a storm. These next steps will walk you through how to make your paver project resilient against water issues.
Create the Right Slope
The secret to preventing puddles on your paver patio or walkway is creating a gentle, consistent slope. This doesn’t have to be dramatic—in fact, it should be barely noticeable. The goal is to grade the area so that water naturally flows away from your house and other structures. A good rule of thumb is to aim for a slope of about one-quarter inch of drop for every foot of distance. This subtle angle is enough to guide rainwater away from the surface, preventing it from seeping into the base and causing instability. Getting this grade right during the excavation and base preparation stages is fundamental to professional hardscaping services and is key to the longevity of your project.
Install Effective Drainage Solutions
For some properties, especially those with heavy clay soil or significant slope challenges, proper grading alone might not be enough. This is where installing dedicated drainage solutions becomes essential. Systems like French drains, which are perforated pipes buried in a gravel-filled trench, are excellent for collecting and redirecting subsurface water away from the paver area. Another option is a channel drain, which is installed flush with the paver surface to catch runoff and carry it away. These systems act as a safety net, ensuring that even during a downpour, excess water is managed effectively and channeled to a safe discharge point on your property.
Prevent Water Pooling and Erosion
Beyond grading and drains, a few other techniques can protect your paver installation from water damage. If you’re working with a steep slope, building a retaining wall can help create a more level, stable area for the pavers while managing soil erosion. Once the pavers are laid, using polymeric sand in the joints is a must. When activated with water, this sand hardens to lock the pavers together, which prevents water from washing out the joints and keeps weeds from sprouting. Finally, laying a geotextile fabric between the native soil and your gravel base adds another layer of stability, preventing the base from mixing with the soil below while still allowing water to drain through.
Common Mistakes to Avoid on Uneven Ground
Laying pavers on uneven ground is a rewarding project, but a few common missteps can turn your dream patio into a bumpy, unstable surface. Even small errors in the early stages can lead to big problems down the road, like shifting pavers, poor drainage, and an uneven finish. The good news is that these mistakes are entirely avoidable when you know what to look for. By paying close attention to ground preparation, paver placement, and long-term water management, you can ensure your hardscape looks professional and lasts for years. Let’s walk through the most frequent errors so you can sidestep them with confidence.
Errors in Ground Prep and Base Installation
The success of your entire project rests on the foundation you build. A common mistake is failing to properly prepare the ground underneath. If the soil isn’t compacted correctly, it can settle over time, creating dips and low spots in your finished patio. You have to be thorough during the excavation phase. It’s essential to dig out any soft, loose topsoil until you reach firm, stable ground. From there, you need to build up a solid base layer of gravel, compacting it in stages to create a durable foundation that won’t shift or sink. Rushing this step is a recipe for an uneven surface that will only get worse with time and weather.
Pitfalls in Paver Laying and Spacing
Once the base is solid, the way you lay the pavers is just as important. A critical error is forgetting to install a strong edge restraint. Without a border to hold everything in place, pavers can gradually shift and separate, especially along the edges. This is particularly true on sloped terrain where gravity is constantly at work. Another pitfall is placing the pavers too tightly against one another. While it might seem like a good idea, you need to leave small gaps for the jointing sand. Don’t hammer them into place; the final compaction step will settle them securely. Proper spacing ensures the pavers can interlock correctly and create a strong, flexible surface.
Overlooking Drainage and Long-Term Care
Water is the number one enemy of a paver installation. A major oversight is failing to plan for proper drainage from the start. If water pools on your patio instead of draining away, it can weaken the base, wash out the jointing sand, and cause the pavers to shift or heave. Preventing soil erosion is also crucial for the long-term stability of your project, especially on a slope. By incorporating a slight grade and considering drainage solutions where needed, you can direct water away from your hardscape and protect its foundation. This foresight prevents standing water and ensures your beautiful new space remains stable and safe for years to come.
Finishing and Stabilizing Your Pavers
You’ve laid the last paver, and your project is really taking shape. Now it’s time for the finishing touches that will lock everything together, ensuring your new patio or walkway stands the test of time. These final steps are all about creating a stable, durable surface that looks clean and professional. Skipping this stage can lead to shifting pavers and weed-filled gaps down the road, so it’s worth doing right. Taking the time to properly fill the joints and compact the surface will make all your hard work pay off.
Sweep Sand and Compact the Surface
To get that solid, interlocked finish, you need to fill the gaps between your pavers. Start by sweeping a coarse sand, like mason sand, across the entire surface, letting it fall into the joints. Your goal is to fill every gap completely. Once you’ve made a first pass, lightly mist the area with a hose to help the sand settle. You’ll notice the sand level drop, so you’ll need to sweep more sand in until the joints are packed tight. For an even more secure result, you can use a plate compactor over the finished surface to vibrate the sand deep into the joints, creating a firm, unified pavement.
Seal Joints with Polymeric Sand
For a step up in durability, consider using polymeric sand. This is a special type of sand mixed with a binding agent that hardens after being wet. It essentially creates a firm, flexible grout in the paver joints. This is a fantastic option for sloped areas, as it prevents sand from washing out during heavy Florida rains. It also does an excellent job of deterring weeds and insects from making a home between your pavers. Using polymeric sand is one of the best ways to ensure your hardscaping services project remains stable and low-maintenance for years to come.
Final Surface Prep and Cleanup
Before you do your final compaction, make sure the paver surface is spotless. Sweep away any excess sand, pebbles, or debris. Anything left on the surface can be ground into the pavers by the compactor, causing scratches and scuffs that are difficult to remove. Also, a quick word on safety: if you had to cut any pavers to fit your design, you know it creates a lot of dust. Always wear proper safety gear, including eye protection, a dust mask, and gloves, when cutting materials. A clean and safe work area is the key to a beautiful, professional-looking result that you can be proud of.
Know When to Call a Professional Hardscaper
While tackling a DIY paver project is incredibly rewarding, it’s also important to know your limits. Some projects, especially on tricky terrain, are better left to the experts. Calling a professional isn’t admitting defeat; it’s making a smart investment in your property’s value and your own peace of mind. A professional hardscaper brings years of experience to the table, ensuring your project is built to last and looks fantastic. They can see the bigger picture, integrating your new patio or walkway seamlessly with your existing landscape.
Professionals handle everything from the initial design and material selection to the heavy lifting of excavation and installation. They understand Central Florida’s unique soil and weather conditions, which allows them to build a foundation that can withstand our heavy rains and shifting ground. When you partner with an expert team, you get more than just a finished project; you get a durable, beautiful outdoor space created with precision and skill. This expertise is what turns a good idea into a stunning, long-lasting feature of your home. For a comprehensive approach, consider professional hardscaping services that can manage the project from start to finish.
For Complex Terrain and Drainage Challenges
If your yard has noticeable slopes, dips, or areas where water tends to pool, it’s a clear sign to call for backup. Managing uneven ground requires more than just digging and leveling; it involves understanding soil mechanics and water flow. A professional can accurately assess your property’s grade and design a paver installation that won’t shift, sink, or wash away. They are experts at creating effective drainage solutions that channel water away from your home’s foundation and prevent erosion under your new hardscape. This foresight prevents major headaches and future repairs, ensuring your investment remains stable and beautiful for years.
When You Need Professional Equipment and Expertise
A flawless paver installation depends on having the right tools and knowing how to use them. Professionals come equipped with heavy-duty machinery like plate compactors, excavators, and laser levels that are essential for creating a perfectly compacted and level base. While you can rent some of this equipment, there’s a steep learning curve to using it safely and effectively. If your project involves creating tiered levels on a slope, you will likely need a professionally engineered retaining wall to ensure stability. An experienced crew has the technical skill to execute these complex designs correctly, saving you from the physical strain and potential for costly mistakes.
Related Articles
Frequently Asked Questions
How steep is too steep for me to install pavers myself? While a gentle grade is often manageable for a DIY project, you should seriously consider calling a professional if your yard has a significant slope. A good indicator is if you can’t create a stable, level area without major digging or if you find yourself thinking a retaining wall might be necessary. Building retaining walls involves engineering and structural knowledge to ensure they are safe and effective, which is where professional expertise becomes essential.
Can I just level the ground and skip adding all that gravel and sand? I know it’s tempting to cut corners, but the gravel and sand base is the most important part of the entire project. The native soil under your grass is soft and will shift and settle over time, especially with Florida’s rain. The compacted gravel base creates a solid, stable foundation that won’t move, while the sand layer provides a perfect bed for setting the pavers. Skipping this step will almost certainly result in a lumpy, uneven surface that fails within a year or two.
My yard seems pretty flat. Do I still need to worry about creating a slope for drainage? Yes, absolutely. Even on ground that looks perfectly level to the eye, you must create a slight, intentional slope. The goal is to direct rainwater away from your home’s foundation and prevent it from pooling on your new paver surface. A subtle grade of about a quarter-inch drop per foot is all you need to keep water moving, protecting both your house and your hardscape investment from water damage.
What’s the big deal about polymeric sand? Can’t I just use regular sand? You can use regular sand, but polymeric sand is a game-changer, especially on a slope. It contains a special polymer that hardens when you wet it, essentially locking your pavers together like a firm, flexible grout. This prevents the sand from washing out during heavy rain, stops weeds from growing in the joints, and deters ants from building nests. It’s a finishing step that adds incredible durability and reduces future maintenance.
What’s the most common mistake people make when laying pavers on uneven ground? The most frequent and damaging mistake is rushing the base preparation. People often don’t dig deep enough to remove all the soft topsoil, or they don’t compact the gravel base in thin, separate layers. A solid foundation is everything. If the base isn’t perfectly firm and stable before the first paver is laid, the entire project is compromised and will inevitably shift, sink, and become uneven.