
Retaining Wall Installation
Stop Erosion, Build Functional Beauty
Trusted Retaining Wall Contractor in Lake Mary, Serving Central Florida
Strong, attractive walls built to keep your soil—and home—secure.
Yard erosion, shifting soil, and water pooling near your foundation can quickly turn your landscape into a serious problem. Sloped yards, failing walls, and poor drainage don’t just hurt curb appeal—they create safety risks and can lead to costly structural damage if left unaddressed. When mudslides, runoff, or foundation moisture become recurring issues, it adds stress and limits how you can use your outdoor space.
As an experienced retaining wall contractor serving Lake Mary and Central Florida, DeAngelos Land Services solves these issues at the source. We design and build custom retaining walls that stabilize slopes, control erosion, and redirect water away from your home. Our solutions include pressure-treated 6×6 wood walls, paver retaining walls, and concrete systems—each engineered to fit your property’s layout, soil conditions, and long-term needs.
Our licensed and insured team uses proven construction methods such as rebar reinforcement, dead-man tiebacks, proper drainage piping, and durable materials designed to withstand Florida’s climate. With more than six years of hands-on experience across thousands of properties, we’ve repaired failed walls, corrected drainage problems, and restored unusable yards into stable, functional spaces.
When you choose us for your retaining wall installation, you’re investing in a solution that holds soil in place, keeps water out, and allows you to enjoy your property with confidence again.
Smart Wall Designs Built to Withstand Erosion Pressure
At DEANGELOS LAND SERVICES, we’re a trusted retaining wall builder providing durable, functional, and visually appealing solutions for every property. Our retaining wall installation services go beyond holding back soil, they’re designed to solve drainage problems, protect foundations, and enhance your outdoor space’s overall appeal.
- Our Specialty – 6×6 Pressure-Treated Wooden Tie Walls: We specialize in pressure-treated wood retaining walls built from rugged 6×6 lumber. Unlike outdated railroad ties that decay quickly, our wooden walls are engineered for Florida’s heat, storms, and humidity, offering both strength and a warm, natural look that complements any yard.
- Superior Reinforcement Techniques: We anchor every wall using heavy-duty rebar driven deep into the ground. This structural reinforcement ensures the wall stays in place even under constant lateral pressure from soil and water.
- Built-In Structural Support: We incorporate deadman tiebacks into our walls to resist soil movement and shifting. These stabilizing anchors extend the life of your wall and prevent future blowouts or collapse.
- Drainage That Actually Works: Each wall features corrugated drain pipes wrapped in granite and landscape matting. This design filters debris, prevents clogs, and directs water away from the structure to reduce hydrostatic pressure, an essential step in quality concrete retaining wall installation and rock retaining wall construction.
- Custom Water Management: Our drainage lines are routed to safe zones on your property to prevent pooling, erosion, or flooding behind the wall, protecting nearby structures and landscapes.
- Design Flexibility and Visual Appeal: Choose from horizontal or vertical layouts, a range of materials, and the option to add stairways, terraces, or decorative finishes. For homeowners looking for a refined touch, our paver retaining wall installation combines durability with a clean, modern aesthetic. We can also stain your wall to match your home or garden style.
We Help Solve Problems Like:
- Yard and Slope Erosion: Retaining walls stabilize sloped areas and prevent valuable topsoil from washing away after heavy rain.
- Backyard Flooding and Pooling: Properly drained walls keep water from collecting near your foundation or flooding low-lying areas.
- Soil Movement Near Foundations: Prevent soil from sliding toward your home, which can lead to cracks, instability, and structural damage.
- Failed Wall Replacement: If your old wall is cracking, leaning, or breaking apart, we’ll replace it with a modern, reinforced design that works.
- Mudslides and Sinkholes: Our retaining walls help prevent dangerous and costly washouts, especially in high-risk erosion zones.
Retaining Wall Applications Include:
- Pool Deck Protection: Keeps soil and water from eroding support around your pool deck, avoiding cracks or washouts under concrete slabs.
- Hillside Stabilization: Controls gravity-fed erosion and creates usable flat space on sloped terrain by locking in hillside materials.
- Foundation Protection: Prevents soil from shifting and collecting around home foundations, reducing water damage and uneven settling.
- Yard Leveling and Terracing: Transforms awkward slopes into level, beautiful spaces for gardens, patios, and outdoor living areas.
- Wall Repairs and Replacements: We repair damaged retaining walls and provide full replacements using better materials and stronger construction.
Create the Perfect Landscape with Durable Retaining Walls
In Lake Mary, FL, and Central Florida, homeowners call on DEANGELOS LAND SERVICES for retaining wall installation that combines utility and elegance. We’re one of the only contractors in the region specializing in 6×6 pressure‑treated wooden tie walls, but we also craft paver, concrete, and cinder‑block walls based on project needs. By merging form and function, our installations solve common yard issues while adding visual interest and value. Contact our retaining wall contractor today!
Specialized Retaining Wall Solutions for Central Florida
While many contractors can build a simple wall, at Landtree.us we specialize in creating structurally sound, long-lasting retaining walls designed to master Florida’s unique soil and weather conditions. We are one of the few contractors in the Lake Mary area with dedicated expertise in constructing 6×6 pressure-treated wooden tie walls. This style offers a timeless, natural aesthetic similar to classic railroad ties but with modern durability, providing an excellent solution for managing slopes and preventing erosion with a clean, traditional look.
Our technical approach is what truly sets our walls apart. We go beyond surface-level installation by integrating critical structural reinforcements, including heavy-duty rebar and “deadman” tieback anchors, ensuring your wall can withstand immense pressure over time. Furthermore, every wall we build incorporates a custom-designed drainage system. By installing corrugated drain pipes, granite, and professional-grade landscape matting, we prevent the hydrostatic pressure that causes most wall failures, protecting your property and investment.
Frequently Asked Questions (FAQs)
What types of materials do you use for retaining walls?
A: We work with a wide range of materials to match your property’s style and functional needs. Our specialty is 6×6 pressure-treated wood timbers, but we also expertly design and install walls using pavers, concrete, rock, and cinder blocks. Each material is chosen for its durability and suitability for the Central Florida climate, ensuring a beautiful and lasting result.
How do you ensure a new retaining wall won’t fail or lean?
A: Wall failure is almost always caused by poor water management. Our primary method for ensuring longevity is installing a robust, integrated drainage system behind the wall. This, combined with deep anchoring and structural tiebacks, prevents pressure buildup and keeps the wall stable and vertical for years to come, even during heavy rains.
Can a retaining wall create more usable space on my sloped property?
A: Absolutely. This is one of the most popular reasons homeowners install retaining walls. By terracing a sloped yard, we can create level, functional areas perfect for patios, gardens, or play spaces. A well-built retaining wall transforms unusable inclines into valuable, enjoyable parts of your property through thoughtful landscape design.
Enjoy 10% Off Retaining Walls as a Veteran or Military Member!
What We Do
Tailored Land & Tree Services for Every Need

Tree Removal
Remove hazardous or unwanted trees safely with professional tree removal services. We use specialized equipment for efficient and damage-free removal.
Read More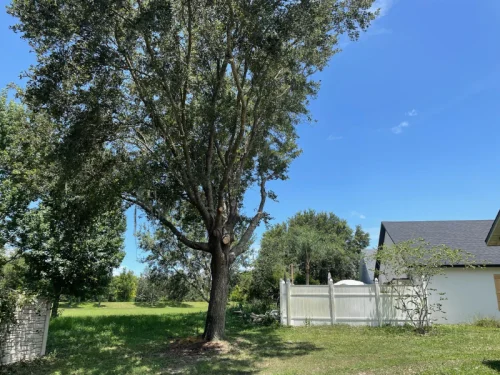
Tree Trimming
Improve tree health and appearance with regular tree trimming services. We remove dead or overgrown branches to boost safety and growth.
Read More
Emergency Tree Removal
Clear dangerous trees fast with our emergency tree removal service. We respond 24/7 to restore safety and access to your property.
Read More
Tree Planting & Transplanting
Add beauty and shade to your landscape with professional tree planting services. We choose and plant trees for healthy, lasting growth.
Read More
Arborist Services
Protect your trees with professional arborist services tailored to their health and structure. We assess, diagnose, and treat for long-term growth.
Read MoreLandscape Design & Installation
Transform outdoor spaces with a creative, experienced landscape contractor. We design and install features that enhance style and function.
Read More
Retaining Wall Installation
Control erosion and elevate your yard with a skilled retaining wall contractor. We build strong, attractive walls for structure and support.
Read More
Drainage Solutions
Prevent flooding and erosion with help from experienced landscape drainage contractors. We design custom drainage systems for long-term protection.
Read More
Excavation
Get your site ready for construction with professional excavation services. We handle digging, trenching, and grading with precision and care.
Read MoreStorm Damage Cleanup
Restore your yard quickly with disaster cleanup services after storms. We remove fallen trees, debris, and hazardous limbs efficiently
Read More
Hardscaping Services
Complete your landscape with custom hardscaping services. We install patios, walkways, and more to add value and visual appeal.
Read More
Sod Installation & Lawn Renovation
Create a lush, green lawn fast with professional sod installation. We prepare and install turf that instantly refreshes your landscape.
Read More
Mulching & Decorative Ground Cover
Boost plant health and curb appeal with mulching services. We apply decorative ground cover to protect soil and add color to your yard.
Read More
Seasonal Clean-Up Services
Our yard clean up services include leaf removal, debris hauling, and seasonal prep to keep your yard clear after storms, in spring, or before fall.
Read More
Planting & Garden Bed Installation
We offer garden bed installation with custom layouts, soil prep, and seasonal plantings to bring lasting color and structure to your outdoor space.
Read More
Irrigation & Sprinkler System Installation
Get efficient sprinkler system installation designed to reduce water waste and simplify lawn care. Built for lasting performance with minimal upkeep.
Read More
Hedge & Shrub Trimming
Keep your landscape neat and healthy with professional hedge trimming services. Clean cuts, seasonal care, and full debris removal included.
Read More
Land Clearing
Prepare your property for development with thorough land clearing services. We clear trees, brush, and debris to give you a clean, usable site.
Read More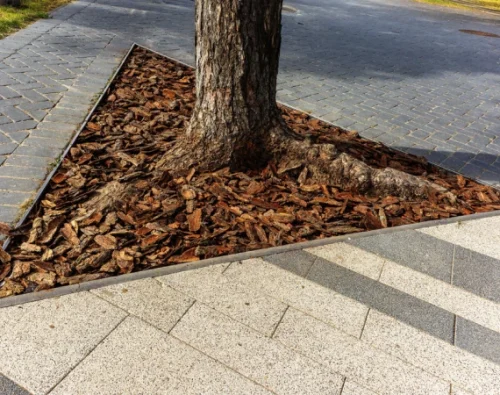
Root Raking & Root Barrier Installation
Our root barrier service and root raking protect your property by removing invasive roots and installing barriers that stop damage to driveways, foundations, and landscapes.
Read More
Commercial Tree Services
We provide commercial tree services including trimming, removal, and maintenance to keep business properties safe, attractive, and hazard-free year-round.
Read More