
Laying Sod Without Tilling: The Hidden Dangers
A beautiful, green lawn doesn’t happen by accident; it starts with what’s underneath. Think of your soil as the foundation of your home. You wouldn’t build a house on shaky ground, and the same principle applies to your lawn. Many homeowners wonder if laying sod without tilling is a viable option to save time. The simple answer is that while you can physically place sod on hard ground, you’re setting it up for a constant struggle. This article will walk you through why tilling is so important for breaking up compacted soil, improving drainage, and giving your new sod’s roots the welcoming environment they need to establish a strong, resilient turf for years to come.
Key Takeaways
- Proper Soil Preparation is Non-Negotiable: For sod to thrive, its roots need loose, clean soil. This means breaking up compacted ground through tilling or aeration and removing all old grass and weeds to give your new lawn a fresh start.
- Untilled Ground Sets Your Sod Up for Failure: Placing new sod on hard, unprepared earth leads to shallow roots, poor drainage, and weak grass that struggles in the heat. Taking a shortcut on prep work often results in a patchy, unhealthy lawn.
- Early Watering and Care are Key: The first few weeks are critical for your new lawn. Water deeply and consistently to encourage strong root growth, and keep foot traffic off the grass to allow the sod to establish itself properly.
Should You Till Before Laying Sod?
Getting a new lawn is exciting, and it’s tempting to look for shortcuts to get that beautiful green carpet laid down as quickly as possible. One of the most common questions we hear is whether tilling the soil is truly necessary. While skipping this step might save you a bit of time upfront, it often leads to a weak, unhealthy lawn that struggles to survive. Proper soil preparation is the foundation of a successful lawn, and tilling plays a key role in creating an environment where your new sod can thrive for years to come. A great lawn starts with great groundwork, which is why our approach to sod installation always begins with what’s underneath.
What is Tilling?
So, what exactly is tilling? Think of it as giving your soil a fresh start. Tilling is the process of using a machine, called a tiller or rototiller, to break up and turn over the top layer of soil. This process loosens hard, compacted earth, aerates it, and helps mix in beneficial amendments like compost. The goal is to create a soft, welcoming bed for the roots of your new sod to dig into. By breaking up the ground, you make it much easier for the roots to establish themselves, find nutrients, and access water. It’s a critical step that transforms packed dirt into a healthy foundation for your new grass.
When Can You Skip Tilling?
Honestly, it’s almost never a good idea to skip tilling. While you can physically lay sod on untilled ground, you’re setting your new lawn up for failure. Doing so often results in poor root growth, an uneven surface, and patches of dying grass. The only time you might consider not tilling is if you’re working with freshly graded, loose topsoil that has just been brought in. Even then, a light till can help ensure the ground is properly prepared. For any existing lawn area, tilling is essential. Taking a shortcut here is a gamble that rarely pays off and can lead to a lot more work down the road.
What Happens if You Don’t Till?
If you lay sod directly onto hard, untilled ground, you create several problems for your new grass. First, the soil remains compacted. This makes it incredibly difficult for the new roots to penetrate the ground and grow deep. Without a strong root system, your lawn will be weak, patchy, and vulnerable to drought. Compacted soil also prevents water and air from reaching the roots, essentially suffocating your grass. Furthermore, if you lay new sod over existing grass or weeds, that old vegetation creates a barrier. The new roots can’t make contact with the soil beneath, preventing them from absorbing the moisture they need to survive and leading to them drying out quickly. This is why proper land clearing is a vital first step.
The Risks of Laying Sod on Untilled Ground
Laying new sod is an exciting step toward getting that lush, green lawn you’ve been dreaming of. It’s tempting to look for shortcuts, and skipping the tilling process might seem like an easy way to save time. However, laying sod on untilled ground is one of the biggest mistakes you can make. The preparation work you do before the sod goes down is what sets your new lawn up for long-term success.
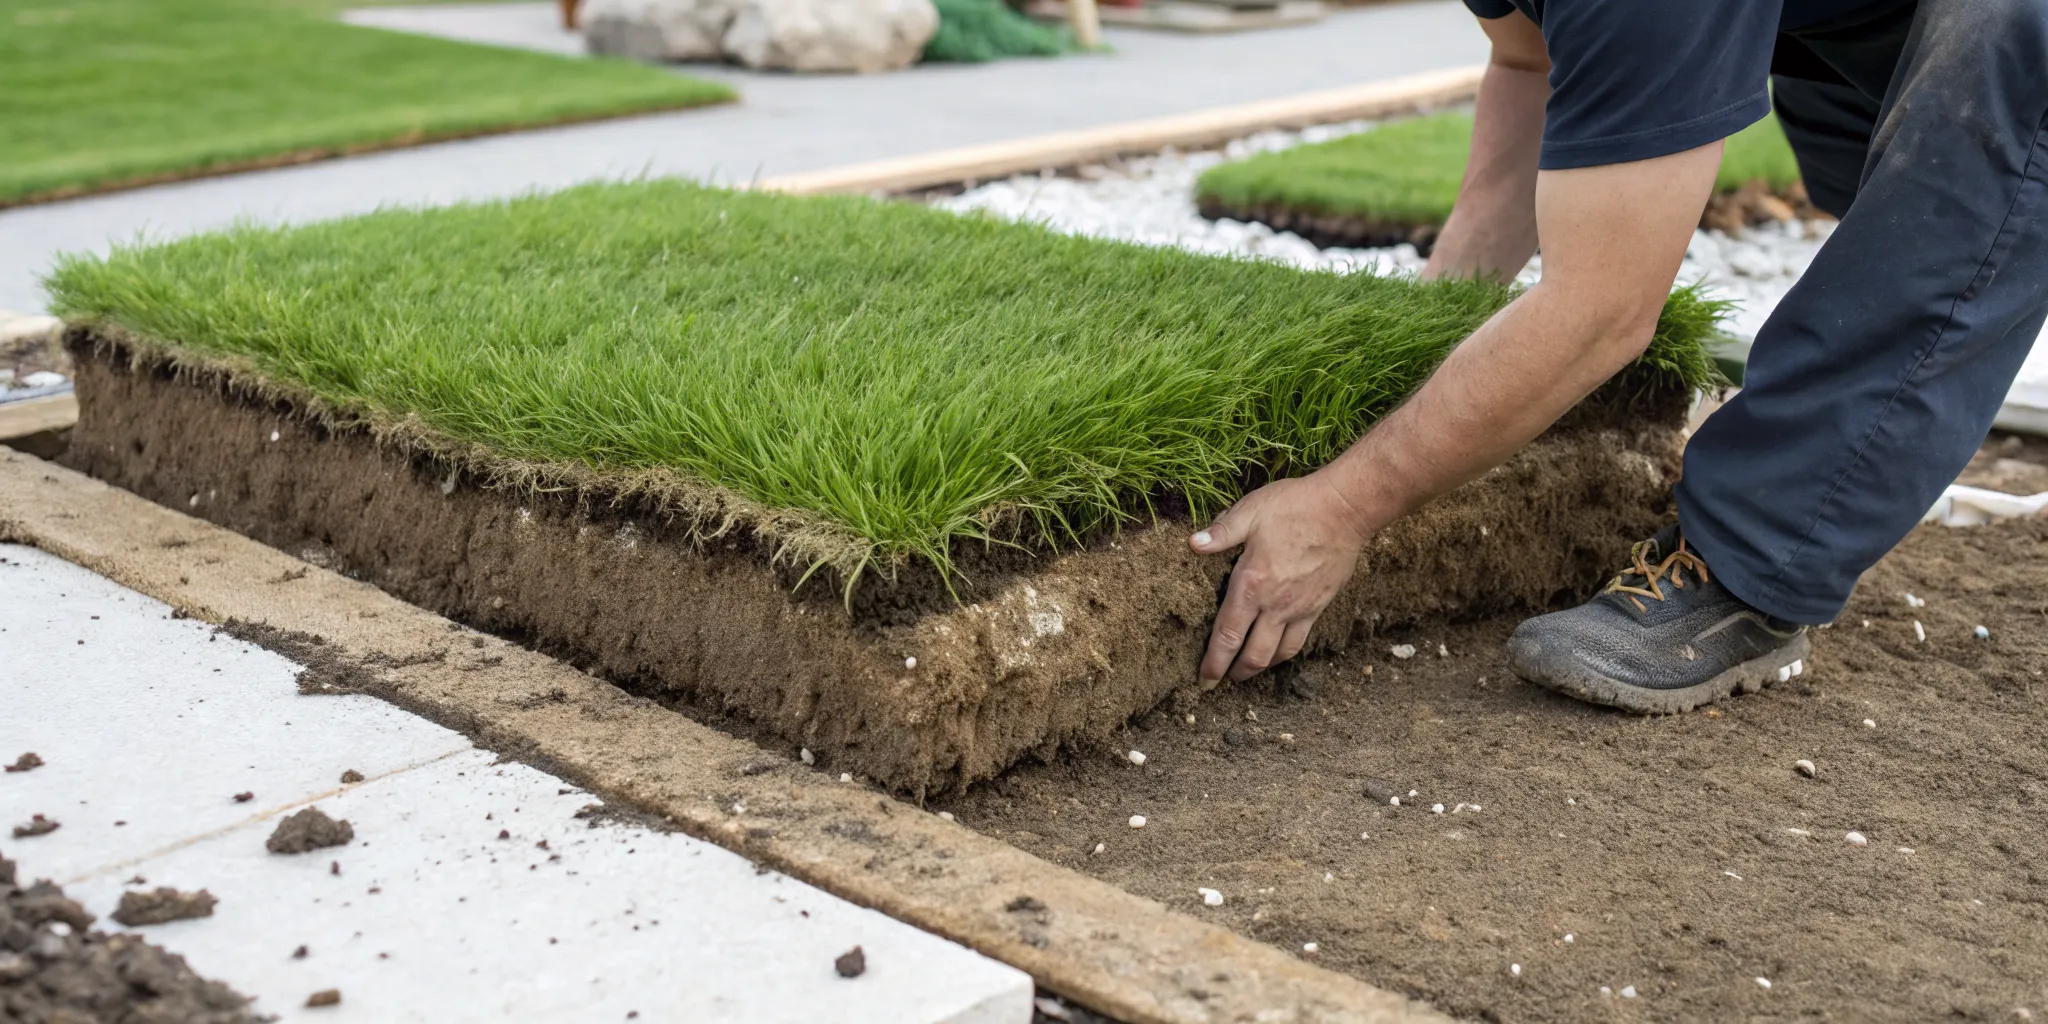
Untilled soil is often hard, compacted, and full of old grass and weeds. When you place fresh sod on top of this unprepared surface, you’re creating a challenging environment for the new roots. Instead of easily growing deep into loose, nutrient-rich soil, the roots struggle to penetrate the hard ground. This can lead to a host of problems, from weak, patchy growth to poor drainage and a lawn that’s constantly battling for survival. Taking the time to properly prepare the soil is a critical investment in the health and beauty of your future lawn.
Shallow Roots and Weak Growth
For your new sod to flourish, its roots need to grow deep into the soil. This is how the grass anchors itself and absorbs the water and nutrients it needs to stay healthy. When you lay sod on untilled ground, the soil is often hard and compacted. This dense layer acts like a wall, preventing the new roots from penetrating deeply. Instead, they form a shallow mat right under the surface. This weak root system makes your lawn incredibly vulnerable. It will struggle during dry spells, be more susceptible to disease, and never achieve that thick, resilient quality you want. The result is often a patchy, unhealthy-looking lawn that requires constant attention.
Battling Old Grass and Weeds
Placing new sod directly over an existing lawn or weedy patch is another common misstep. The old vegetation creates a barrier between the new sod’s roots and the soil beneath. For the sod to take hold, its roots must make direct contact with the soil to draw up moisture. If a layer of old grass is in the way, the new sod can quickly dry out and die, especially in the Florida heat. Furthermore, any persistent weeds you cover up won’t just disappear. They will fight their way through the seams of your new sod, competing for sunlight, water, and nutrients, leaving you with a constant battle to keep your lawn looking clean.
Compacted Soil and Poor Drainage
Compacted soil is a major issue for lawn health. Over time, foot traffic and heavy rains can press soil particles tightly together, squeezing out the air pockets that are essential for healthy roots. This hardpan layer prevents water from soaking in, leading to puddles on the surface and waterlogged conditions that can suffocate roots and invite fungal diseases. Tilling breaks up this compaction, allowing air and water to move freely through the soil. Without this step, your new sod will sit on a surface that can’t drain properly, creating a stressful environment that hinders growth. If you already have standing water in your yard, you may need dedicated drainage solutions to correct the issue before laying sod.
Why Your New Sod Might Not Survive
Ultimately, laying sod on untilled ground sets your new lawn up for failure. The combination of challenges is often too much for the grass to overcome. With shallow roots, the sod can’t access enough water to survive hot, dry periods. While battling old weeds for resources, it’s also struggling with compacted soil that either drowns its roots in puddles or is too hard to penetrate. All these factors create a high-stress environment that weakens the grass, making it susceptible to pests and diseases. Investing in proper sod installation ensures the soil is perfectly prepped, giving your new lawn the strong foundation it needs to thrive for years to come.
How to Prep Your Soil Without a Tiller
While tilling is a popular method for breaking up soil, it’s not always necessary or even the best option for your yard. If you’re working with decent soil that isn’t heavily compacted, you can create a healthy foundation for your new sod with a few key steps. The goal is the same whether you till or not: you need to give your new sod’s roots a welcoming environment where they can grow deep and strong.
Skipping the tiller means you’ll need to be extra diligent with your prep work. This process involves clearing out any competition, loosening the existing soil, adding fresh nutrients, and making sure the ground is perfectly graded. Each step is crucial for ensuring your sod establishes itself properly and grows into a lush, resilient lawn. Rushing through this stage can lead to weak growth and drainage problems down the road, so it’s worth taking the time to do it right.
Clear Out Old Grass and Weeds
Before you can lay new sod, you have to get rid of what’s already there. Covering old grass and weeds with new turf is a recipe for trouble. The old vegetation will decompose, creating an uneven surface and potentially introducing disease to your new lawn. More importantly, stubborn weeds can push their way through the new sod, competing for water and nutrients.
For the best results, you need to remove all existing growth completely. A sod cutter is an excellent tool for this, as it slices under the grass and roots, allowing you to roll up the old lawn and remove it. This creates a clean, bare surface, giving your new sod a fresh start without any competition. A properly cleared area is the first step in a successful sod installation.
Aerate to Loosen Compacted Soil
Compacted soil is one of the biggest enemies of a new lawn. When the ground is hard and dense, sod roots struggle to penetrate it. This leads to a shallow root system, making your grass weak and vulnerable to drought and stress. If you’re not tilling, you absolutely must find another way to loosen the soil.
A core aerator is the perfect tool for the job. This machine pulls small plugs of soil out of the ground, creating channels for air, water, and nutrients to reach deep into the root zone. This process relieves compaction and encourages the new sod roots to grow downward, establishing a strong foundation. Aerating is a non-negotiable step for giving your new lawn the best chance to thrive in Florida’s often-compacted soil.
Spread a Fresh Layer of Topsoil
Once you’ve cleared and aerated the area, the next step is to add a fresh layer of high-quality topsoil. Since you haven’t tilled to mix in amendments, this new layer will serve as the primary bed for your sod’s roots to establish themselves. This gives your new lawn an immediate source of nutrients and a loose medium to grow into.
Spread about one to two inches of a quality topsoil or compost blend evenly across the entire area. This fresh layer will hold moisture, provide essential nutrients, and create the ideal environment for the roots to take hold quickly. Think of it as a welcome mat for your new sod, ensuring it has everything it needs to start growing strong from day one. This is a key part of any professional landscaping project.
Level and Grade the Area
Proper grading is essential for a healthy, functional lawn. An uneven surface not only looks bad but can also cause serious drainage issues. Water will pool in low spots, creating soggy patches that can kill the grass and become a breeding ground for pests. On the other hand, high spots can cause water to run off too quickly, leaving the sod dry and stressed.
After spreading your topsoil, carefully rake the area to create a smooth, level surface. The ground should have a gentle slope away from your home’s foundation to ensure proper water runoff. As a rule of thumb, the soil level should be about one inch below any adjacent sidewalks or patios to accommodate the thickness of the new sod. Getting the grading right is critical for preventing water damage, a service our landscape drainage contractors specialize in.
Test and Balance Your Soil’s pH
Looks can be deceiving, and what you can’t see in your soil can have the biggest impact on your new lawn. The pH level of your soil determines how well your grass can absorb nutrients. If the pH is too acidic or too alkaline, the sod will struggle to thrive, no matter how much you water or fertilize it.
Before laying your sod, it’s a smart move to get your soil tested. A simple soil test will tell you its pH level and what nutrients it might be missing. Based on the results, you can add amendments like lime or sulfur to balance the pH and incorporate specific fertilizers to address any deficiencies. This step ensures you’re creating the perfect growing environment tailored to your lawn’s specific needs.
How to Fix Compacted Soil
Compacted soil is one of the biggest hurdles for a new lawn, acting like a barrier that prevents roots from growing deep and strong. When the ground is hard-packed, water can’t soak in properly, and essential nutrients have a tough time reaching the grassroots. The good news is you don’t always need a tiller to solve the problem. With the right approach, you can loosen the soil and create a healthy foundation for your sod to thrive. These methods focus on breaking up compaction and enriching the soil, giving your new lawn the best possible start.
Try Core Aeration
If your soil feels as hard as concrete, core aeration is a fantastic first step. This process involves using a machine to pull up small plugs of soil, creating thousands of tiny channels in your lawn. These openings allow air, water, and nutrients to penetrate deep into the ground, breaking up compaction and encouraging roots to stretch out. When soil is too dense, new sod roots can’t push through, which can cause the grass to dry out and fail. Core aeration gives them the breathing room they need to establish a strong, resilient root system for a lush, healthy lawn.
Add Compost and Organic Matter
Once you’ve opened up the soil with aeration, the next step is to enrich it. Spreading a one to two-inch layer of high-quality compost or topsoil over the area creates a nutrient-rich bed for your new sod. This fresh layer does more than just feed the grass; it fundamentally improves the soil’s structure. Organic matter helps break up heavy clay, improves drainage, and holds moisture more effectively. Think of it as giving your sod a soft, welcoming place to land. This simple step can make a huge difference in how quickly your new lawn takes root and begins to flourish.
Water Deeply to Encourage Roots
How you water can either help or hinder your new sod, especially on compacted ground. While new sod needs to stay consistently moist for the first couple of weeks, your long-term goal is to encourage deep root growth. Watering lightly and frequently trains the roots to stay near the surface, where they are vulnerable to heat and drought. Instead, water deeply and less often. This approach encourages the roots to grow downward in search of moisture, helping them push through tougher soil layers. A strong, deep root system is the key to a durable and beautiful lawn.
Use Mulch to Improve Soil Over Time
Improving your soil isn’t just a one-time task; it’s an ongoing process. Using organic mulch in your garden beds and around trees can contribute to the health of your entire yard, including your lawn. As materials like wood chips or pine bark break down, they slowly release nutrients into the ground. This process attracts beneficial organisms like earthworms, which are nature’s best aerators. Their tunneling naturally loosens the soil, improving its structure and drainage over time. Healthy garden beds contribute to a healthier lawn, creating a balanced ecosystem right in your backyard. You can find quality mulching services to help get you started.
How to Care for Your New Sod
Your beautiful new lawn is here, and the next few weeks are all about helping it settle in. Giving your sod the right care from day one is the secret to growing a lush, healthy lawn that lasts for years. Think of it as a little TLC to welcome your new grass to its home. With a consistent routine, you’ll help those new roots take hold and create a strong foundation. Here’s a simple guide to follow to make sure your new sod thrives.
Your Watering Schedule for the First Two Weeks
For the first one to two weeks, your new sod is thirsty. Plan on watering it heavily so the soil underneath stays consistently moist. A good rule of thumb is to soak the lawn for at least 15 minutes every morning and again in the evening. This consistent moisture is crucial because the sod’s roots are still very shallow and can dry out quickly, especially in the Florida sun. This initial watering schedule helps the roots get the hydration they need to start growing into the soil below.
Water Deeply for Stronger Roots
The goal of your watering routine is to encourage the roots to grow deep into the ground. When you water deeply, you ensure moisture soaks past the sod layer and into the topsoil. This signals the roots to stretch downward in search of water, which is exactly what you want. This process builds a strong, resilient root system that will help your lawn withstand dry spells later on. Shallow, frequent watering can lead to weak, shallow roots, so stick with those deep soaks.
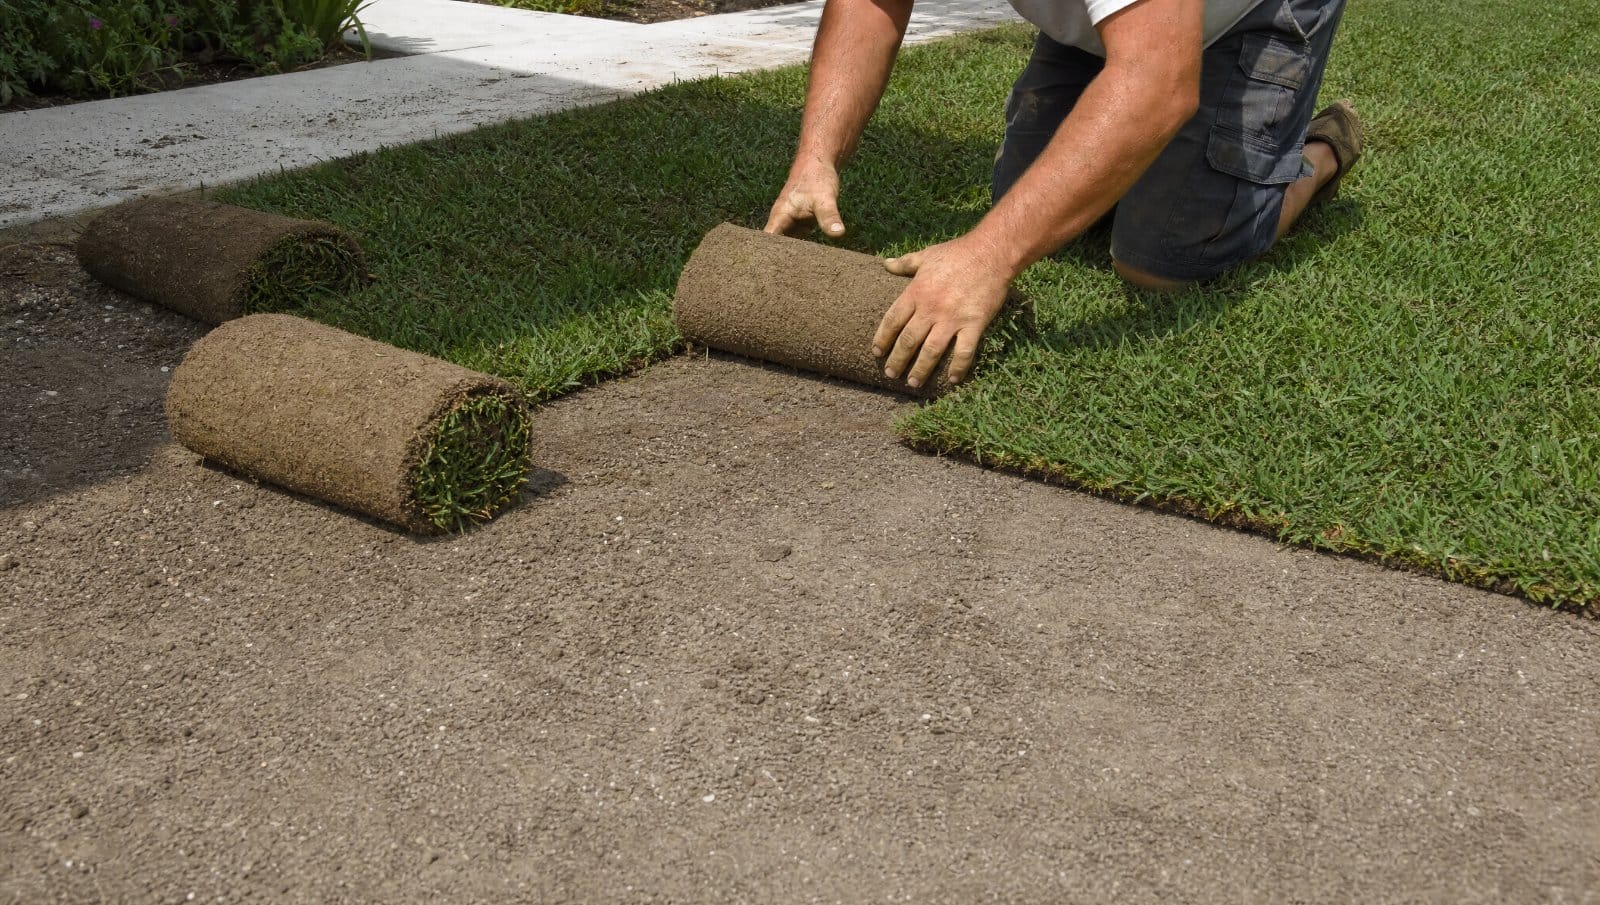
Roll Your Sod to Remove Air Pockets
After the sod is laid, it’s important to make sure the roots are touching the soil everywhere. Air pockets can get trapped between the sod and the ground, preventing the roots from getting the water and nutrients they need. You can fix this by using a lawn roller to gently press the sod down. This simple step ensures good root-to-soil contact across your entire lawn, which is essential for the grass to establish itself properly and avoid developing dry, brown patches.
Check for Proper Soil Moisture
How do you know if you’re watering enough? It’s easy to check. Gently lift a corner of one of the sod pieces and feel the soil underneath. It should be damp, not soggy or dry. If the soil is dry, your water isn’t penetrating deep enough, so you may need to water a little longer during your scheduled times. This quick check gives you peace of mind that your efforts are working and that the new roots have access to the moisture they need to grow.
Keep Off the Grass (For Now!)
As tempting as it is to walk on your new green lawn, it’s best to admire it from a distance for a little while. Keep foot traffic from people and pets to an absolute minimum for the first two to three weeks. The ground is very soft from all the watering, and walking on it can create depressions and prevent the roots from knitting together properly. Giving the sod this undisturbed time to establish itself will pay off with a smoother, healthier lawn.
When to Mow and Fertilize
You can plan for your lawn’s first haircut around the third week. Before you mow, check to make sure the sod is rooted. You can do this by gently tugging on a corner; if it feels anchored, you’re good to go. For the first mow, set your mower blades to the highest setting. You never want to cut more than one-third of the grass blade’s height. As for fertilizer, hold off for about four to six weeks to give the roots plenty of time to get established. A professional sod installation gives your lawn the best possible start, making this follow-up care routine even more effective.
Why a Professional Touch Makes a Difference
Laying sod seems straightforward, but creating a lawn that thrives for years requires more than just rolling out green carpet. The real secret to a lush, healthy lawn lies in the groundwork, and that’s where professional expertise becomes invaluable. Handling the entire process, from ground preparation to the final roll, ensures every detail is managed correctly. This approach helps you avoid common pitfalls that can turn your dream lawn into a frustrating, patchy problem. A professional team understands the specific challenges of Central Florida soil and climate, setting your new grass up for long-term success. They bring the right equipment, knowledge, and techniques to ensure your investment results in a beautiful, resilient outdoor space without the guesswork and potential rework of a DIY project.
Expert Soil Prep for a Healthy Foundation
The foundation of any great lawn is healthy soil. Simply laying new sod over hard, unprepared ground is a recipe for failure. Without proper tilling, the soil remains compacted, making it nearly impossible for new grassroots to dig in and establish themselves. This leads to shallow roots, weak growth, and a lawn that struggles to survive Florida’s heat and dry spells. Professionals understand that tilling to the correct depth is a critical first step. This process breaks up compacted earth, improves aeration, and allows water and nutrients to reach the roots where they’re needed most, creating the perfect environment for your new sod installation to flourish from day one.
The Right Tools and Techniques for the Job
Achieving professional results requires professional equipment. While you could rent a tiller, a professional crew arrives with the right tools and, more importantly, the experience to use them effectively. The process starts with completely clearing the area of old grass, weeds, and debris. Then, the team tills the soil to a depth of four to six inches, breaking up large clumps and removing rocks. This meticulous preparation is something that’s difficult to replicate with basic tools. Proper landscape design and installation also involves grading the area correctly to ensure proper drainage and prevent water from pooling, protecting both your lawn and your home’s foundation from potential water issues.
Guaranteed Success and a Lasting Lawn
When you invest in a new lawn, you want it to last. The biggest benefit of professional installation is the peace of mind that comes from knowing the job was done right from the start. Proper soil preparation prevents the most common issues, like poor water absorption and weak root development, that cause new sod to fail. A well-prepared lawn is more resilient, better equipped to handle foot traffic, and less susceptible to disease and pests. By ensuring the ground is perfectly prepped, a professional service gives your sod the best possible chance to establish itself as a dense, vibrant, and enduring part of your property for years to come.
Related Articles
- Sod Installation 101: A Step-by-Step Guide
- How to Lay Sod in a Small Area: Step-by-Step
- How to Lay Sod Over Existing Lawn The Right Way
Frequently Asked Questions
Is it ever okay to lay sod without tilling first? It’s a shortcut that almost always leads to problems down the road. The only time you might get away with it is if you’re starting with a fresh delivery of loose, high-quality topsoil. For any existing ground, tilling is essential. It breaks up the hard, compacted earth, giving the new roots a soft place to grow deep and strong, which is the foundation of a healthy lawn.
My old lawn is just patchy and brown. Can I lay new sod right over it? I know it’s tempting to just cover up the problem, but laying new sod over an old lawn is a recipe for failure. The old grass and weeds create a barrier that prevents the new roots from making contact with the soil. Without that connection, the sod can’t absorb water and will quickly dry out and die. A clean slate is non-negotiable for a successful installation.
What’s the single most important thing I can do for my new sod after it’s installed? Watering is everything. For the first couple of weeks, your new sod needs consistent moisture to help its shallow roots establish themselves in the soil below. Deep, regular watering encourages those roots to grow downward, which is exactly what you want for a strong, drought-tolerant lawn that can handle the Florida heat.
How soon can I walk on my new lawn? You’ll need to admire your new green space from a distance for a little while. It’s best to keep all foot traffic, including from kids and pets, off the sod for at least two to three weeks. The ground will be very soft from all the watering, and walking on it can create dents and disturb the new roots as they try to knit into the soil.
My yard has some drainage issues. Will new sod fix that? New sod won’t solve existing drainage problems; in fact, standing water can drown the roots and kill your new lawn. The real fix happens before the sod is ever laid. Proper ground preparation, including grading the soil to slope away from your home, is critical for ensuring water flows where it should. Addressing drainage first is key to protecting your investment.