How to Uproot a Small Tree and Replant Like a Pro
Here in Central Florida, our trees face unique challenges, from intense summer heat to sandy soil. That means when you decide to move a tree, timing and technique are even more critical. Transplanting during the wrong season can put incredible stress on a tree trying to survive our climate. But when done correctly, you can give your tree a new lease on life. This guide is tailored for Florida property owners, focusing on how to uproot a small tree and replant it for success in our specific environment. We’ll cover the ideal dormant seasons for our region, how to prepare the soil, and the best watering practices to help your tree establish strong roots before the summer sun arrives.

Key Takeaways
- Timing and location are your foundation: The best chance for success comes from moving a tree during its dormant season (late fall to early spring) and preparing its new, spacious home before you even start digging.
- Handle the root ball with care: A tree’s survival depends on its roots, so dig a wide, shallow root ball, lift it from the bottom instead of by the trunk, and replant it at the same depth it was originally growing.
- Aftercare is non-negotiable: A transplanted tree is under stress and needs consistent support. Provide deep, regular watering and a layer of mulch for at least the first year to help it recover and establish itself in its new environment.
When Is the Best Time to Move a Small Tree?
Moving a small tree seems simple enough, but timing is everything. Think of it as surgery for your tree; you want to perform the operation when the patient is strongest and the conditions are perfect for recovery. Uprooting a tree, no matter how carefully you do it, is a stressful event that can lead to what’s known as transplant shock. The process inevitably severs tiny roots that are essential for absorbing water and nutrients. The key to a successful transplant is choosing a time that minimizes this shock and gives the tree the best possible chance to re-establish itself in its new home. Picking the right season, and even the right day, can make the difference between a thriving tree and one that struggles to survive. In Central Florida, our unique climate means we have to be especially mindful of intense heat and sudden dry spells. Before you grab your shovel, let’s walk through the ideal conditions for the big move. This will help ensure your tree not only survives but flourishes for years to come. For more complex situations or larger trees, professional tree planting services can handle the entire process, ensuring your tree gets the best start in its new spot.
Why the Dormant Season Is Ideal
The absolute best time to move a tree is during its dormant season. This is the period in late fall, winter, or early spring when the tree is essentially “asleep.” During dormancy, the tree has stopped actively growing leaves and branches, directing its energy reserves toward its root system. This is a huge advantage. When you transplant a dormant tree, it can focus all its strength on repairing its roots and getting established in the new soil before the stress of summer heat arrives. Trying to move a tree in the middle of summer, when it’s busy producing leaves and photosynthesizing, is like asking someone to run a marathon right after a major operation. It’s simply too much stress at once.
How Weather Plays a Role
Beyond the season, the weather on the day of the move matters. Aim for a cool, overcast, and calm day. Hot sun and gusty winds are the enemies of a newly uprooted tree. They can quickly dry out the exposed, delicate roots, causing irreversible damage before you even get the tree into its new hole. Transplanting on a cloudy day reduces water loss from the leaves and roots, giving the tree a much gentler transition. It’s also helpful if the soil is moist but not waterlogged. Damp soil is easier to dig and helps the root ball hold together. If you’re facing a dry spell, be sure to water the tree deeply a few days before you plan to move it.
Timing Based on Tree Species
While the dormant season is a great general rule, the ideal timing can vary slightly depending on the type of tree you’re moving. For deciduous trees, the ones that lose their leaves in the fall, you have two windows. The first is in the fall after the leaves have dropped but before the ground gets too cold. The second is in early spring before new buds begin to open. Evergreen trees, like pines and magnolias, have a slightly different schedule. The best times to move them are in early spring, just before new growth starts, or in late summer to early fall. The late summer move gives their roots enough time to get established before winter sets in. Understanding your tree’s specific needs is a key part of successful arborist services.
How Do You Prepare for a Tree Transplant?
Moving a tree is a big deal for the tree, so a little prep work goes a long way toward helping it settle into its new home. Think of it like setting up a guest room before a friend comes to stay; you want to make sure everything is just right. Taking these steps seriously will give your tree the best possible chance to thrive after the move. Proper preparation minimizes stress on the root system and helps the tree adapt quickly to its new environment.
If you’re feeling unsure about any part of the process, remember that professional tree planting services can handle the entire transplant for you, ensuring your tree gets the expert care it needs from start to finish.
Select the Perfect New Location
Before you even touch a shovel, scout out the ideal spot for your tree’s new home. This is the most critical step. You need to think about the tree’s future, not just its current size. Make sure the new spot has enough room for the tree to grow to its mature height and width without crowding buildings, power lines, or other plants.
Consider the specific needs of your tree species. Does it love basking in the sun all day, or does it prefer a bit of afternoon shade? Check that the soil is suitable and that it will get enough water. A great landscape design considers how each plant fits into the bigger picture, so choose a location that protects your tree from strong winds and gives it the best chance to flourish.
Prepare the Soil and Planting Site
Once you’ve picked the perfect spot, it’s time to get it ready. The goal is to create a welcoming environment for the roots to spread out. Start by digging the new hole before you uproot the tree. A common mistake is digging a hole that’s just big enough for the root ball. Instead, dig the new hole much wider than you think you’ll need, at least two to three times the width of the tree’s root ball.
However, the hole should be no deeper than the root ball itself. This wide, shallow hole encourages the roots to grow outward into the surrounding soil rather than circling around in a confined space. Clear any weeds or grass from the area to reduce competition for water and nutrients.
Gather Your Tools and Equipment
Having the right tools on hand makes the job smoother and safer for both you and the tree. You don’t need a lot of fancy equipment for a small tree, but what you do have should be in good condition. A sharpened nursery spade or a sturdy digging shovel is essential for getting clean cuts through the soil and roots.
You’ll also want a wheelbarrow or a large tarp to transport the tree without damaging the root ball. Burlap and twine are perfect for wrapping and securing the roots during the move. And don’t forget a good pair of gardening gloves! For larger or more established trees, the job may require specialized equipment, which is when calling in a professional arborist is your best bet.
Pre-Water and Prune the Roots
A couple of final steps before digging will make a huge difference. First, water the soil around the tree thoroughly a day or two before you plan to move it. This makes the soil much easier to work with and ensures the root ball stays moist and intact during the transfer. Dry, crumbly soil can fall away, exposing and damaging delicate roots.
For some trees, root pruning a few months in advance can be beneficial. This involves cutting the roots in a circle around the tree to encourage a more compact, fibrous root system to develop. This technique reduces transplant shock by preparing the tree for the move. It’s a more advanced step, but it can significantly improve the success rate of your transplant.
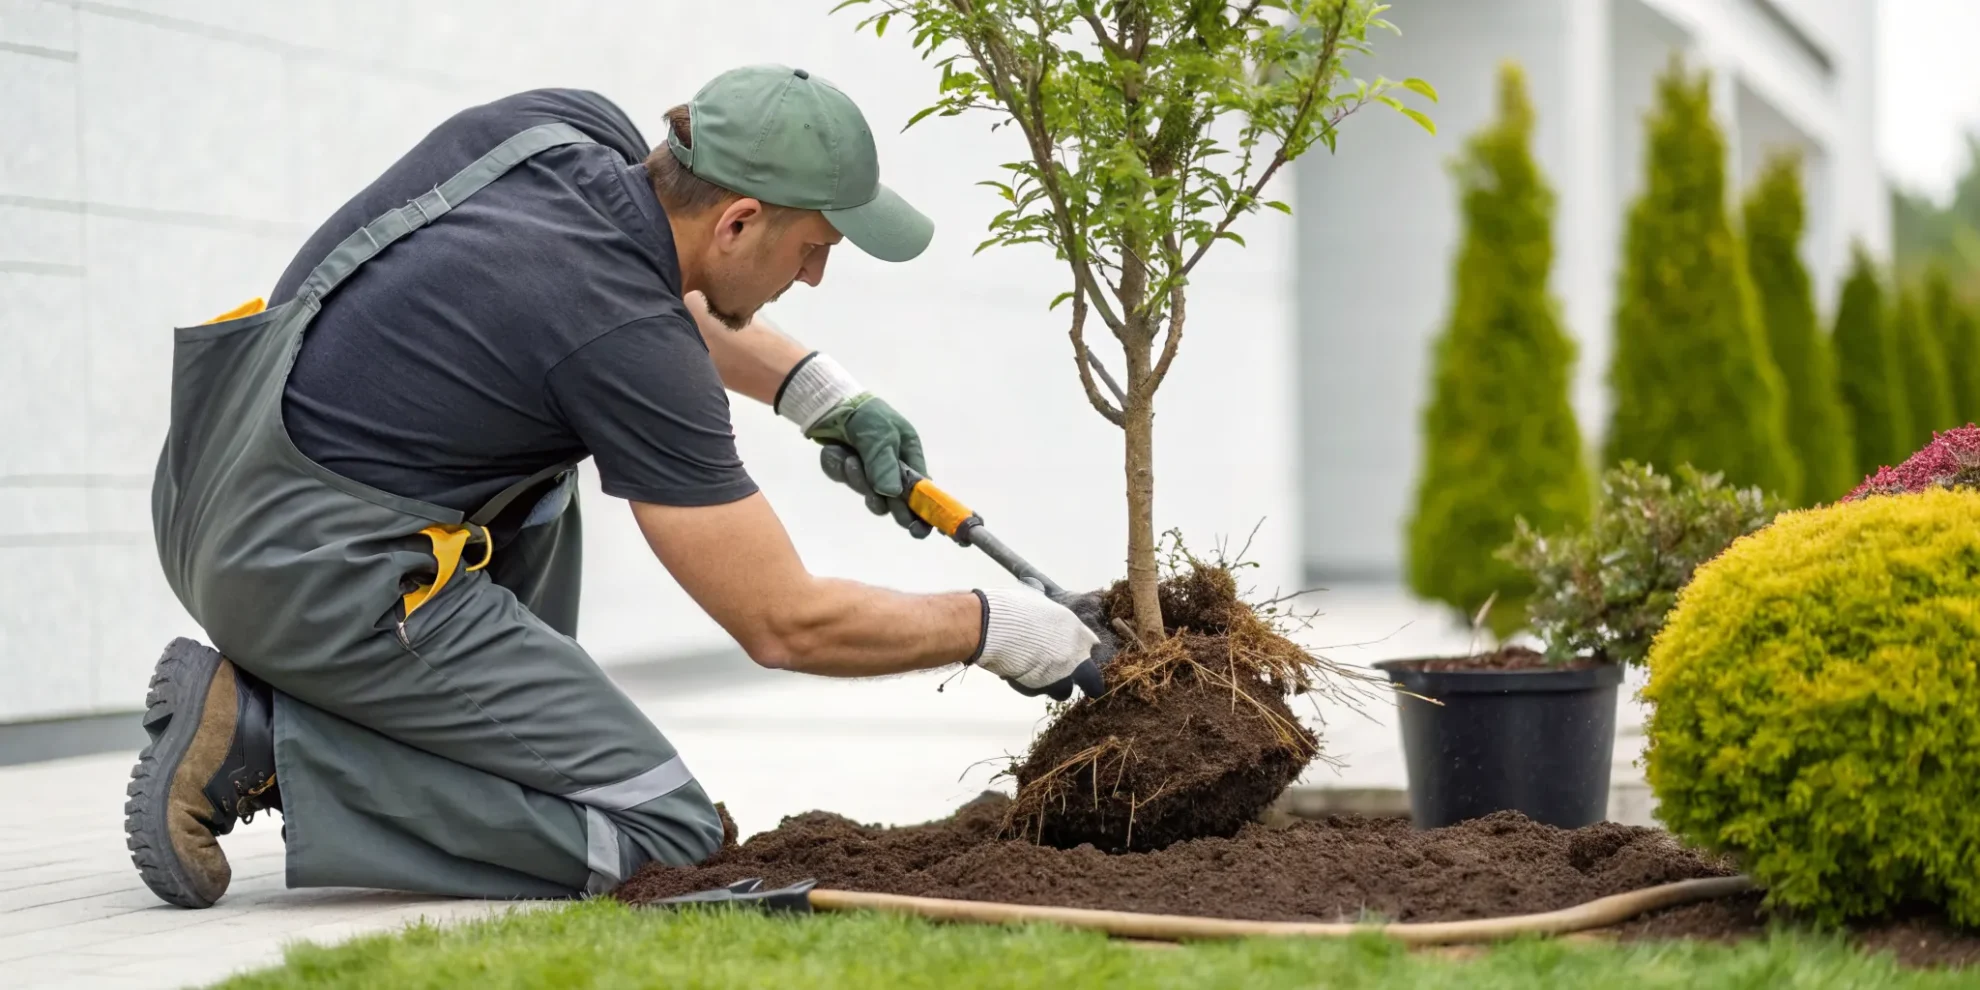
What’s the Right Way to Uproot a Small Tree?
Once you’ve prepared your new site, it’s time for the main event: moving day for your tree. Uprooting a tree, even a small one, is a delicate operation. The goal is to keep the root system as intact and undisturbed as possible to give it the best chance of thriving in its new home. This process requires patience and a gentle hand. Remember, you’re not just digging up a plant; you’re carefully relocating its entire life support system. For very established or valuable trees, it’s always a good idea to consult with a professional. Certified arborists have the expertise and equipment to handle complex tree planting and transplanting projects safely. But if you’re tackling a smaller tree yourself, following these steps will help you do it right.
Measure and Mark the Root Ball
Before your shovel even touches the ground, you need to figure out how big of a root ball to dig. Getting this measurement right is critical because it ensures you capture enough of the root system for the tree to survive. A good rule of thumb is to allow for about 10 to 12 inches of root ball diameter for every inch of the tree’s trunk diameter. To find the trunk diameter, measure it about six inches up from the ground. So, if your tree’s trunk is two inches thick, you’ll want to mark a circle on the ground that is at least 20 to 24 inches wide. This circle will be your guide for digging.
Dig the Trench Carefully
With your circle marked, you can start digging. Instead of digging straight down at your mark, begin by digging a trench just outside of it. This trench should be about one to two feet deep, depending on the size of the tree. The idea is to create a work area that lets you cleanly sever the roots around the perimeter of the root ball. As you dig the trench, you’ll encounter roots. Use a sharp spade or pruners to make clean cuts; this helps the roots heal faster. Once the trench is complete, you can begin carefully cutting under the root ball at a 45-degree angle to round out the bottom and free it from the ground.
Protect the Roots During Removal
The most important parts of the root system are the fine, fibrous feeder roots that absorb water and nutrients. Most of these are located within the root ball you’ve just outlined. As you dig, your main priority is to keep this ball of soil and roots intact. If the soil is dry and crumbly, it can fall away, exposing the delicate roots to air and causing them to dry out, which can lead to transplant shock. This is why watering the tree a few days before the move is so important. A moist root ball holds together much better. Treat the root system with care, avoiding any unnecessary bumps or breaks as you work to free it.
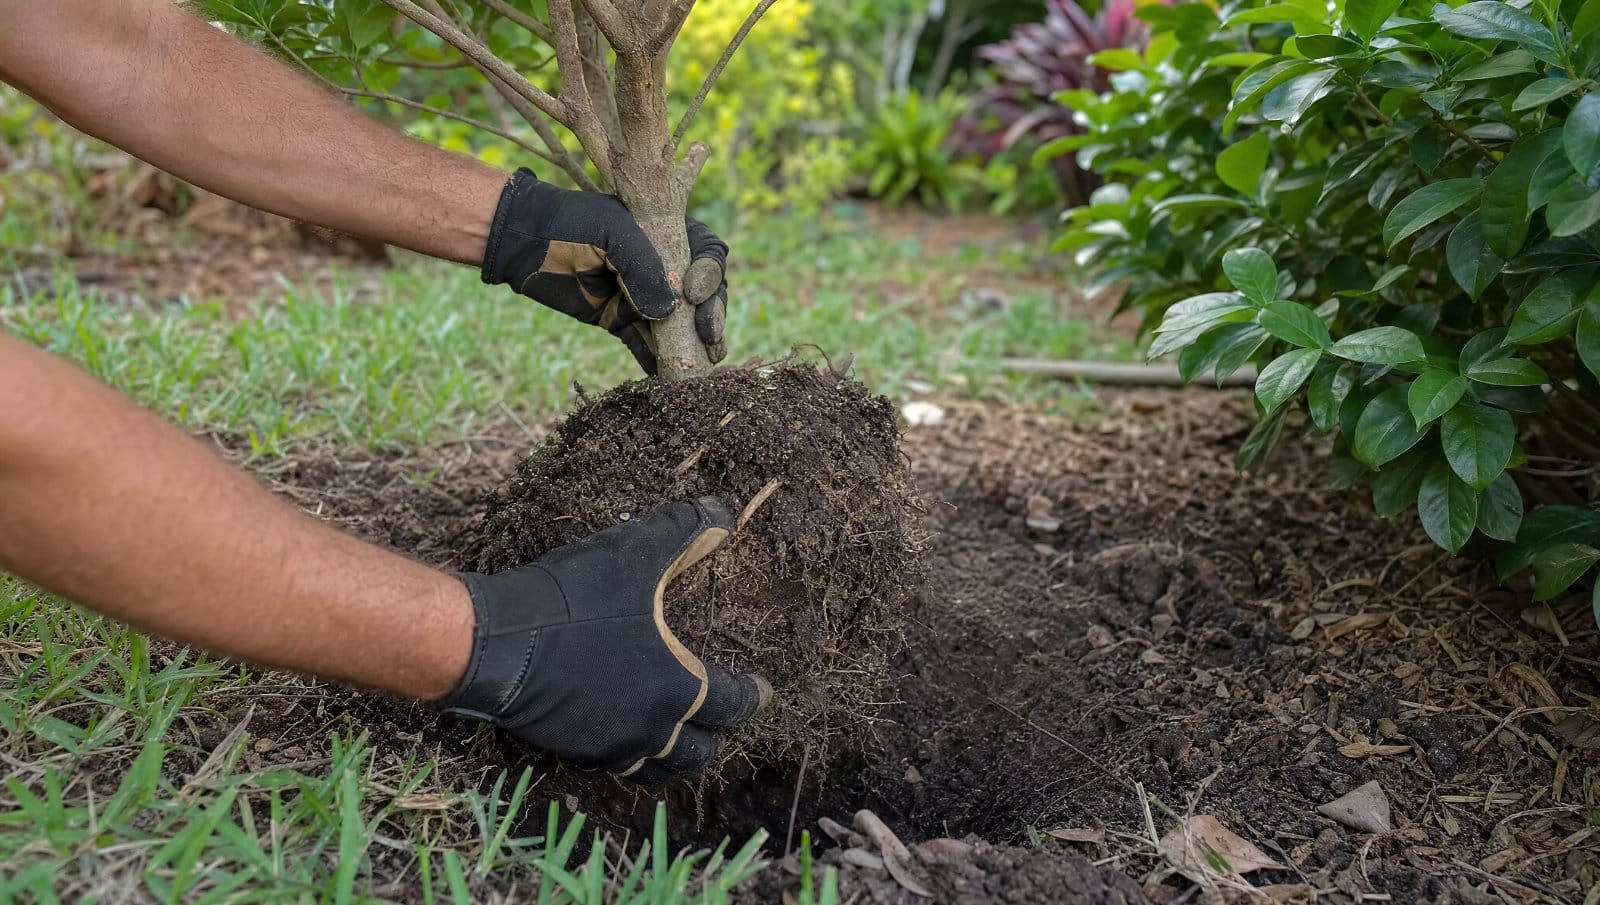
Lift and Wrap the Root Ball for Transport
Once the root ball is completely free, it’s time to lift it from the hole. Gently tip the tree to one side and slide a large piece of burlap or a tarp underneath it. Then, tip it back the other way to wrap the material around the entire root ball. For a small tree, you might be able to do this yourself, but it’s always easier and safer with a partner. Lift the tree from the bottom of the root ball, never by the trunk. Wrapping the root ball snugly in burlap helps keep the soil in place and protects the roots during the move to its new location. Secure the burlap with twine to make sure it stays put.
How Do You Replant a Tree for Success?
You’ve successfully uprooted your tree, and now it’s time for the final, most critical step: replanting it in its new home. Getting this part right is essential for the tree’s long-term health and survival. A successful transplant means giving the tree everything it needs to establish new roots and thrive in its new environment. It’s not just about digging a hole and dropping it in; it’s a thoughtful process that sets the stage for future growth and ensures your landscape continues to look its best.
The goal is to minimize stress and create a welcoming space for the roots to expand. This involves careful handling during transport, preparing the new site correctly, and providing immediate care after planting. Each step, from digging the hole to the final watering, plays a vital role in helping the tree acclimate. While moving a small tree can be a rewarding DIY project, larger or more established trees often require professional expertise. For complex situations, considering professional tree planting services can ensure the job is done safely and correctly, protecting both your property and the tree’s health. Below, we’ll walk through the key steps to replant your tree like a pro and give it the best possible chance to flourish in its new spot.
Transport the Tree Safely
Once the tree is out of the ground, your top priority is moving it without causing damage. The root ball is delicate, and the trunk isn’t a handle. According to experts at Iowa State University, you should always lift and carry the soil ball itself, not the trunk. Lifting by the trunk can tear the roots away from the soil, which is a major source of stress for the tree. If you wrapped the root ball in burlap, use the wrapping to help you lift. For very short distances, you can carefully slide it onto a tarp. For longer moves, a wheelbarrow or garden cart is your best friend. The goal is a smooth, gentle ride to its new location.
Dig the New Planting Hole
Before you even uproot the tree, you should have its new home ready. A properly prepared hole gives the roots the space they need to expand and establish themselves. The key is to dig wide, but not too deep. A good rule of thumb is to make the new hole two to three times wider than the tree’s root ball. However, the hole should be slightly shallower than the height of the root ball. This prevents the tree from settling too deep over time, which can lead to root rot. A slightly elevated position ensures proper drainage and gives your tree a solid foundation for growth.
Position the Tree at the Correct Depth
Now it’s time to place the tree in its new spot. Getting the depth just right is crucial. You want the tree to sit at the same depth it was originally growing, or even a tiny bit higher. A helpful guide from the Cooperative Extension Service suggests you place the tree in the hole so it sits at the same depth it was growing before. Look for the soil line on the trunk as a reference. Planting too deep is one of the most common transplanting mistakes and can suffocate the roots. Once it’s in the hole, step back and check it from a few angles to make sure it’s straight before you start backfilling.
Backfill, Mulch, and Water Thoroughly
With the tree perfectly positioned, you can begin backfilling the hole with the soil you removed. As you add soil, gently pack it down to eliminate any air pockets around the roots. Once the hole is filled, it’s time for a deep watering. Experts recommend you create a ‘moat’ or rim of soil around the base to help hold water and direct it to the roots. After watering, finish the job by applying a layer of mulch around the base, keeping it a few inches away from the trunk. Proper mulching helps retain soil moisture and regulate temperature, giving your tree a supportive environment as it settles in.
How Can You Tell if Your Transplanted Tree Is Struggling?
Moving a tree is a big event in its life, and it’s normal for it to show some signs of stress afterward. This adjustment period is often called “transplant shock,” and it happens when the tree’s root system is disturbed and has to work overtime to establish itself in a new home. The key is to recognize the signs early and give your tree the support it needs to recover. By paying close attention in the weeks and months following the move, you can catch potential issues before they become serious problems and help your tree thrive in its new spot.
Spot the Signs of Transplant Shock
After you’ve replanted your tree, keep a close eye on its leaves. They are often the first indicators of transplant shock. You might notice the leaves wilting, turning yellow, or curling at the edges. Some trees may even drop their leaves earlier than usual. This happens because the reduced root system struggles to pull in enough water to support the entire canopy, so the tree sheds leaves to conserve resources. While these symptoms can be alarming, they are common. Recognizing them is the first step toward helping your tree recover. If you’re unsure whether the signs are normal, consulting with a professional arborist can provide peace of mind.
Avoid These Common Mistakes
When you see your tree struggling, your first instinct might be to start pruning, but this can do more harm than good. Heavy pruning adds unnecessary stress when the tree needs to focus all its energy on re-establishing its roots. Only trim away branches that are clearly dead, damaged, or broken. Another common mistake is overlooking pests and diseases. A tree experiencing transplant shock is more vulnerable to attack, so be vigilant about checking for any unusual spots, insects, or fungi. Addressing these issues promptly will give your tree a much better chance of a full recovery.
Create a Post-Transplant Care Plan
A solid care plan is your best tool for helping a tree overcome transplant shock. Water is the most critical element. Since the tree has fewer roots to absorb moisture, you need to make sure the soil stays consistently damp but not waterlogged. Provide a deep watering that saturates the entire root zone right after planting, and continue to water it regularly throughout the first growing season. To help the soil retain that crucial moisture, apply a two- to three-inch layer of mulch around the base of the tree, making sure to keep it a few inches away from the trunk itself.
Monitor Your Tree’s Long-Term Health
Patience is essential when caring for a transplanted tree. It can take a full 12 to 24 months for a tree to fully recover and re-establish its root system. During this time, you might notice that it doesn’t grow as vigorously as other trees in your yard. This is completely normal. Continue your watering and care routine, and watch for signs of new, healthy growth, which is a great indicator that the tree is adapting well. If a full growing season passes and you don’t see any improvement, it may be time to seek professional tree care services to diagnose any underlying issues.
Related Articles
- How to Get Rid of Tree Roots: Your Complete Guide
- DIY Root Barrier Installation: A Complete Guide
- Tree Root Removal: A Step-by-Step DIY Guide
Frequently Asked Questions
Is it okay to move a tree in the summer? I would strongly advise against it. Moving a tree during the summer, especially in the Florida heat, puts it under extreme stress. The tree is actively growing and needs all its energy and water for its leaves, so uprooting it then is a major shock to its system. The ideal time is during the dormant season, which is late fall or winter, when the tree is resting and can focus its energy on root repair.
How big should the root ball be when I move a tree? Getting the right size root ball is crucial for the tree’s survival. A good general guideline is to measure the tree’s trunk diameter about six inches from the ground. For every inch of trunk thickness, you should plan for about 10 to 12 inches of root ball diameter. So, a tree with a two-inch trunk needs a root ball that is at least 20 to 24 inches wide to ensure you capture enough of the essential root system.
My tree’s leaves are yellowing after I moved it. Is it dying? Don’t panic just yet. It’s very common for a newly transplanted tree to show signs of stress, like yellowing or wilting leaves. This is called transplant shock, and it happens because the root system was disturbed and is struggling to supply enough water to the leaves. The best thing you can do is provide consistent care, especially with watering, to help it recover. Keep the soil moist but not soggy, and give it time to adjust.
How often should I water a newly transplanted tree? Consistent watering is the most important job after transplanting. You should give the tree a deep, slow soaking right after you plant it to settle the soil and eliminate air pockets. After that, check the soil every couple of days. You want to keep the root zone consistently moist, but not waterlogged. The frequency will depend on the weather, but plan on regular, deep waterings for at least the first full growing season to help the roots get established.
Can I move any size tree myself, or do I need a professional? This really depends on the tree’s size and your comfort level. A small, young tree is often a manageable DIY project if you have the right tools and a helping hand. However, as trees get larger and more established, the root ball becomes incredibly heavy and the process gets much more complex. If you’re dealing with a larger tree or one that is particularly valuable to your landscape, calling in a professional arborist is the safest and most effective choice.