How to Lay Pavers for Walkway: Step-by-Step
Here in Central Florida, our landscapes have to stand up to some serious weather, from blazing sun to heavy downpours. When you’re building a paver walkway, that means planning for water is non-negotiable. A path that looks beautiful on a sunny day can quickly become a soggy, shifting mess if it isn’t built to handle our rain. This guide is tailored for that reality. We’ll show you how to lay pavers for walkway projects with a special focus on creating a durable foundation and proper drainage. You’ll learn how to build a base that won’t wash out and a slope that directs water away from your home, ensuring your new walkway is as resilient as it is beautiful.
Key Takeaways
- Your Walkway Is Only as Strong as Its Base: Don’t cut corners on the foundation. A properly compacted, multi-layered gravel base is non-negotiable for preventing the shifting and sinking that ruins DIY projects. Take the time to compact each layer for a stable, long-lasting result.
- Control Water and Maintain Your Shape: Two things will ruin a walkway fast: poor drainage and spreading edges. Always build a slight slope into the foundation to guide water away from structures, and install edge restraints to keep your paver pattern tight and prevent the edges from creeping apart.
- Lock It All Together with Polymeric Sand: The final steps are what turn loose stones into a solid surface. Sweeping polymeric sand into the joints and then compacting the entire walkway is essential. This locks the pavers in place, prevents weeds, and creates a durable, professional finish.
Gather Your Materials and Tools
Before you can start laying your beautiful new walkway, you need to get all your ducks in a row. Proper preparation is the secret to a project that not only looks great but also lasts for years. Let’s walk through everything you’ll need to get started.
Choose the Right Pavers
First, the fun part: picking your pavers! The material you choose sets the entire tone for your walkway. Pavers come in various materials, including precast concrete, cut stone, and flagstone. Each type offers a different look and level of durability, so think about your home’s style and the overall vibe of your garden. Are you aiming for a rustic, natural path? Flagstone could be a perfect fit. If you prefer something sleek and modern, concrete pavers provide clean lines and consistent color. It’s also smart to consider how your choice will stand up to the Florida sun and rain. Exploring different hardscaping services can give you great inspiration for pairing materials with local landscape designs.
Get the Essential Tools for the Job
Having the right tools ready to go will make this project so much smoother. You’ll want to gather a few key items before you break ground. For the heavy lifting, you’ll need a plate compactor to create a solid, unshakeable base and a wheelbarrow for moving gravel and sand. For the detail work, make sure you have a rubber mallet to gently set the pavers, a level to check your work, and a straight edge for screeding the sand. Of course, you’ll also need the basics: a sturdy shovel, a tape measure, and some string and stakes to mark out your path. For larger projects that require significant digging, professional excavation services can ensure the site is prepared correctly from the start.
Safety First: What You’ll Need
Let’s make sure you stay safe while building your walkway. This job involves heavy materials and sometimes powerful equipment, so a few precautions are essential. Always wear the right gear: sturdy, closed-toe boots, heavy-duty gloves to protect your hands, and safety glasses to shield your eyes from flying debris. Before you begin, walk the area and clear any obstacles that could trip you up. Remember to lift with your knees, not your back, and stay hydrated—that Florida heat is no joke! A well-planned project is a safe one. Taking these steps seriously is just as important as any other part of the installation, whether you do it yourself or work with a professional landscape contractor to handle the job.
How Deep Should You Dig?
Getting the depth of your walkway foundation right is one of the most critical steps for a project that lasts. If you don’t dig deep enough, you risk pavers shifting or becoming uneven over time. Proper excavation is your best defense against future headaches. This isn’t just about making a hole in the ground; it’s about creating a solid base that can handle foot traffic and Florida’s weather without budging. A strong foundation is what separates a beautiful, long-lasting walkway from one that becomes a bumpy, uneven mess after a few seasons. Taking the time to get this part right will save you a lot of frustration down the road and ensure your hard work results in a path you can be proud of for years to come.
Follow Standard Depth Guidelines
As a general rule, plan to dig down about 7 to 8 inches for a standard walkway. This depth isn’t arbitrary—it’s calculated to accommodate all the necessary layers. You’ll need space for a 4- to 6-inch compacted gravel base, a 1-inch layer of sand, and the thickness of the pavers themselves. This multi-layer system gives your walkway its strength and stability. Following this guideline creates a robust foundation that distributes weight evenly and prevents individual pavers from shifting or sinking, ensuring your path remains smooth and level.
Factors That Change How Deep You Dig
While 7 to 8 inches is a great starting point, it’s not a one-size-fits-all number. The biggest factor that can change your digging depth is the thickness of your pavers—thicker pavers will naturally require a deeper dig. It’s also essential to remove all of the topsoil. That rich, dark soil is great for gardens but terrible for a foundation because it breaks down over time, creating soft spots that lead to sinking. You need to dig until you reach the firm subsoil. Proper hardscaping always starts with a solid, unyielding base.
Measure and Mark Your Walkway Area
Before you pick up a shovel, grab some marking paint or stakes and string. Planning and marking out the exact path of your walkway is a non-negotiable first step. Use spray paint to draw the outline directly on the grass for a clear visual guide. For perfectly straight lines, run a string between two stakes. This simple prep work ensures your walkway will have clean, professional edges and will be exactly where you envisioned it. This part of the landscape design process saves you from the frustration of a crooked path later on.
How to Prepare the Ground, Step-by-Step
A beautiful paver walkway is only as good as the foundation it’s built on. This is where the real work happens, and taking your time here will pay off for years to come. Rushing through ground preparation is the number one reason paver projects fail, leading to shifting, sinking, and uneven surfaces down the road. By following these steps carefully, you’ll create a solid base that ensures your walkway remains stable and attractive through every season. Think of it as setting the stage for a project you can be proud of.
It might not be the most glamorous part of the job, but a strong foundation is what separates a DIY project that lasts from one that needs redoing in a year or two. Without a properly prepared base, pavers can become a tripping hazard, water can pool and cause damage, and weeds can easily push their way through the cracks. A little extra effort now saves you a lot of headaches later. So, grab your gloves and let’s get into the nitty-gritty of creating a foundation that will support your beautiful new walkway for the long haul.
Plan and Mark Your Walkway’s Path
Before you pick up a shovel, you need a clear plan. Start by outlining your walkway’s path using stakes and string. For straight lines, run the string between stakes at either end. To make sure your corners are perfect 90-degree angles, measure the diagonals—if they’re equal, you’ve got a perfect square or rectangle. If you’re picturing a more organic, curved path, a garden hose is your best friend. Lay it on the ground to create the gentle curves you want, then mark the shape with spray paint. This simple step helps you visualize the final result and is a crucial part of any successful hardscaping project.
Dig Out the Area
Once your path is clearly marked, it’s time to start digging. Proper excavation is key to a long-lasting walkway. You’ll need to dig down about six to eight inches to make room for the gravel base, sand layer, and the pavers themselves. As you dig, make sure to remove all the grass, roots, and topsoil, creating a clean slate. It’s also important to build a slight slope into the foundation, about a quarter-inch drop for every foot of width, directing water away from your home or other structures. This ensures proper drainage and prevents water from pooling on your new walkway.
Build a Stable Gravel Base
With the area cleared, you can begin building the foundation. Start by adding a layer of crushed gravel, often called road base, that is about four to six inches deep. Don’t dump it all in at once. The best method is to add the gravel in two-inch layers, thoroughly compacting each one before adding the next. You can use a hand tamper for smaller areas or rent a plate compactor for a more efficient and effective result. This compacted gravel base is what provides the primary stability for your walkway, preventing the pavers from shifting or sinking over time.
Install Edge Restraints
To keep your pavers locked in place and prevent them from spreading apart over the years, you’ll need to install edge restraints. These are typically made of durable plastic or metal and are installed along the perimeter of your excavated area. Secure them into the ground with long metal spikes, following the manufacturer’s instructions. Edge restraints are absolutely essential for maintaining the structural integrity and clean lines of your walkway, especially along any edges that aren’t up against a solid surface like a concrete patio or driveway. This step ensures your hard work looks great for years to come.
Compact the Foundation
The final step in preparing the ground is one last, thorough compaction. After your gravel base is laid and leveled, go over the entire area with a plate compactor. This powerful tool pounds the gravel into a dense, solid foundation that won’t settle or shift. Proper compaction is what prevents your finished walkway from developing dips, waves, or uneven spots. Taking the time to create a rock-solid base ensures your paver walkway will be smooth, durable, and ready to handle foot traffic and weather without any issues. It’s the professional touch that makes all the difference.
Get the Slope Right for Proper Drainage
One of the most common mistakes in a DIY paver project is overlooking drainage. It might seem like a minor detail, but getting the slope right is what separates a beautiful, long-lasting walkway from one that becomes a waterlogged headache. In a place like Central Florida, where heavy rain is a regular occurrence, managing water flow is non-negotiable. A properly graded walkway directs water away from your home’s foundation, preventing potential damage and keeping your property safe and dry. Without the right slope, you risk creating a path that holds water, leading to shifting pavers, moss growth, and a perpetually soggy yard. This step is your best defense against the elements, ensuring your hard work pays off for years to come. While a well-sloped walkway is a great start, if you’re dealing with more significant water issues across your property, professional drainage solutions can address the root cause and protect your entire landscape investment. Getting the drainage right from the beginning is far easier than trying to fix it later, so let’s walk through how to do it correctly. It’s a crucial part of the foundation that supports every paver you lay.
Why Good Drainage Is a Game-Changer
Good drainage is the unsung hero of a great paver walkway. When your walkway has the correct slope, rainwater doesn’t pool on the surface, creating slippery spots or mosquito breeding grounds. Instead, it flows away harmlessly. Pavers are a great choice for this because they naturally allow some water to trickle through the joints and into the ground, which helps reduce runoff. This protects your surrounding garden beds from erosion and prevents water from collecting against your house. Taking the time to plan for drainage now saves you from dealing with shifting pavers, foundation issues, and a soggy yard later.
Create the Correct Slope
Creating the right slope isn’t complicated, but it does require precision. The goal is to build a gentle, almost unnoticeable grade that directs water away from any buildings. A good rule of thumb is to create a slope of about ¼ inch for every foot of walkway. So, if your walkway is four feet wide, the outer edge should be about one inch lower than the edge closest to your house. It’s crucial to establish this slope in your gravel and sand base layers, not just when you lay the final pavers. This ensures the entire foundation is stable and properly angled for drainage.
Test Your Slope Before Laying Pavers
Before you even think about laying the first paver, you need to check your work. The easiest way to test your slope is with a long, straight 2×4 board and a carpenter’s level. Lay the board across the width of your prepared base. Place the level on top of the board. The bubble should be slightly off-center, indicating a gentle slope. You can also use stakes and string lines set at the correct height on either side of the path to serve as a visual guide. Taking a few extra minutes to verify your slope will give you peace of mind and a professional-quality result.
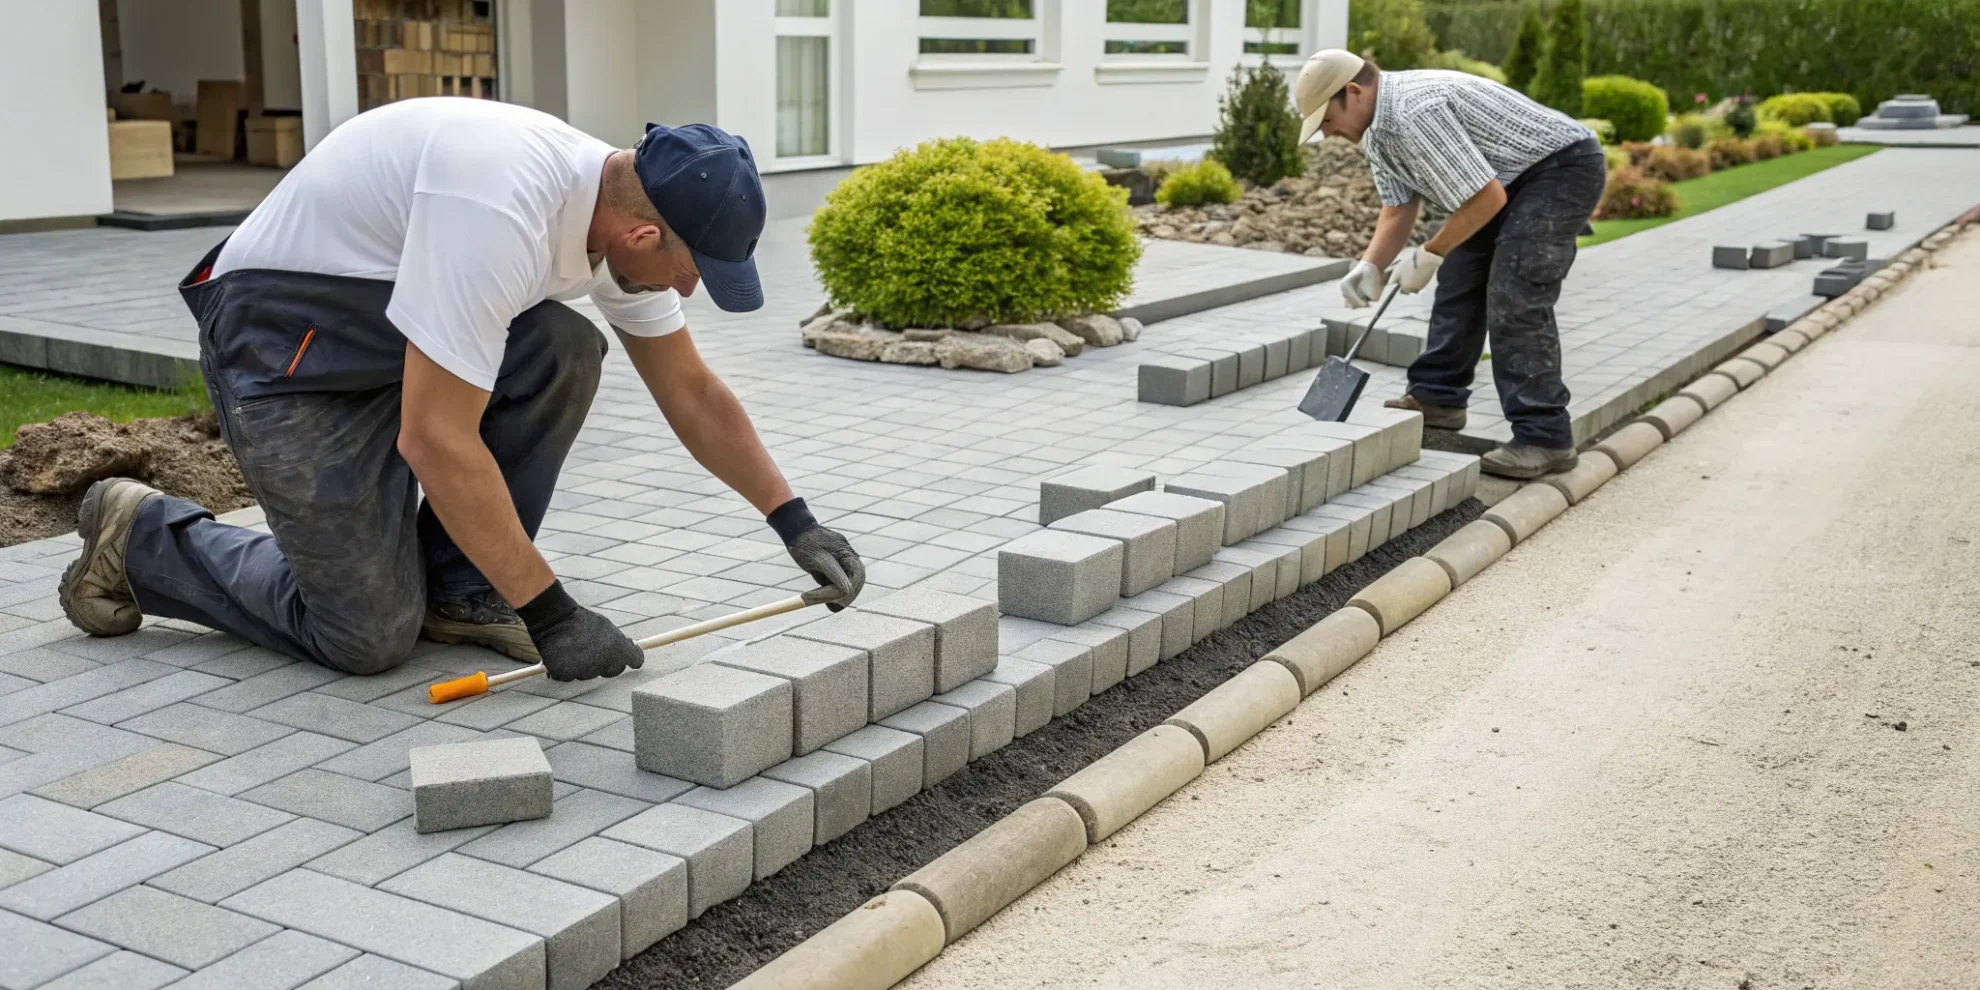
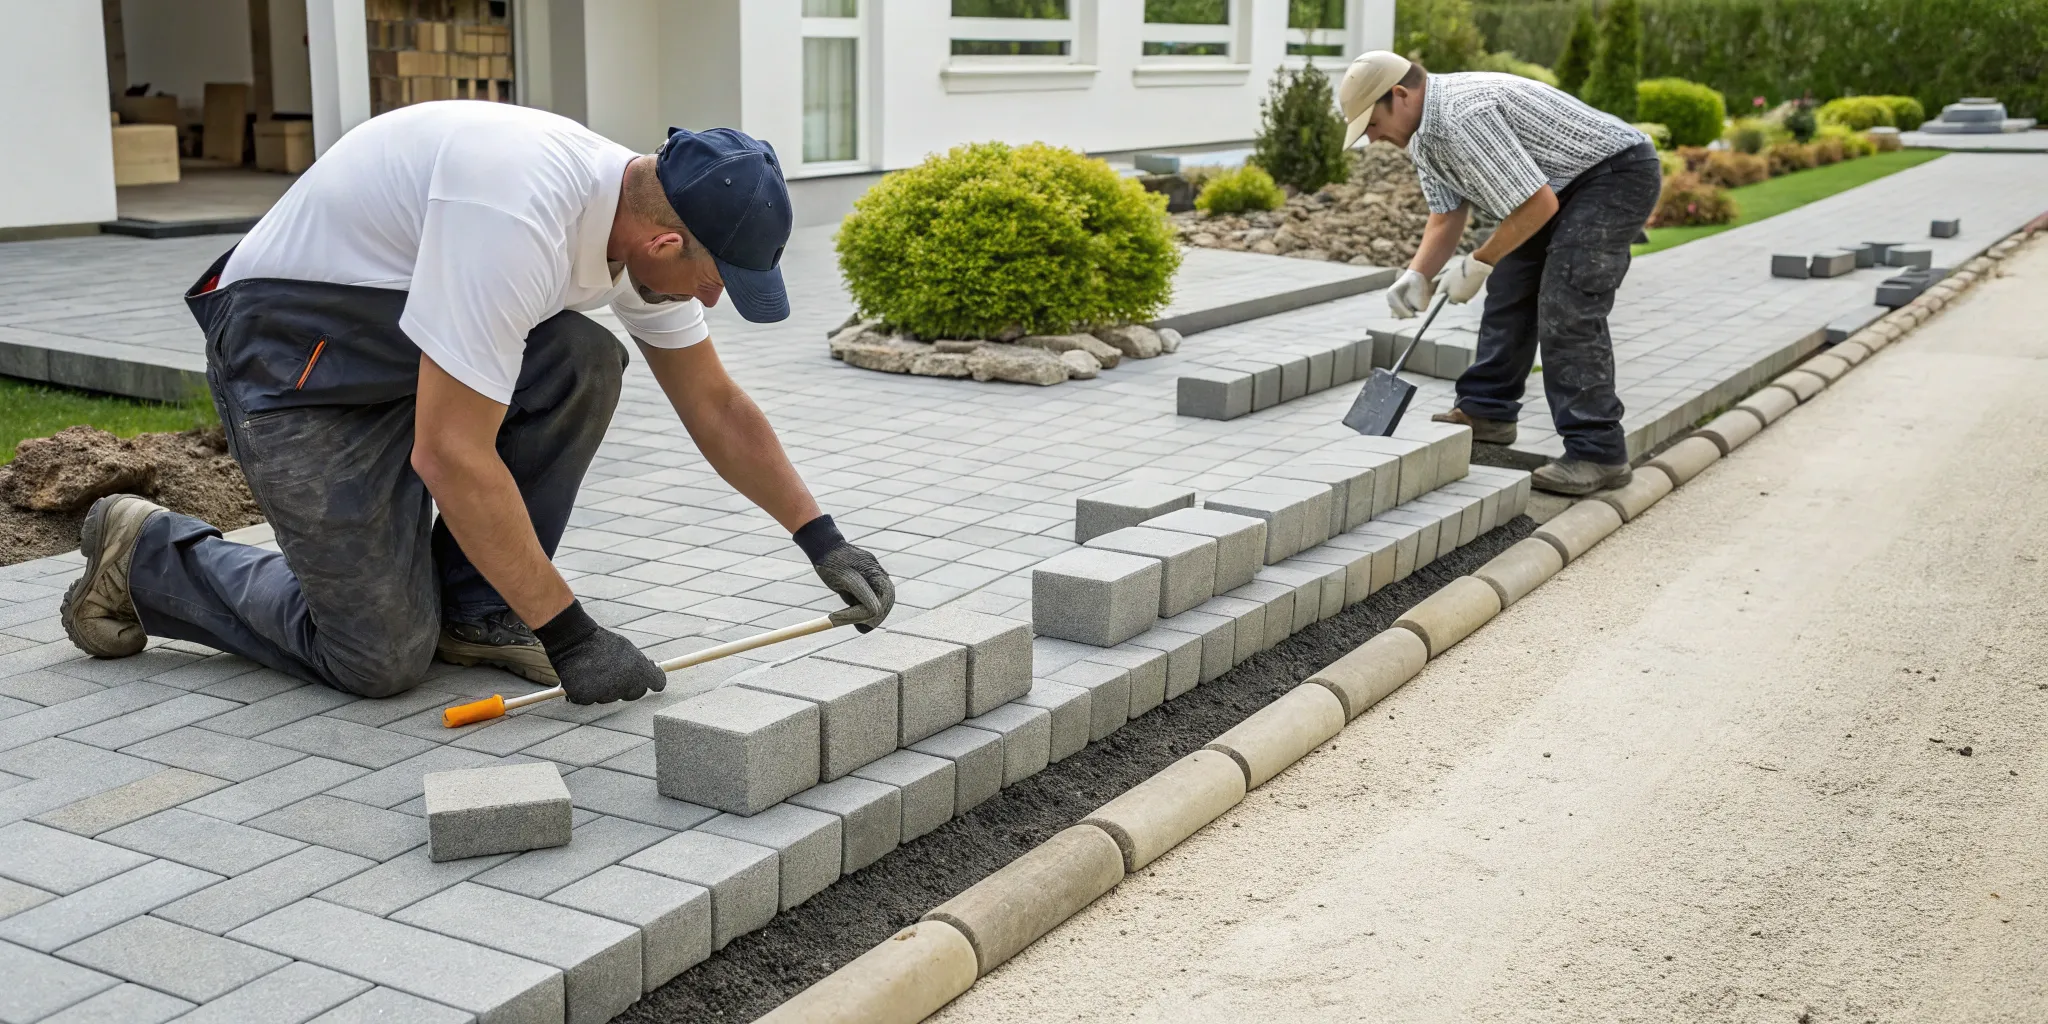
How to Lay Pavers Like a Pro
This is where your vision starts to become a reality. Laying the pavers is a satisfying process, but it requires patience and a bit of technique to get that polished, professional look. A well-laid paver walkway not only looks fantastic but is also a durable part of your landscape. Taking your time here ensures your new walkway will be level, stable, and beautiful for years to come. If you’re looking for a team to handle the heavy lifting, our hardscaping services can create the perfect path for your property.
Pick a Pattern You Love
Before you lay a single stone, decide on a pattern. This choice affects the entire look and feel of your walkway. Classic options like running bond or herringbone create timeless appeal, while a basketweave pattern can add a more decorative touch. You can find plenty of paver pattern ideas to get inspired. The main pavers in the middle of your project are called “field pavers,” and your chosen pattern will guide how you place each one. Sketching it out beforehand helps you visualize the final result and plan your cuts for the edges.
Lay a Straight First Row
Your first row sets the standard for the entire project, so it’s crucial to get it right. Start by laying your pavers against a fixed, straight edge, like the foundation of your house or the side of your driveway. This gives you a solid, straight line to build from. As you place each paver, leave a small, consistent gap of about 1/4-inch between them. These gaps are important because they’ll be filled with sand later to lock everything together. Don’t slide the pavers into place on the sand bed; gently set them down to keep the surface perfectly level.
Place Pavers and Mind the Gaps
Work your way out from your first row, placing pavers one by one according to your chosen pattern. The key is to work from the section you’ve already laid, so you aren’t stepping on the prepared sand bed. Gently place each paver straight down—this prevents you from disturbing the sand and creating low spots. Use the small bumps on the sides of the pavers, called spacer bars, to maintain consistent gaps between each stone. These gaps are essential for the jointing sand, which you’ll sweep in later to create a strong, interlocking surface.
Use String Lines to Keep It Level
To ensure your walkway is perfectly flat and even, use string lines as a guide. Run strings along the edges of your walkway area, staked down and pulled tight. Set the string to the height of your finished paver surface. This simple trick gives you a constant visual reference, helping you see if any pavers are sitting too high or too low. You can check your work against the string line as you go, making small adjustments to the sand bed underneath as needed. This is a pro tip that makes a huge difference in the final quality.
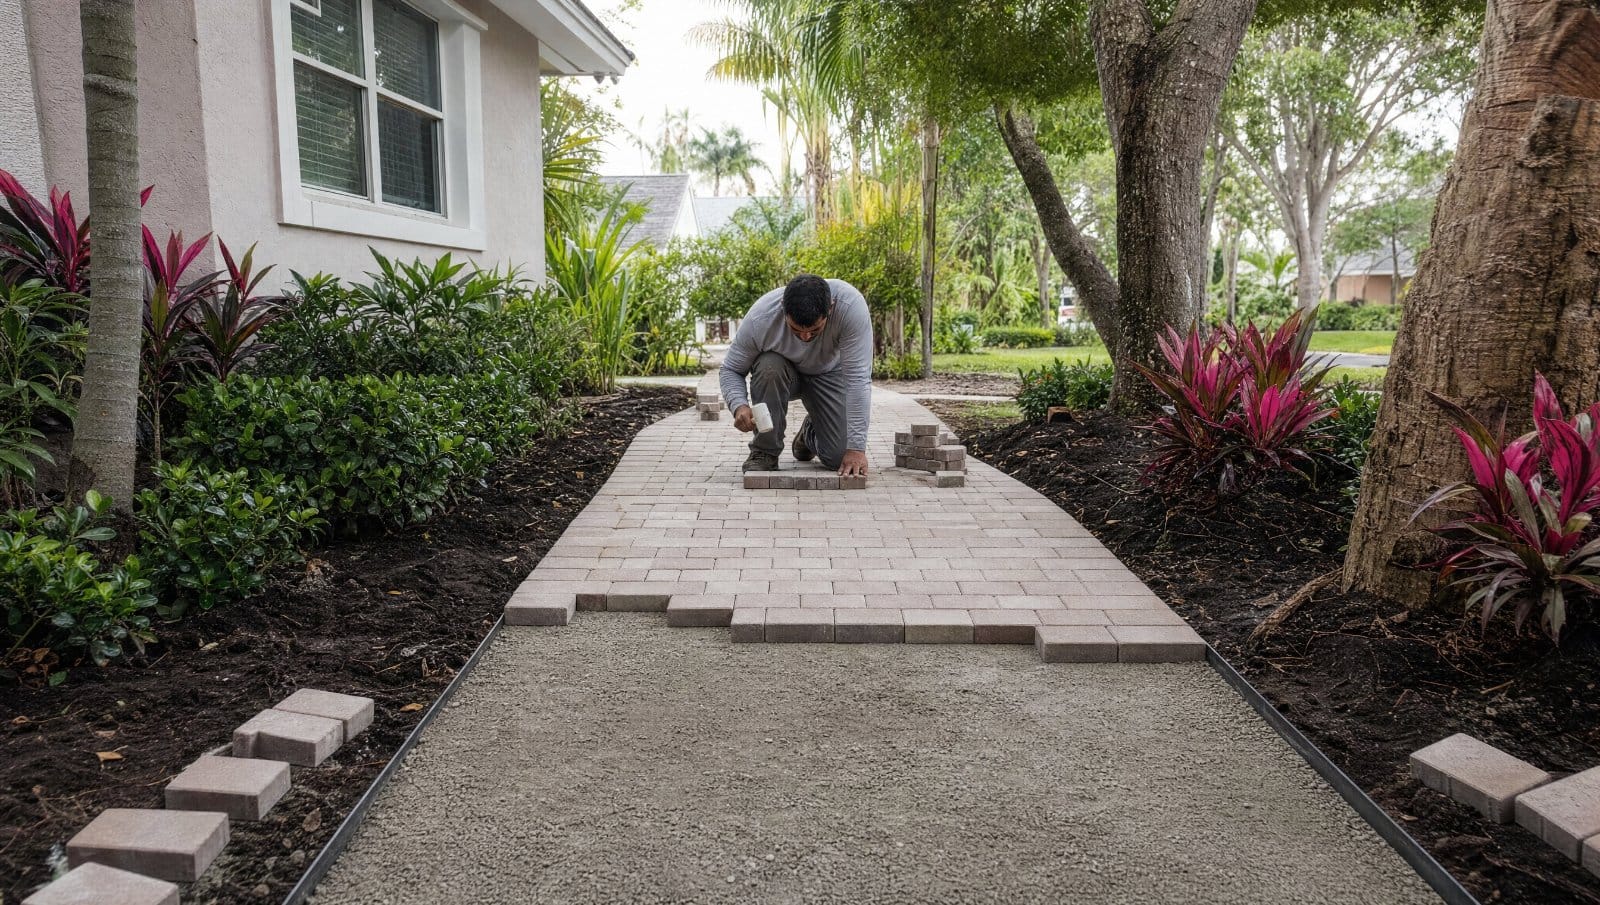
Cut Pavers to Fit Edges and Curves
Unless your project is a perfect rectangle, you’ll need to cut some pavers to fit along the edges or around curves. This is what gives your walkway a clean, custom-finished look. For straight cuts, you can use a circular saw fitted with a concrete or diamond blade. For more complex cuts or a large number of pavers, a rented wet saw is a great option because it reduces dust and makes smoother cuts. Always measure twice and cut once. Mark your cut line clearly with a pencil, and be sure to wear safety glasses and a mask to protect yourself from dust and debris.
Lock Your Pavers in Place
You’re on the home stretch! Your pavers are laid out, and your walkway is taking shape. Now it’s time for the final, crucial steps that will lock everything together, ensuring your hard work lasts for years. This finishing process is what separates a good-looking walkway from a great one that stands up to foot traffic and Florida weather. By properly filling the joints and compacting the surface, you prevent the pavers from shifting, stop weeds from popping up in the cracks, and give your project a polished, professional look. It might seem like a small detail, but getting this part right is non-negotiable for a durable and beautiful result. These final touches are a key part of professional hardscaping services, and they make all the difference in the longevity of your walkway. Let’s walk through how to secure your pavers for good.
Fill the Joints with Sand
With your pavers in place and any edge restraints set, it’s time to fill the gaps. This step is what truly locks the individual stones together into a single, solid surface. Grab a bag of sand—we’ll talk about which kind in a moment—and pour it over your paver walkway. Using a push broom, sweep the sand across the surface, working it into every joint and crevice. Don’t be shy here; you want to make sure every gap is completely filled from bottom to top. Go over the area from different angles to ensure no spot is missed. This sand is the glue that will hold your entire project together.
Polymeric vs. Regular Sand: What to Choose
When you get to the hardware store, you’ll see a few sand options. For paver joints, polymeric sand is the best choice by a long shot. Unlike regular sand, it contains special polymers that activate with water. Once you lightly mist the area, the sand hardens to form a firm, flexible bond. This is what locks your pavers tightly in place, prevents them from shifting, and does a fantastic job of keeping weeds from growing through the cracks. While regular sand can wash out over time, polymeric sand stays put, meaning less maintenance for you down the road. It’s a small upgrade that delivers big results in durability.
Compact the Pavers One Last Time
After you’ve swept the polymeric sand into the joints, it’s time for one final round of compaction. Gently run the plate compactor over the entire walkway again. This does two important things: it vibrates the sand, helping it settle deep into the joints for a tight fit, and it helps to set the pavers firmly into the bedding sand below. This final pass ensures that the entire surface is level, stable, and ready to withstand years of use. It’s the step that truly interlocks all the components of your walkway, from the base layer to the paver surface.
Sweep the Surface Clean
Before you introduce any water, it’s absolutely critical to get every last grain of excess sand off the paver surfaces. Use your broom to sweep the walkway thoroughly. For the best results, follow up with a leaf blower, paying close attention to the corners and textured surfaces of the pavers. Any polymeric sand left on top of the pavers will harden when it gets wet, leaving a permanent, hazy residue. Take your time with this step to ensure a clean finish. Once the surface is completely clear, you can lightly mist the walkway with a hose to activate the sand, following the manufacturer’s instructions.
Common Paver Mistakes to Avoid
You’ve put in the hard work to plan, dig, and lay your pavers. The last thing you want is to see your beautiful walkway become a wavy, weed-filled mess in a year. Many common DIY paver projects fail not because of the pavers themselves, but because of a few critical missteps during installation. Taking the time to get the foundation, drainage, and finishing touches right will make all the difference between a walkway that lasts for a season and one that lasts for decades.
Even the most carefully laid pavers can fail if the prep work isn’t solid. If you’re feeling unsure about any of these steps, remember that getting professional help with your hardscaping projects can save you a lot of headaches down the road. Let’s walk through the most frequent mistakes so you can steer clear of them.
A Weak or Uneven Foundation
The long-term stability of your walkway depends entirely on the base you build beneath it. A weak or uneven foundation is the number one reason pavers shift, sink, and become uneven over time. Simply digging out the soil and throwing down some sand isn’t enough. It’s crucial to properly compact each layer of your base material. You need to “use a steel tamper or rent a gas plate compactor to ensure a firm base before laying the pavers.” Without a densely compacted foundation, your pavers will settle unevenly as the ground shifts, creating an unstable surface and potential tripping hazards. This is the most important step for ensuring your walkway looks great for years to come.
Forgetting About Drainage
Water can be your paver walkway’s worst enemy if you don’t plan for it. Proper drainage is essential for preventing erosion, shifting, and water damage to your home’s foundation. A major mistake is failing to create a gentle slope to direct water away from structures. A good rule of thumb is to build a slight slope of about 1/8 inch for every foot, ensuring water runs off the surface instead of pooling. Failing to properly compact the gravel base or the bedding sand also creates drainage issues, leading to pavers sinking as water settles underneath. Taking the time to get the slope right is a non-negotiable step for a durable and long-lasting walkway.
Rushing the Final Steps
It’s tempting to speed through the final steps when the finish line is in sight, but this is where the project all comes together. After laying the pavers, you need to lock them in place with jointing sand. Using polymeric sand is a great choice because it hardens when wet, which helps secure the pavers and prevent weeds from growing in the cracks. Once you’ve swept the sand into the joints, don’t skip the final compaction. As this helpful video guide shows, running a plate compactor over the finished walkway helps settle the sand deep into the joints, creating a strong, interlocking surface. Rushing this process will result in a less stable walkway that’s more prone to weeds and movement.
Keep Your Paver Walkway Looking Great
Now that you’ve put in the work to create a stunning paver walkway, you’ll want to keep it looking its best. The good news is that maintenance is pretty straightforward. A little bit of regular care will protect your investment and ensure your walkway remains a beautiful feature of your property for years to come. From simple sweeping to tackling pesky weeds, these tips will help you maintain that fresh, professional look. If you ever feel like your outdoor space needs a bigger refresh, remember that professional hardscaping services can always help bring a new vision to life.
Your Simple Cleaning Routine
Keeping your paver walkway clean doesn’t have to be a huge chore. A simple, regular routine is all you need. Make it a habit to sweep away leaves, dirt, and other debris with a stiff-bristled broom. If you have gravel or pebbles alongside your pavers, a rake can help keep the stones smooth and off the walkway itself. For a quicker cleanup, a leaf blower on a low setting works wonders to clear away leaves without scattering your decorative stones. This small amount of effort goes a long way in preventing stains and buildup, keeping your walkway looking tidy and inviting.
How to Prevent Weeds
Weeds popping up between pavers can be frustrating, but there’s a fantastic solution: polymeric sand. Unlike regular sand, this product contains a special polymer that hardens when wet, locking the pavers together and creating a durable barrier that makes it tough for weeds to sprout. When you first install your walkway, using polymeric sand in the joints is a game-changer. To keep that protection strong, you may need to reapply the sand every few years, especially if you notice any cracks or new weed growth. It’s a simple step that saves you a lot of weeding time later on.
Touch-Ups: Refilling Joints and Leveling Pavers
Over time, you might notice a paver has settled a bit or the sand in the joints has washed away. These minor touch-ups are easy to handle. To refill the joints, just sweep more polymeric sand over the surface until the gaps are full. Then, lightly mist the area with water to activate the polymers and lock everything in place. If a paver has become uneven, you can lift it out, add a little more sand underneath to level it, and set it back in place. These small fixes help maintain the structural integrity of your walkway and keep it looking flawless.
Related Articles
- Patio Installation 101: Your Ultimate DIY Guide
- How to Build a Wall with Concrete Blocks: A DIY Guide
Frequently Asked Questions
Is renting a plate compactor really necessary for this project? I know it can feel like an extra step, but yes, it’s absolutely essential. A plate compactor does a job that simple hand-tamping can’t replicate. It creates an incredibly dense and stable foundation by forcing the gravel and sand particles together. This is your best defense against pavers shifting, sinking, or becoming uneven over time. Skipping this step is the most common reason DIY walkways fail, so think of it as the key to making sure your hard work lasts for years.
What should I consider when choosing pavers for the Florida climate? When you’re picking out pavers here in Florida, durability is key. You’ll want a material that can stand up to intense sun without fading and handle our heavy rains without becoming overly slippery or stained. Look for dense materials like concrete pavers or certain types of natural stone that are rated for outdoor use. It’s also smart to consider color—lighter shades can stay cooler to the touch, which is a nice bonus for a path you’ll be walking on barefoot.
Will I have to deal with weeds growing between my pavers forever? You don’t have to! The secret weapon against weeds is using polymeric sand to fill the joints. Unlike regular sand that can wash away and leave room for seeds to sprout, polymeric sand contains a binding agent. When you lightly water it, it hardens to form a firm yet flexible seal. This creates a powerful barrier that locks the pavers together and makes it extremely difficult for weeds to push through.
What’s the best way to create a smooth, curved walkway? Creating beautiful curves is all about planning and precision cutting. Start by laying out your desired curve with a flexible garden hose to get the shape just right, then mark it with spray paint. As you lay your pavers, you’ll place them up to this line. The final step is to rent a wet saw to custom-cut the edge pavers to fit your curve perfectly. This gives you that clean, professional edge instead of large, clunky gaps.
What if I lay a paver and it’s not perfectly level? Don’t worry, this is an easy fix and a normal part of the process. If a paver is sitting too high or too low, simply lift it back out. Use a small trowel to add or remove a bit of the bedding sand underneath until you get the height just right. Then, gently set the paver back in place and check it with your level. It’s much better to make these small adjustments as you go rather than trying to fix an entire section later.