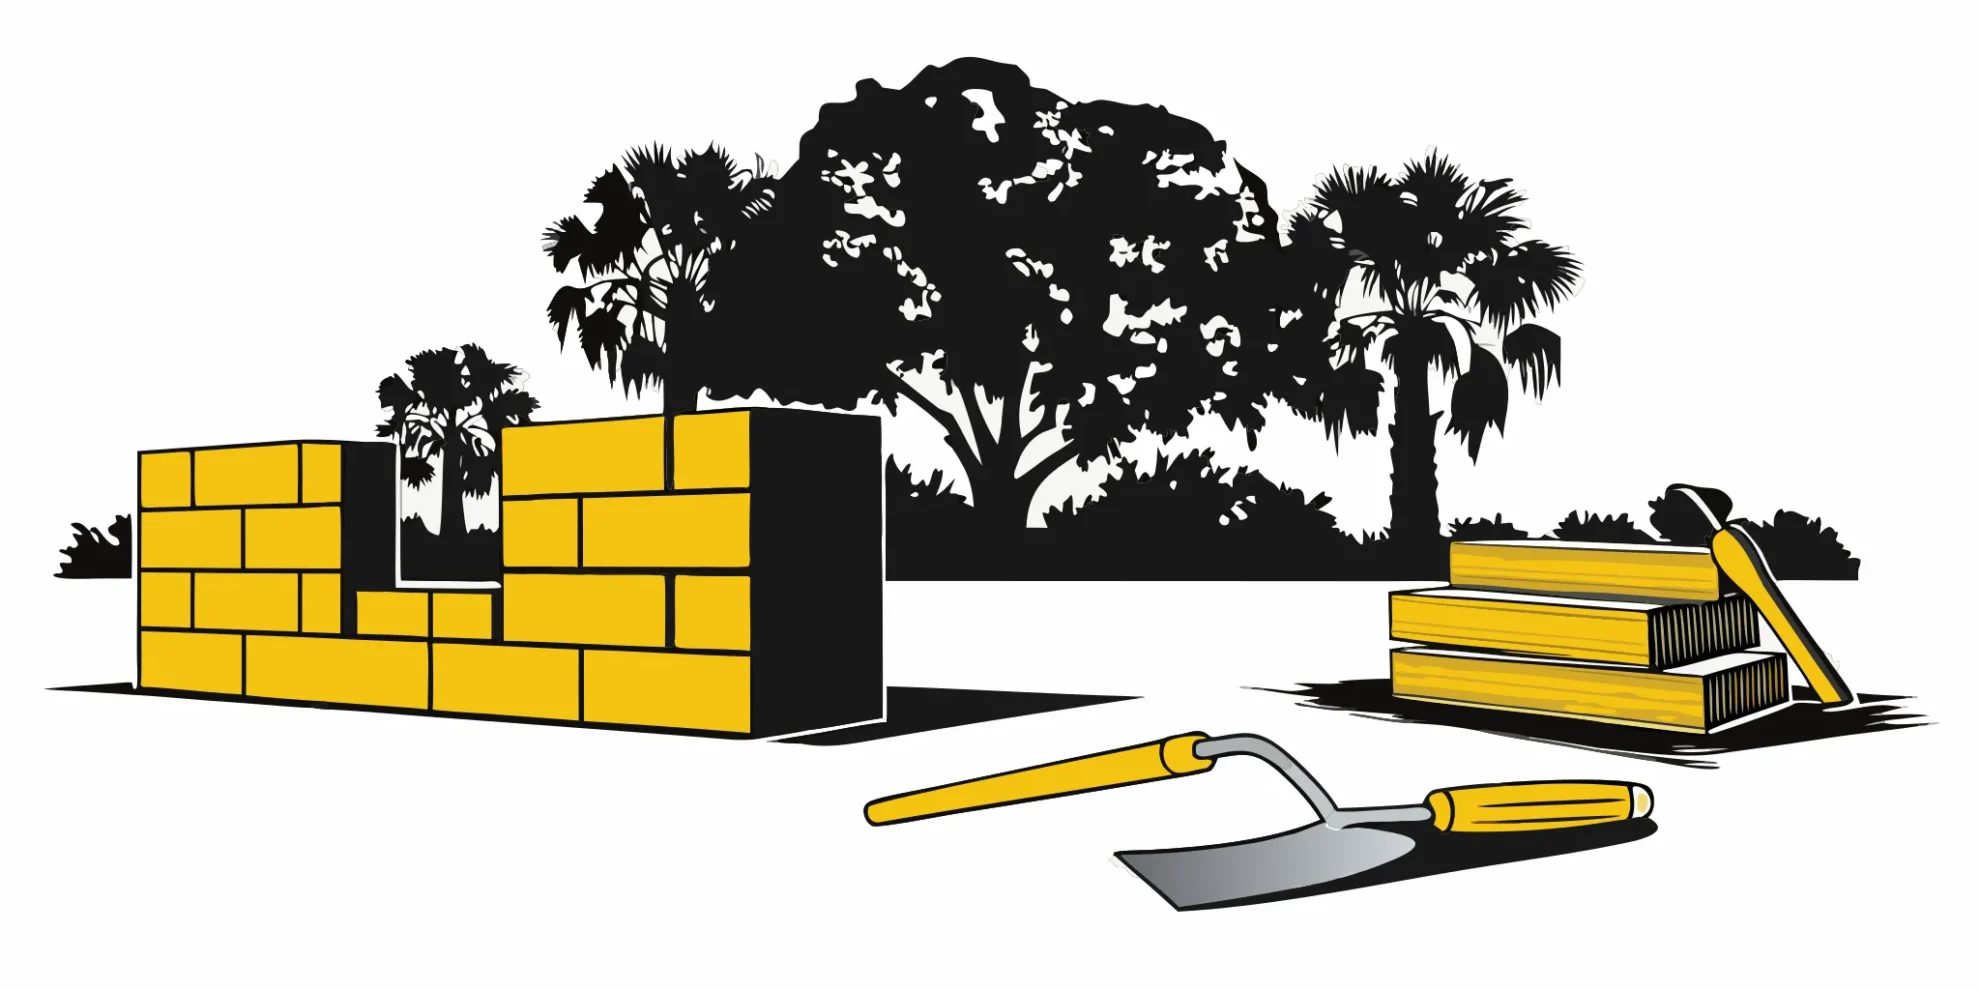
Building a Wall with Concrete Blocks: Step-by-Step
Let’s be honest: the idea of building a wall with concrete blocks can feel a little intimidating. It’s a serious construction project involving heavy materials and precise measurements, and it’s easy to feel like you’re in over your head before you even start. But here’s the good news: with the right instructions, it’s a completely achievable DIY project. This guide is designed to demystify the process, breaking it down into simple, step-by-step instructions. We’ll show you how to plan your layout, pour a solid foundation, and stack each block perfectly. You don’t need to be a professional mason to get a professional result.
Key Takeaways
- Master the Prep Work First: The success of your wall is determined before you lay the first block. A perfectly level concrete footing, a clear understanding of local permit rules, and having all your tools ready are the non-negotiable steps for a project that’s built to last.
- Work Methodically and Safely: Building a straight, strong wall is all about consistency. Mix your mortar to a smooth, peanut-butter texture, use a level and string line on every single course, and always prioritize safety by wearing the right gear and lifting heavy blocks correctly.
- Protect Your Hard Work for the Long Haul: A finished wall needs protection to endure the elements. Taking the time to properly finish the mortar joints, apply a waterproof sealer, and perform regular inspections will ensure your project remains a durable, long-lasting feature.
What Tools and Materials Will You Need?
Before you can lay the first block, a little preparation goes a long way. Gathering all your tools and materials ahead of time is the secret to a smooth, successful project. There’s nothing more frustrating than having to stop mid-task for an emergency run to the hardware store. Think of this as setting up your workshop—having everything within arm’s reach makes the entire process more efficient and enjoyable.
This guide covers the essentials for a standard block wall, like a garden bed or a small decorative barrier. However, if your plans involve a taller, load-bearing structure, it’s important to recognize when a project requires professional expertise. Large-scale projects often involve complex considerations like soil stability and proper drainage to ensure they last. For those bigger jobs, working with experienced professionals on retaining wall installation can save you time and guarantee the structure is built safely and correctly. For now, let’s focus on what you’ll need for a straightforward DIY wall.
Your Material Checklist
Getting your materials right is the foundation of a strong, durable wall. You can’t just grab any bag of cement and expect it to work. Different mixes serve specific purposes, from creating a solid base to binding the blocks together. Here’s a list of the core materials you’ll need to pick up:
- Concrete Mix: A high-strength mix is perfect for creating the footing—the underground base that your wall will sit on. This provides a stable platform to build upon.
- Gravel: This is used in the trench for your footing. It helps with drainage and prevents water from pooling around the base of your wall, which is crucial for preventing cracks from frost heave.
- Mason Mix: Think of this as the glue for your blocks. It’s the mortar you’ll spread between each course to hold everything together securely.
- Core Fill Grout: If you’re building a structural wall that needs extra strength, you’ll use this to fill the hollow cores of the concrete blocks.
The Right Tools for the Job
Having the proper tools doesn’t just make the job easier; it helps you achieve a professional-looking result. You don’t need a massive collection, but a few key masonry tools are non-negotiable for getting straight lines and strong joints. Here are the essentials to have on hand:
- Mixing Tools: A wheelbarrow or a large plastic mixing tub and a sturdy mixing hoe are essential for preparing your mortar and concrete.
- Measuring and Leveling Tools: A tape measure, a 4-foot level, and a mason’s line with line blocks are your best friends for keeping the wall straight, level, and plumb.
- Masonry Tools: A brick trowel is used to scoop and spread mortar onto the blocks. After you’ve laid a few blocks, you’ll use a jointing tool to create clean, finished mortar joints.
- General Tools: A shovel for digging, a stiff brush for cleaning, and a hammer will also be necessary.
Essential Safety Gear
Let’s talk about the most important part of any project: keeping yourself safe. Working with concrete and heavy blocks comes with risks, but they are easy to manage with the right protective gear. Cement products can be caustic to your skin and eyes, and the dust can be harmful to breathe in. Don’t even think about starting until you have this gear ready:
- Eye Protection: Always wear safety glasses or goggles. Mixing concrete can kick up dust and debris, and you definitely don’t want any of it in your eyes.
- Gloves: Waterproof gloves are a must. They protect your hands from scrapes and prevent the wet cement from causing skin irritation or chemical burns.
- Mask: A dust mask is crucial when you’re mixing dry concrete or mortar to avoid inhaling fine particles.
- Sturdy Clothing: Wear long sleeves, pants, and closed-toe boots to protect your skin and feet from spills and falling objects.
How to Plan Your Project
A successful project always starts with a solid plan. Taking the time to map out your wall, understand its foundation needs, and calculate your materials will save you from headaches and extra trips to the hardware store later. Think of it as creating a roadmap for your build. When you know exactly where you’re going, the journey is much smoother. This planning phase is where you answer the big questions about size, location, and supplies, ensuring your wall is strong, straight, and built to last. Let’s walk through the three essential steps to get your project started on the right foot.
Measure and Map Your Layout
First things first, you need to know exactly where your wall will go. Use wooden stakes and string to create a clear outline of the wall’s perimeter on the ground. This simple step helps you visualize the final placement and ensures your lines are straight.
Once you have your outline, do a dry run with the first course of blocks. Lay them out along the string line without any mortar. Be sure to leave a 3/8-inch space between each block to account for the mortar joint—the blocks are made slightly smaller for this reason. This dry layout lets you check your measurements and see how the blocks fit before you commit. For projects on sloped ground or with complex designs, a professional landscape design can ensure your layout is perfect from the start.
Define Your Foundation Needs
Your wall is only as strong as the ground it stands on, which is why a proper foundation, or footing, is non-negotiable. The footing is a concrete base that distributes the wall’s weight and prevents it from shifting or settling over time. A good rule of thumb is that the footing should be at least twice as wide as your blocks. So, for a standard 8-inch block, you’ll need a 16-inch wide footing.
The depth is just as important. You need to dig down past the topsoil to reach stable, undisturbed earth. If your wall will hold back soil, it’s considered a retaining wall, which has specific structural needs. These often require a special layer to stop moisture from seeping in and weakening the structure. For these more demanding projects, working with a retaining wall installation expert is the safest bet.
Calculate How Many Blocks You Need
Now it’s time for a little math—don’t worry, it’s straightforward. To figure out how many blocks you need, start by calculating the number of blocks for a single row (or course). Measure the total length of your wall in inches and divide it by the length of one block plus the 3/8-inch mortar joint (e.g., 16 inches + 0.375 inches).
Next, determine how many courses you’ll need to reach your desired height. Divide the total wall height in inches by the height of one block plus its mortar joint. Multiply the number of blocks per course by the total number of courses, and you’ll have your grand total. It’s always a smart idea to add about 10% to your final count to cover any blocks needed for cuts or accidental breaks.
How to Stay Safe While Building
Building a concrete block wall is a fantastic project, but it’s also serious construction work. The materials are heavy, the mortar can be messy, and the process is physically demanding. Putting safety first isn’t just a good idea—it’s essential to prevent injuries and ensure your finished wall is strong and stable. A little preparation goes a long way in protecting yourself and making the project go smoothly.
Before you even mix your first batch of mortar, take the time to think through the potential risks. This means getting the right personal protective equipment (PPE), setting up a clean and secure work area, and knowing how to handle heavy blocks without straining your back. These steps are just as important as getting your measurements right. If the scope of the project feels overwhelming or you’re concerned about the physical demands, remember that calling in a professional for retaining wall installation is always a smart option. A pro team has the experience and equipment to get the job done safely and efficiently.
Wear the Right Protective Gear
Working with concrete and mortar requires specific gear to protect you from chemical burns, dust, and injuries. At a minimum, you should always wear eye protection and waterproof gloves. Cement-based products can irritate your skin, and you definitely don’t want dust or splashes getting in your eyes.
Beyond that, a good pair of steel-toed boots is a must-have to protect your feet from falling blocks. A dust mask is also crucial, especially when you’re mixing dry mortar, to avoid inhaling fine particles. Think of this gear as your uniform for the job—don’t start working without it. It’s a simple step that can save you from a lot of pain later.
Prepare a Safe Workspace
A clean and organized worksite is a safe worksite. Start by clearing the area of any potential hazards like rocks, tools, or yard debris that could cause you to trip while carrying a heavy block. It’s also important to keep children and pets away from the construction zone entirely.
Before you dig, you should also check with your local building department to see if any special permits are required for your wall. They can also provide information on property lines and other regulations. Finally, make sure you know what’s underground. You can call 811 before you dig; it’s a free service that marks the location of buried utility lines, preventing a dangerous and costly accident.
Lift and Handle Blocks Safely
Let’s be honest: lifting concrete blocks all day is tough work. As one DIYer put it, “It’s very hard on your body, especially your back.” To avoid injury, always lift with your legs, not your back. Keep your back straight, bend your knees, and hold the block close to your body. Avoid twisting your torso while carrying a block; instead, turn your feet to change direction.
If you’re moving a lot of blocks, use a wheelbarrow to transport them from the stack to your work area. Better yet, ask a friend to help. Having an extra set of hands makes the work go faster and significantly reduces the strain on your body.
How to Prepare the Foundation
A strong wall starts with a solid foundation. Think of it as the anchor for your entire project—if you get this part right, everything else will fall into place much more easily. Taking the time to properly prepare the ground ensures your wall will stand straight and strong for years to come, resisting shifting soil and the heavy Florida rains. It’s a step you definitely don’t want to rush.
Excavate and Prep the Site
First things first, you need to clear and dig out the area for your wall’s footing. Start by marking the wall’s layout with stakes and string. Then, clear away any grass, plants, or debris. You’ll need to dig a trench that’s at least twice as wide as your concrete blocks and deep enough to create a stable base. For example, an 8-inch block needs a 16-inch-wide footing. While Florida doesn’t have a deep frost line like northern states, you still need to dig down to firm, undisturbed soil. If you’re dealing with uneven ground or a large project, professional excavation services can save you a ton of time and physical effort, ensuring the trench is perfectly level and ready for concrete.
Pour and Level the Footing
With your trench dug, it’s time to pour the concrete footing. This solid base will distribute the wall’s weight and prevent it from sinking or shifting. You can mix bagged concrete in a wheelbarrow or rent a mixer for bigger jobs. Pour the concrete into the trench, spreading it evenly with a shovel or rake. As you fill the trench, use a long, straight 2×4 in a back-and-forth sawing motion to level the surface. It’s absolutely critical that this footing is perfectly level, as any imperfections will be magnified as you build the wall higher. Let the concrete cure completely based on the manufacturer’s instructions, which usually takes a few days.
Add Moisture Barriers and Drainage
Water is the biggest enemy of any structure, and in Central Florida, we see plenty of it. To protect your wall, you need to manage moisture from the ground up. Before you lay the first block, place a damp-proof course or moisture barrier on top of the cured footing. This prevents groundwater from wicking up into your blocks, which can cause damage over time. It’s also smart to plan for surface water. Installing proper drainage solutions, like a French drain along the base of the wall, will direct rainwater away and prevent pressure from building up. This step is key to ensuring your wall’s long-term stability and integrity.
How to Mix the Perfect Mortar
Think of mortar as the glue that holds your entire concrete block wall together. Getting the mix right is one of the most critical steps for building a structure that’s strong and will stand the test of time. It might seem intimidating, but it’s a process you can definitely master. The goal is to create a smooth, consistent paste that’s easy to work with but sturdy enough to support heavy blocks.
Mixing mortar is a bit like following a recipe—you need the right ingredients in the right proportions. But it’s also about feel. Factors like humidity and temperature can affect how your mix turns out, so you’ll need to pay close attention as you go. We’ll walk through how to achieve that perfect consistency, share some tips for mixing in any weather, and point out a few common mistakes to help you avoid them. A well-built wall starts with a great mortar mix, and it’s a key part of any successful retaining wall installation. With a little practice, you’ll be mixing like a pro.
Getting the Right Consistency
The ideal mortar consistency is often described as being like thick, creamy peanut butter. It should be smooth and easy to spread, but not so wet that it drips everywhere. A great way to test your mix is the trowel test. Scoop some mortar onto your trowel and turn it sideways to a 90-degree angle. If the mortar is mixed correctly, it should be thick enough to “hang” on the trowel without sliding off. If it immediately falls off, it’s too wet. If it’s crumbly and won’t stick at all, it’s too dry. Achieving this balance ensures the mortar will properly adhere to the blocks and create a strong, lasting bond for all your hardscaping services.
Mixing Tips for Any Weather
Before you even start mixing, make safety your priority. Always wear eye protection and waterproof gloves when working with cement products, as they can irritate your skin and eyes. Weather plays a big role in how your mortar behaves. On hot, dry days, the water in your mix will evaporate faster, so you might need to add a little more. On cool, damp days, you’ll likely need less. The key is to add water slowly and mix thoroughly until you reach that perfect consistency. If the mortar is too wet, it can weaken the wall; if it’s too dry, it won’t adhere properly. Finding that “just right” balance is essential for a successful build.
Common Mortar Mistakes to Avoid
One of the most frequent mistakes is getting the water-to-mix ratio wrong. As we’ve covered, you’re looking for a mix that’s not too wet and not too dry. Always add your dry mix to the bucket or wheelbarrow first, create a small well in the center, and pour the water in gradually. This gives you much better control. Another common oversight is letting excess mortar dry on the face of the blocks. As you lay each course, mortar will squeeze out of the joints. Be sure to scrape off any extra mortar from the sides of the wall as you go, before it has a chance to harden. This keeps your work looking clean and professional.
How to Build Your Wall, Step by Step
With your foundation ready and your mortar mixed, it’s time for the main event: building the wall. This is where your project really starts to take shape. The key is to work methodically and check your progress often. Taking your time on these first few rows sets you up for a straight, strong wall that will stand the test of time. Let’s get those blocks laid.
Lay the First Course
The first row of blocks, or the first course, is the most important one you’ll lay. It sets the standard for the rest of the wall, so precision is everything. Start by wetting the concrete footing where you’ll be working. This keeps the dry concrete from pulling moisture out of your mortar too quickly. Spread a one-inch layer of mortar on the footing, using your trowel to create a V-shaped furrow down the middle. Place mortar on one end of your first block and press it firmly into the mortar bed at a corner. Your mortar joints should be about 3/8 of an inch thick. Repeat this at the opposite corner, then fill in the blocks between them, making sure everything is level and straight.
Stack and Align the Next Courses
Once your first course is complete, you can start building upward. Spread another one-inch layer of mortar on top of the blocks you just laid. To create a strong, interlocking pattern, you’ll start the second course with a half-block at the end, with its smooth side facing out. This staggers the joints. To keep everything perfectly straight, stretch a mason’s line from one end of the wall to the other. This line acts as your guide for each course, ensuring the face of your wall stays flat and uniform. Just tap the blocks gently with the handle of your trowel to align them with the string as you go.
Check for Level and Plumb
This step might feel repetitive, but it’s non-negotiable for a professional-looking wall. You need to check that your blocks are level (horizontally) and plumb (vertically) constantly. A good rule of thumb is to check with your level every few blocks you lay, and definitely after each completed course. It’s much easier to adjust a block while the mortar is still wet than it is to fix a crooked wall later. Catching a small mistake early prevents it from becoming a major headache. A few seconds of checking now will save you hours of frustration down the road.
Add Rebar for Reinforcement
For walls that need extra strength—especially any structure that will hold back soil—reinforcement is essential. This is where steel rebar comes in. Before you pour your footing, you can insert vertical pieces of rebar that will stick up through the block cores. As you build, you can also place rebar into every other block hole. Once the rebar is in place, you’ll fill the block cores with grout to lock it all together. This process creates a strong internal skeleton for your wall. For complex projects like a retaining wall installation, getting the reinforcement right is critical for safety and longevity.
How to Handle Common Problems
Even the most carefully planned project can hit a few snags. When you’re working with concrete blocks and mortar, small issues can pop up, from a wobbly block to a mortar mix that just feels off. The key is not to panic. Most common problems are easy to fix if you catch them early. Think of it as part of the learning process. We’ll walk through how to tackle the most frequent challenges, like keeping your wall perfectly straight, getting your mortar consistency right, managing the heavy work safely, and dealing with cracks. With a little patience and the right techniques, you can keep your project on track and achieve a professional-looking result.
Fixing Alignment and Leveling Issues
A straight, level wall is the goal, but it’s easy for blocks to shift slightly. The best way to prevent this is to check your work constantly. Keep a level handy and place it across your blocks every few minutes to make sure everything is perfectly horizontal and vertical. A taut string line stretched between your corner stakes is your best friend for keeping each course straight. If you spot a block that’s out of place before the mortar sets, you can gently tap it into position with a rubber mallet. Catching these small misalignments early saves you from a much bigger headache later on.
Troubleshooting Your Mortar Mix
Getting the right mortar consistency can feel more like an art than a science at first. You’re aiming for a smooth, buttery texture—thick enough to hold its shape on a trowel but wet enough to spread easily. If your mix is too watery, it will run out of the joints and create a weak bond. If it’s too dry and crumbly, it won’t stick to the blocks properly. The trick is to add water slowly while mixing until you get it just right. Remember that mortar starts to harden quickly, so only mix as much as you can use within an hour or two to avoid waste.
Tips for Managing Heavy Lifting
Let’s be honest: concrete blocks are heavy. Building a wall is physically demanding work, so it’s crucial to protect your body from strain and injury. Always lift with your legs, not your back, by bending your knees and keeping your back straight. Hold the blocks close to your body to maintain your center of gravity. A wheelbarrow can be a huge help for moving multiple blocks from your stack to your workspace. And don’t be a hero—if you have a friend who can help, ask them! Working with a partner not only speeds things up but also makes the entire process much safer.
How to Prevent and Repair Cracks
Cracks can happen, but good construction techniques are your best defense. Proper reinforcement with rebar is essential for giving your wall the strength it needs to resist pressure and settling over time. Ensuring your mortar joints are fully packed also prevents weak spots where water could get in and cause damage. If you notice small hairline cracks later on, you can often seal them with a flexible masonry sealant. However, large or expanding cracks can signal a deeper issue with the foundation. For significant structural concerns, it’s always best to consult with professionals who specialize in retaining wall installation and repair.
Adding the Finishing Touches
Your wall is standing tall, but the project isn’t quite finished. These last few steps are what truly complete the job, turning a functional structure into a professional-looking feature of your property. Taking the time to properly finish the details will not only improve the wall’s appearance but also help it withstand the Florida weather for years to come. It’s the difference between a good DIY project and a great one.
Finish the Mortar Joints
Once the mortar has started to set—it should be firm enough to hold a thumbprint but not completely hard—it’s time to give the joints a clean, polished look. This step isn’t just for aesthetics; properly finished joints compact the mortar and help seal it against moisture. Using a simple jointing tool, run it along the mortar lines with firm, steady pressure to create a smooth, concave groove. As you work, be sure to brush away any excess mortar that gets pushed out. This simple technique makes a huge difference in the final appearance and overall durability of your wall.
Apply a Protective Coating
For an exterior wall, especially here in Central Florida with our humidity and heavy rains, a protective coating is essential. This final layer acts as a shield, preventing water from seeping into the blocks and causing damage over time. You’ll need to wait until the mortar has fully cured, which can take a few weeks. After that, you can apply a quality masonry sealer or waterproof paint. This step is crucial for preventing cracks and mildew growth, ensuring your hard work lasts. While you can often skip this for an interior wall, it’s a vital step to protect any outdoor structure from the elements.
Do You Need a Permit to Build Your Wall?
Before you mix a single bag of mortar, let’s talk about the not-so-fun but absolutely essential part of the process: permits. It’s tempting to skip this step and get straight to building, but taking the time to understand the rules now can save you from major headaches, fines, and even having to tear down your hard work later. Building permits exist to ensure that structures are safe, stable, and correctly placed on your property. They protect you, your family, and your property’s value.
The specific requirements can vary quite a bit depending on where you live in Central Florida, as each city and county has its own set of regulations. A wall that’s perfectly fine in one neighborhood might need a permit just a few miles away. The height of your wall, its purpose (like whether it’s a simple garden wall or a structural retaining wall), and its location on your property are all factors that determine what kind of paperwork you’ll need to file. Think of it as the foundation of your project—get this right, and everything else will fall into place much more smoothly.
Check Your Local Building Codes
Your first move should always be to check with your local building department. You can usually find this information on your city or county’s official website, or you can give them a call. Don’t be intimidated; they’re there to answer these exact kinds of questions. Ask them specifically about the requirements for building a block wall. They’ll tell you if a permit is needed and what the process involves. It’s smart to do this before you even buy your materials, as the local Florida Building Code might have specific requirements for the type of blocks or reinforcement you need to use.
Know the Rules on Height and Property Lines
Two of the biggest factors that trigger the need for a permit are the wall’s height and its proximity to property lines. As a general rule, most freestanding walls under four feet tall don’t require a permit, but anything taller often does. Retaining walls—those designed to hold back soil—are a different story and usually have much stricter requirements, often needing a permit regardless of height. You also need to be certain about your property lines. Building even a few inches onto a neighbor’s property can lead to serious disputes. If you’re not 100% sure where your property ends, it’s worth getting a land survey.
When to Call a Professional
If your project involves a wall over four feet tall, a load-bearing retaining wall, or complex drainage considerations, it’s time to call in a professional. The risks associated with an improperly built structural wall are just too high—it can fail, causing property damage or injury. A licensed contractor not only has the expertise to build a safe and durable wall but also understands the local permitting process inside and out. They can handle the paperwork for you, ensuring everything is up to code. For a project that needs to be structurally sound and built to last, professional retaining wall installation is a wise investment.
How to Care for Your New Wall
You’ve put in the work to build a solid concrete block wall, and now it’s time to protect that investment. A little bit of regular care goes a long way in keeping your wall strong and looking great for years to come. Just like any other part of your property, your wall needs attention to handle weather, shifting ground, and general wear and tear. By staying on top of inspections, cleaning, and minor repairs, you can catch small issues before they turn into major headaches. Think of it as a simple maintenance routine that ensures your hard work continues to pay off. It’s all about being proactive, not reactive.
Inspecting Your Wall Regularly
Think of this as a quick health check for your wall. A good habit is to walk the length of your wall about four times a year, especially after a heavy storm or a change in seasons. You’re looking for anything that seems out of place. Are there new cracks, even tiny ones? Does any part of the wall appear to be bulging or leaning? Check the base for signs of erosion and make sure water is draining away from the wall, not pooling against it. Catching these things early is the key. If you spot significant shifting or large cracks, it’s a sign that there might be a bigger issue with pressure or drainage, and it’s best to consult with a professional retaining wall contractor.
Cleaning and Upkeep Tips
Keeping your wall clean prevents buildup that can stain or damage the concrete over time. For routine upkeep, a stiff broom or a leaf blower is usually all you need to clear away dirt, leaves, and cobwebs. If you’re dealing with mud or algae, a bucket of soapy water and a scrub brush will often do the trick. You can use a pressure washer for a deeper clean, but be careful. Use a wide-angle nozzle and the lowest pressure setting to avoid damaging the surface of the blocks. It’s always a smart idea to test your cleaning method on a small, out-of-the-way spot first to make sure you’re happy with the results.
Simple Repair Techniques
When you spot a small issue during your inspection, it’s best to address it right away. For hairline cracks, you can find concrete patching compounds at most hardware stores. These are designed to fill small gaps and prevent water from getting in, which is crucial for preventing wider cracks when temperatures drop. Just make sure the area is clean and dry before you apply the patch. However, it’s important to know your limits. If you see large, deep cracks, blocks that are shifting, or any signs of structural failure, this is not a DIY fix. These problems often point to underlying issues with the foundation or drainage that require an expert eye and professional hardscaping services.
Related Articles
- Retaining Wall Contractor in Lake Mary, FL | Expert Installation
- Mastering Coastal Excavation: Deangelo’s Florida Coastline Trap Bag Seawall Project
- Tree Root Removal: A Step-by-Step DIY Guide
- Sprinkler System Installation: A Step-by-Step Guide
Frequently Asked Questions
What’s the real difference between a simple garden wall and a structural retaining wall? Think of it this way: a garden wall is mostly for looks and to define a space, like a flower bed. A retaining wall, on the other hand, has the tough job of holding back a significant amount of soil. Because it’s under constant pressure, a retaining wall requires a much deeper foundation, specific reinforcement like rebar, and proper drainage to prevent it from failing. While you can tackle a short, decorative wall on your own, a true retaining wall is a complex engineering project that’s best left to professionals.
How long should I wait for the concrete footing and mortar to cure? Patience is key here, as you want everything to be solid before you put weight on it. After you pour the concrete footing, you should let it cure for at least three to seven days before you start laying the first course of blocks. For the mortar between the blocks, it will start to set within a few hours, but you should give the completed wall about a month to cure fully before you apply any protective sealant or paint.
My yard has a slight slope. Can I still build a block wall myself? Building on a slope adds a layer of complexity to the project. For a gentle slope, you can create a stepped foundation, where each section of the footing is level, stepping down with the grade of the land. This requires careful measuring and excavation to get right. If your yard has a significant or uneven slope, the project becomes much more challenging. In those cases, professional site prep and excavation are crucial to ensure the wall is stable and won’t fail under pressure.
Do I really need to add rebar for a short, decorative wall? While a very short wall (under two feet) that isn’t holding back any soil might not strictly require rebar, adding it is always a good idea for long-term stability. Rebar acts as a steel skeleton inside your wall, giving it the strength to resist shifting soil and pressure from water. It’s a relatively small extra step that provides a lot of insurance against future cracks and leaning, ensuring your hard work stands strong for years.
Why is managing water and drainage so critical for a wall in Florida? Here in Central Florida, we get a lot of rain, and that water can be a wall’s worst enemy. When water collects in the soil behind a wall, it creates immense pressure that can cause the wall to bulge, crack, or even collapse. Proper drainage, like a French drain installed at the base, gives that water an escape route. This relieves the pressure and prevents water from seeping into the blocks, which is the single most important thing you can do to ensure your wall has a long, stable life.